Alert Webhook
Overview
To forward AWS CloudWatch Alarms to CloudOps, create an SNS Topic, register the CloudOps webhook URL as a Subscription, and set the Topic as the notification target for your CloudWatch Alarm.
You will need:
- CloudOps webhook URL — the endpoint that CloudOps issues when you register an AWS SNS webhook source. Obtain it first by following Integrate AWS SNS to CloudOps.
- AWS console permission to create SNS Topics, Subscriptions, and CloudWatch Alarms.
The setup follows this order:
- Create an SNS Topic
- Create an SNS Subscription (connect CloudOps webhook URL)
- Create a CloudWatch Alarm and link it to the SNS Topic
- Test the integration
1. Create an SNS Topic
Navigate to SNS in the AWS Console
Log in to the AWS Console
, type SNS in the search bar, and navigate to Simple Notification Service.
Create a Topic
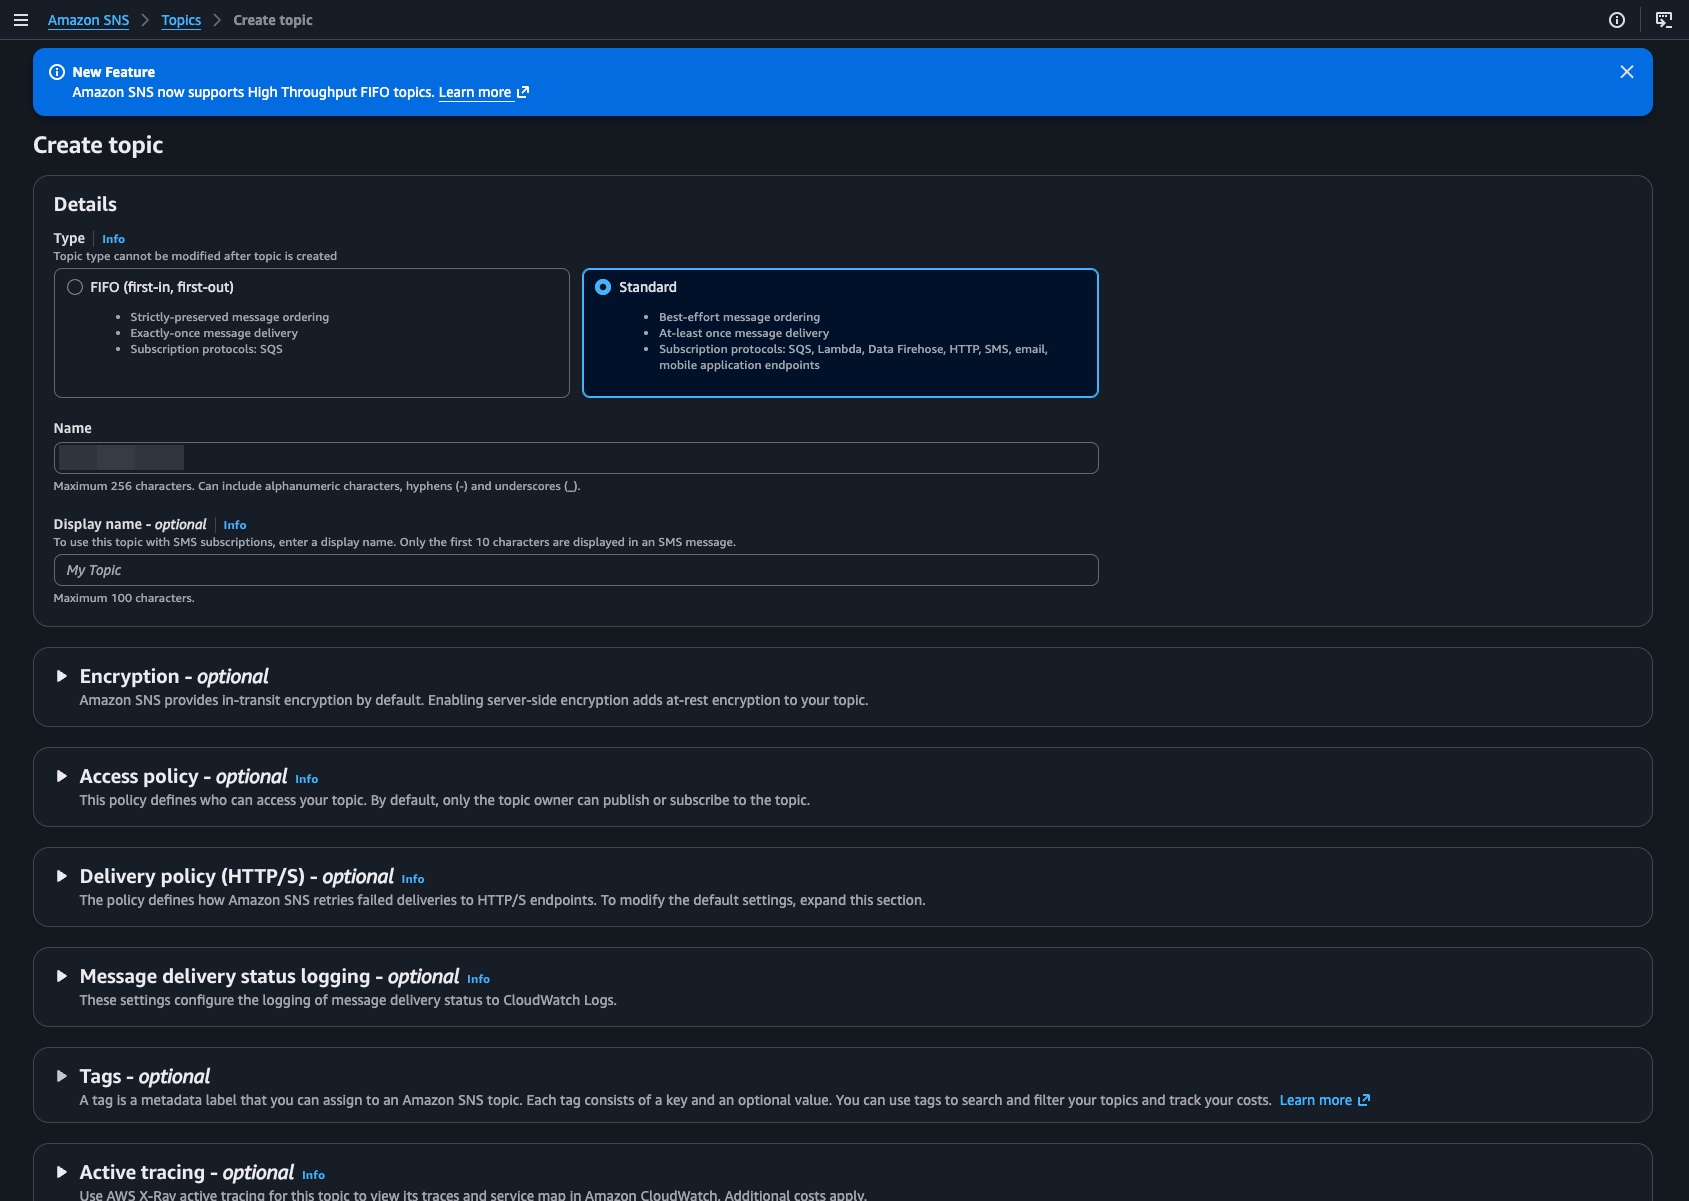
Click [Topics] in the left menu, then click [Create topic].
- Type: Select
Standard(FIFO does not support HTTPS subscriptions) - Name: Enter a recognizable name (e.g.,
cloudops-alarm-topic)
Leave the remaining settings at their defaults and click [Create topic].
2. Create an SNS Subscription
Register the CloudOps webhook URL as a subscription to the Topic.
Create Subscription
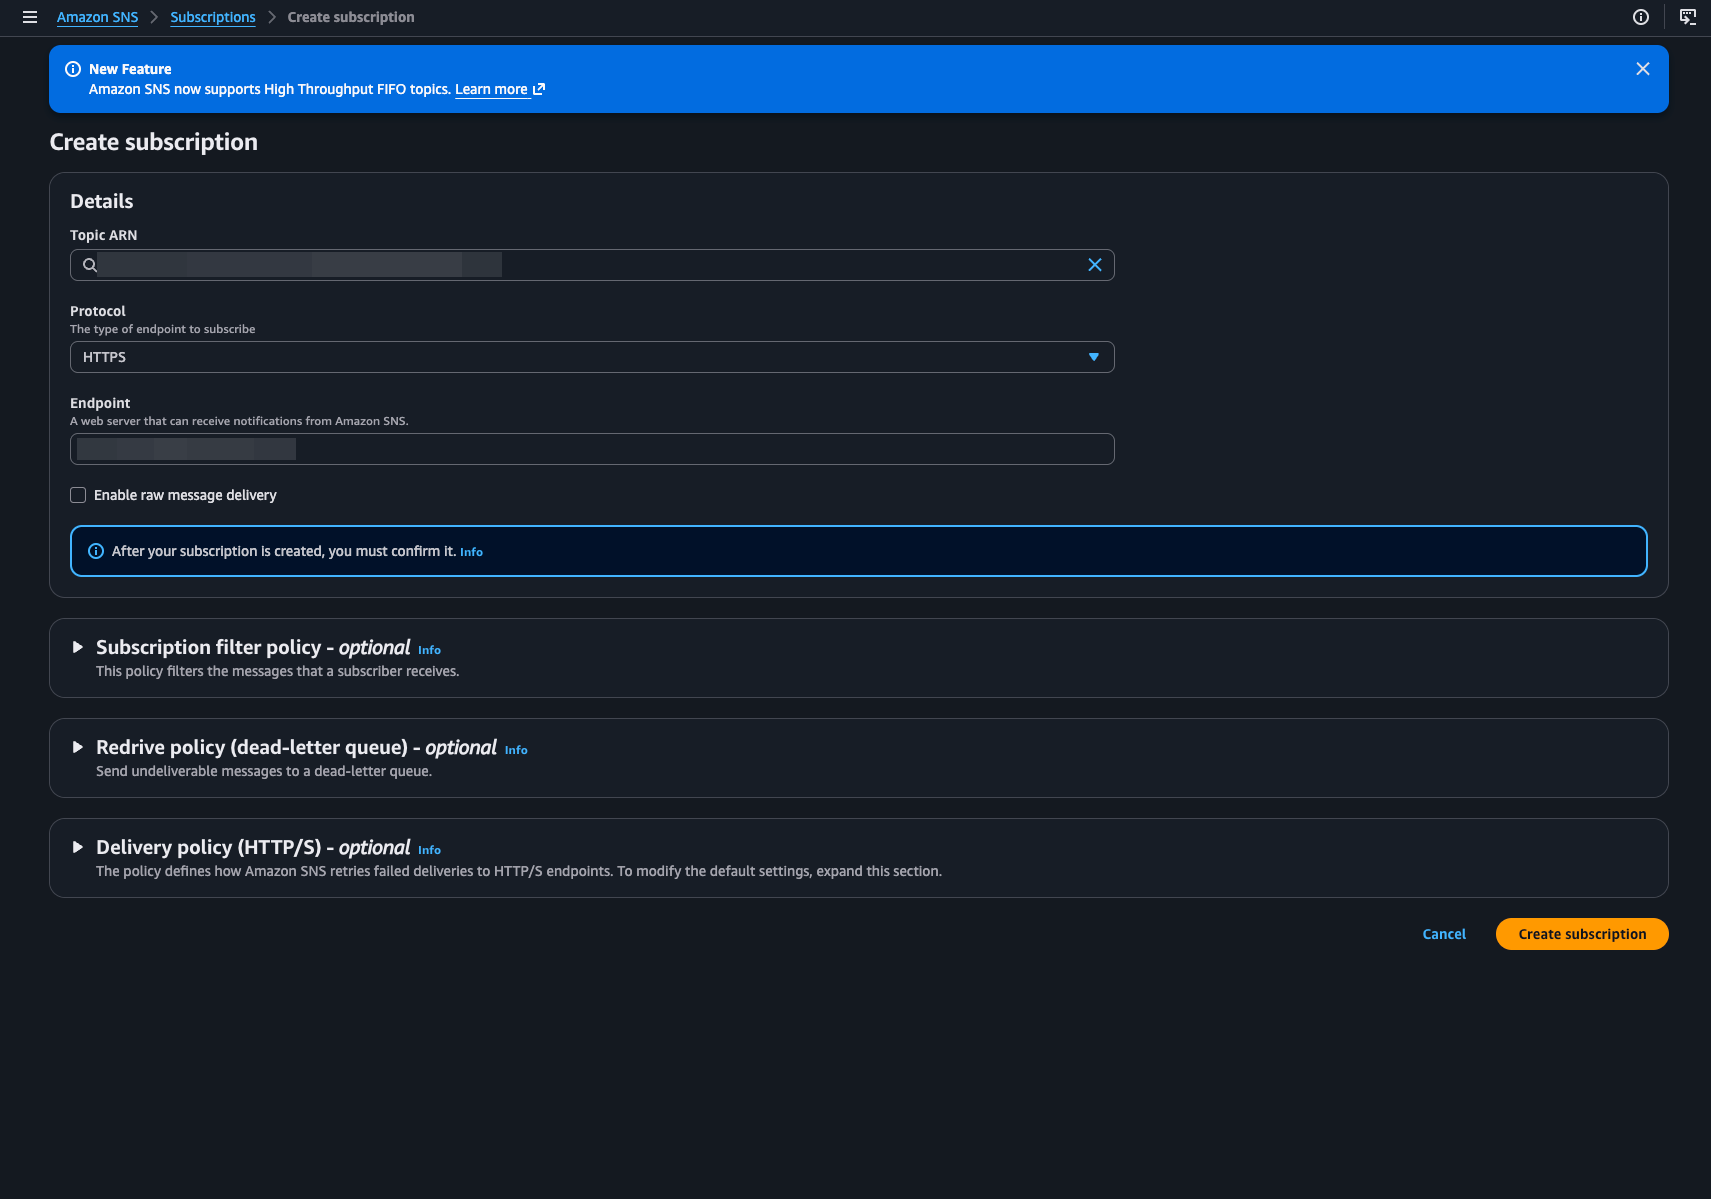
On the Topic detail page, click [Create subscription].
Configure the Subscription
- Protocol: Select
HTTPS - Endpoint: Paste the Webhook URL issued by CloudOps.
Click [Create subscription].
Subscription Confirmation
SNS sends a SubscriptionConfirmation request to the registered endpoint. CloudOps handles the confirmation automatically.
Verify that the Status changes to Confirmed in the Subscription list.
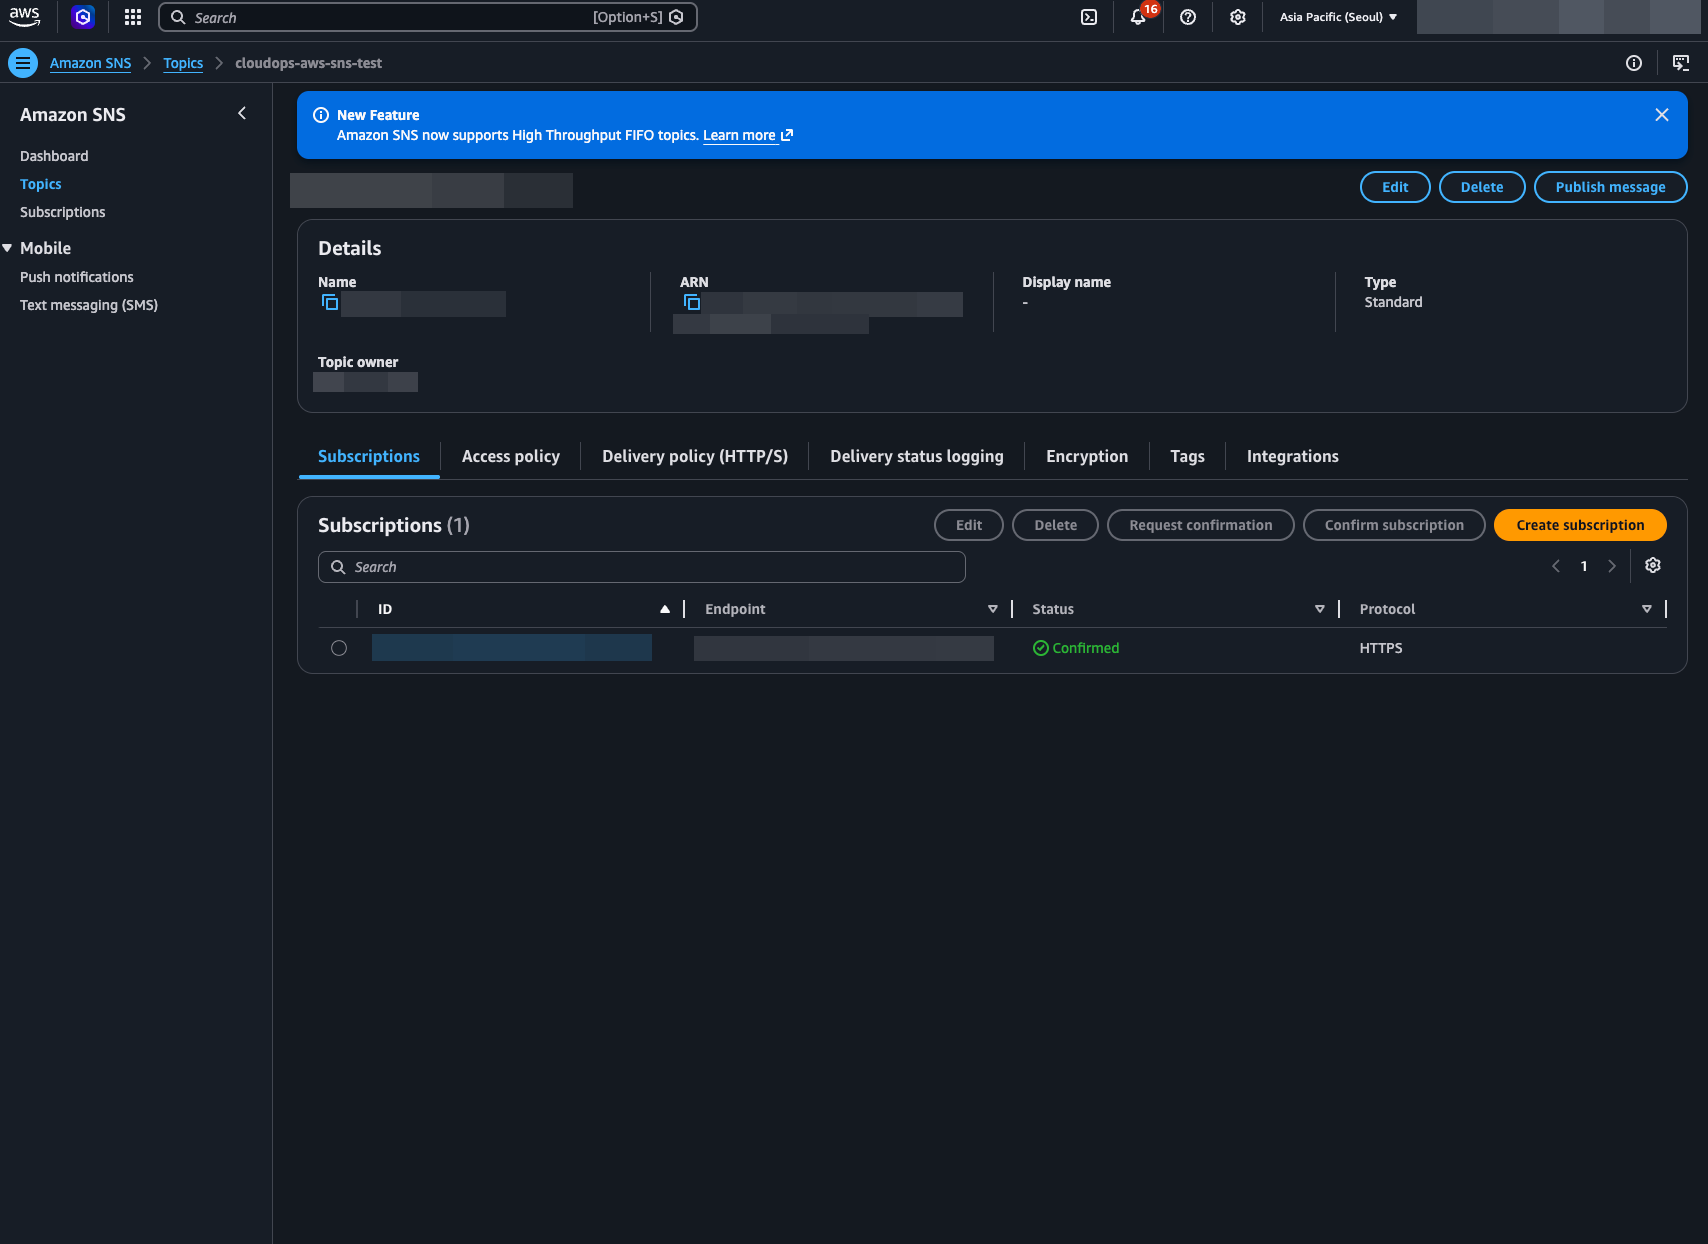
PendingConfirmation, verify that the CloudOps webhook URL is correct. If incorrect, delete the Subscription and create a new one.3. Create a CloudWatch Alarm
Configure a CloudWatch Alarm to send notifications to the SNS Topic created above when it fires.
Navigate to CloudWatch
Type CloudWatch in the AWS Console search bar to navigate.
Create an Alarm
Click [Alarms > All alarms] in the left menu, then click [Create alarm].
Select a Metric
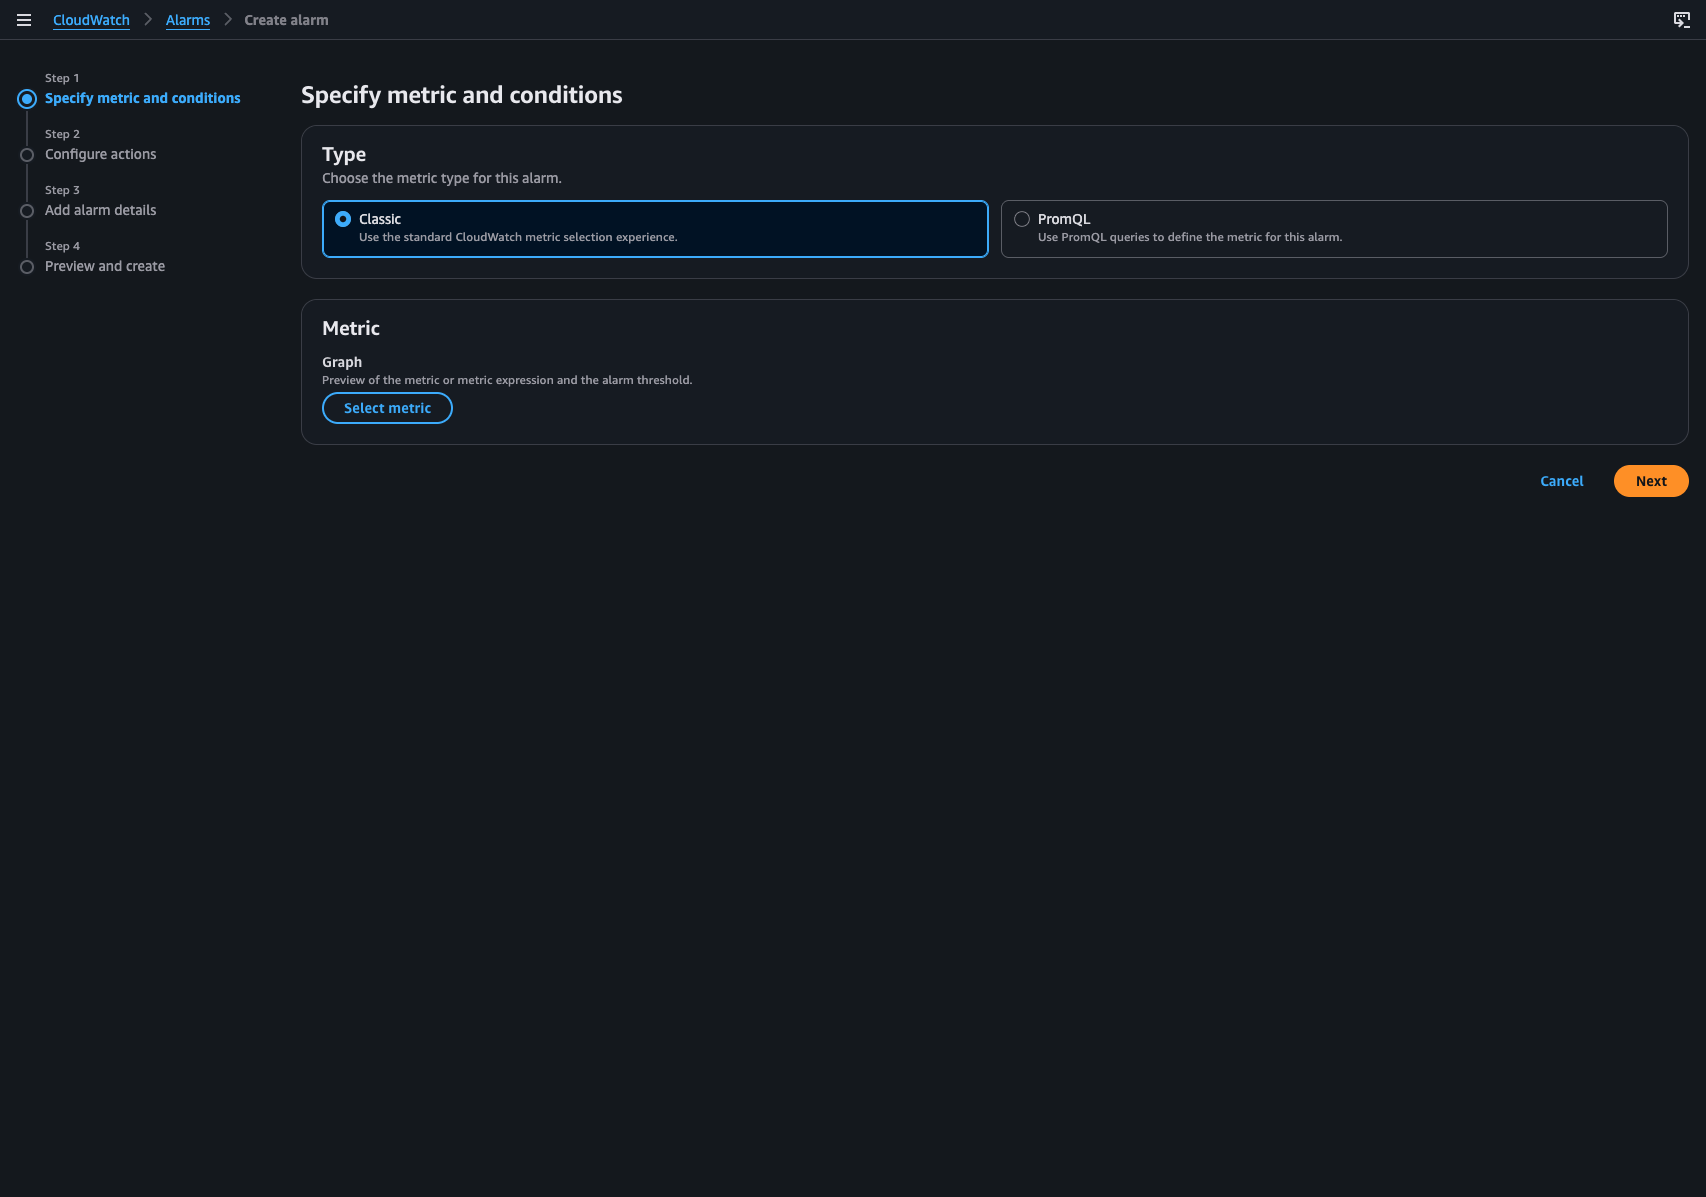
Click [Select metric] to choose the metric to monitor.
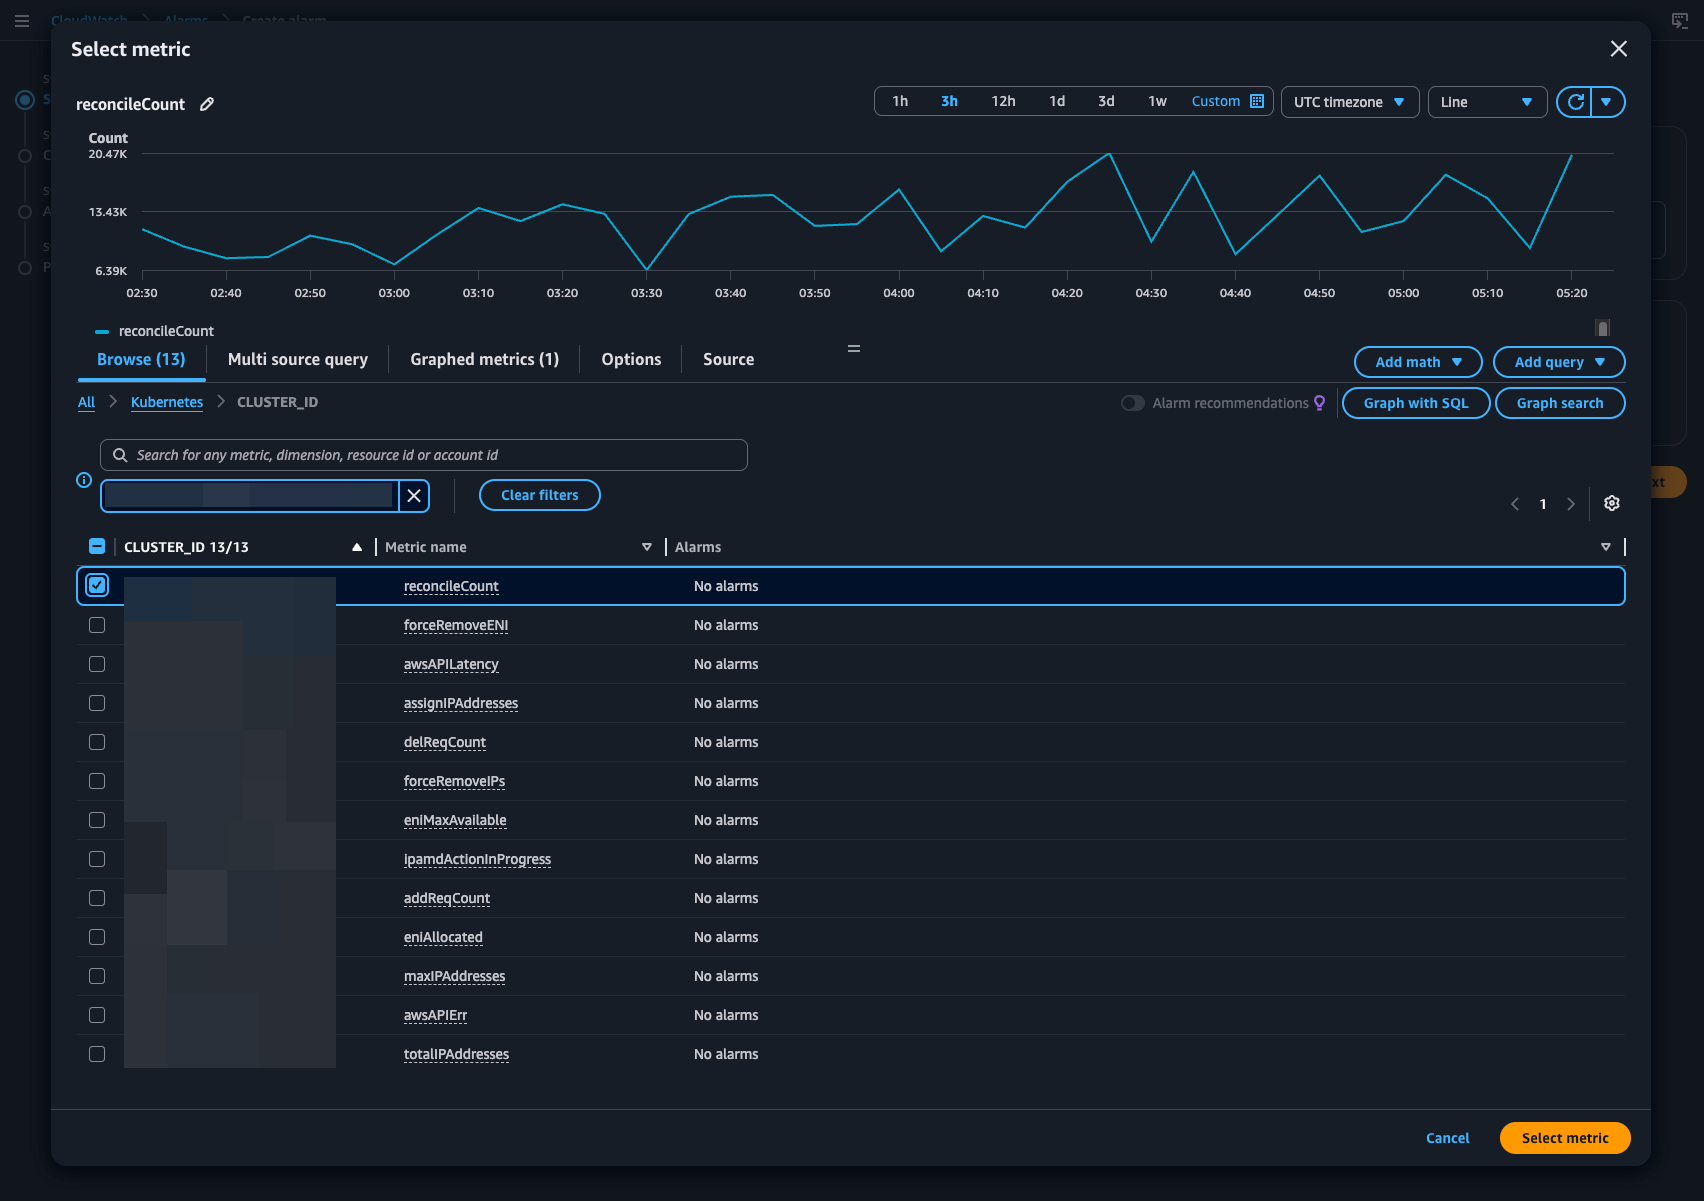
Example:
- EC2 > Per-Instance Metrics > CPUUtilization
- Select the target instance and click [Select metric]
Configure Conditions
- Threshold type:
Static - Whenever CPUUtilization is…: Select
Greater than - than…: Enter the threshold value (e.g.,
80)
Click [Next].
Configure Notifications
- Alarm state trigger: Select
In alarm - Select an SNS topic: Select
Select an existing SNS topic - Send a notification to…: Select the Topic created above (e.g.,
cloudops-alarm-topic)
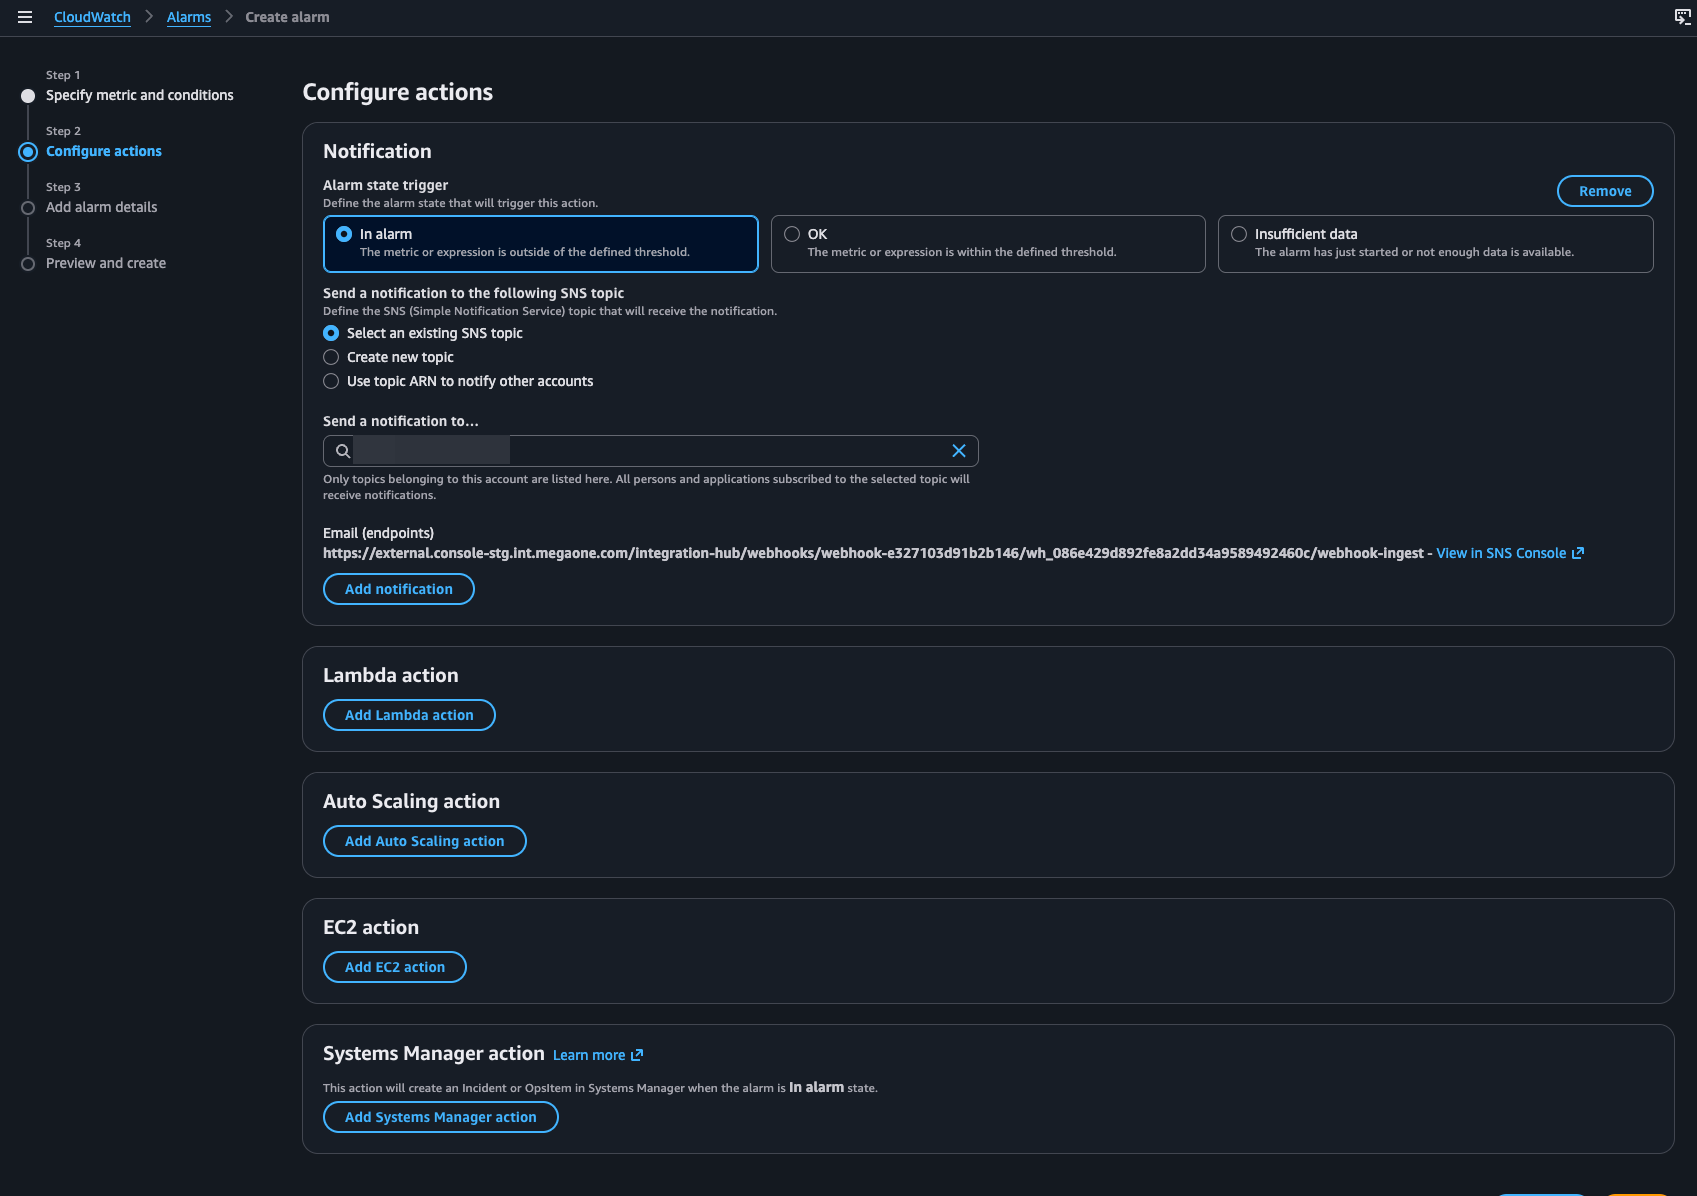
OK state transitions, click [Add notification] and add an OK trigger to the same Topic. CloudOps will treat this as a RECOVERY event.Click [Next].
Enter Name and Description
- Alarm name: Enter a recognizable name (e.g.,
cpu-high-alarm) - Alarm description: Optional
Click [Next] → [Create alarm] to complete.
4. Test the Integration
Force the Alarm to Fire
To immediately test the created Alarm, force a state change using the AWS CLI:
aws cloudwatch set-alarm-state \
  --alarm-name "cpu-high-alarm" \
  --state-value ALARM \
  --state-reason "CloudOps integration test"
Verify on CloudOps
Check that the Requests (24h) count increases on the registered webhook source in the CloudOps console.
If the event does not arrive:
- Confirm the SNS Subscription Status is
Confirmed. - Confirm the endpoint URL in the SNS Topic’s Subscriptions tab matches the value issued by CloudOps exactly.
- Confirm the CloudWatch Alarm’s Actions point to the correct SNS Topic.
Restore State
After testing, restore the Alarm state to normal:
aws cloudwatch set-alarm-state \
  --alarm-name "cpu-high-alarm" \
  --state-value OK \
  --state-reason "Test completed"