Assume Role Method
Overview
The Assume Role method uses AWS STS AssumeRole so that the CloudOps collector account temporarily assumes an IAM role in your account to collect resources. Instead of providing long-term credentials (Access Keys) directly, you create a single read-only role, which is recommended for security.
How it works
You create a read-only IAM role in your account and register the CloudOps collector account as a trusted principal in the role’s Trust Policy. Each time CloudOps collects data, it assumes this role to obtain short-lived temporary credentials. The credentials are short-lived (1 hour by default).
The Assume Role method requires the following information.
- Account ID: The 12-digit unique identifier automatically assigned when an AWS account is created.
- Role ARN: The unique identifier of the IAM role you create. It is the target that CloudOps assumes, and can be found after the role is created.
- External ID: A secret identifier for verifying the trust relationship that prevents unauthorized AssumeRole (confused deputy attacks) by third parties. It is automatically generated and shown on the CloudOps cloud account registration screen, so use that value as-is.
ec2:DescribeRegions) in your account for collection. There is no need to specify regions.There are two ways to create the role. Choose the one that fits your environment.
1. Manual creation via AWS Console
Start creating an IAM role
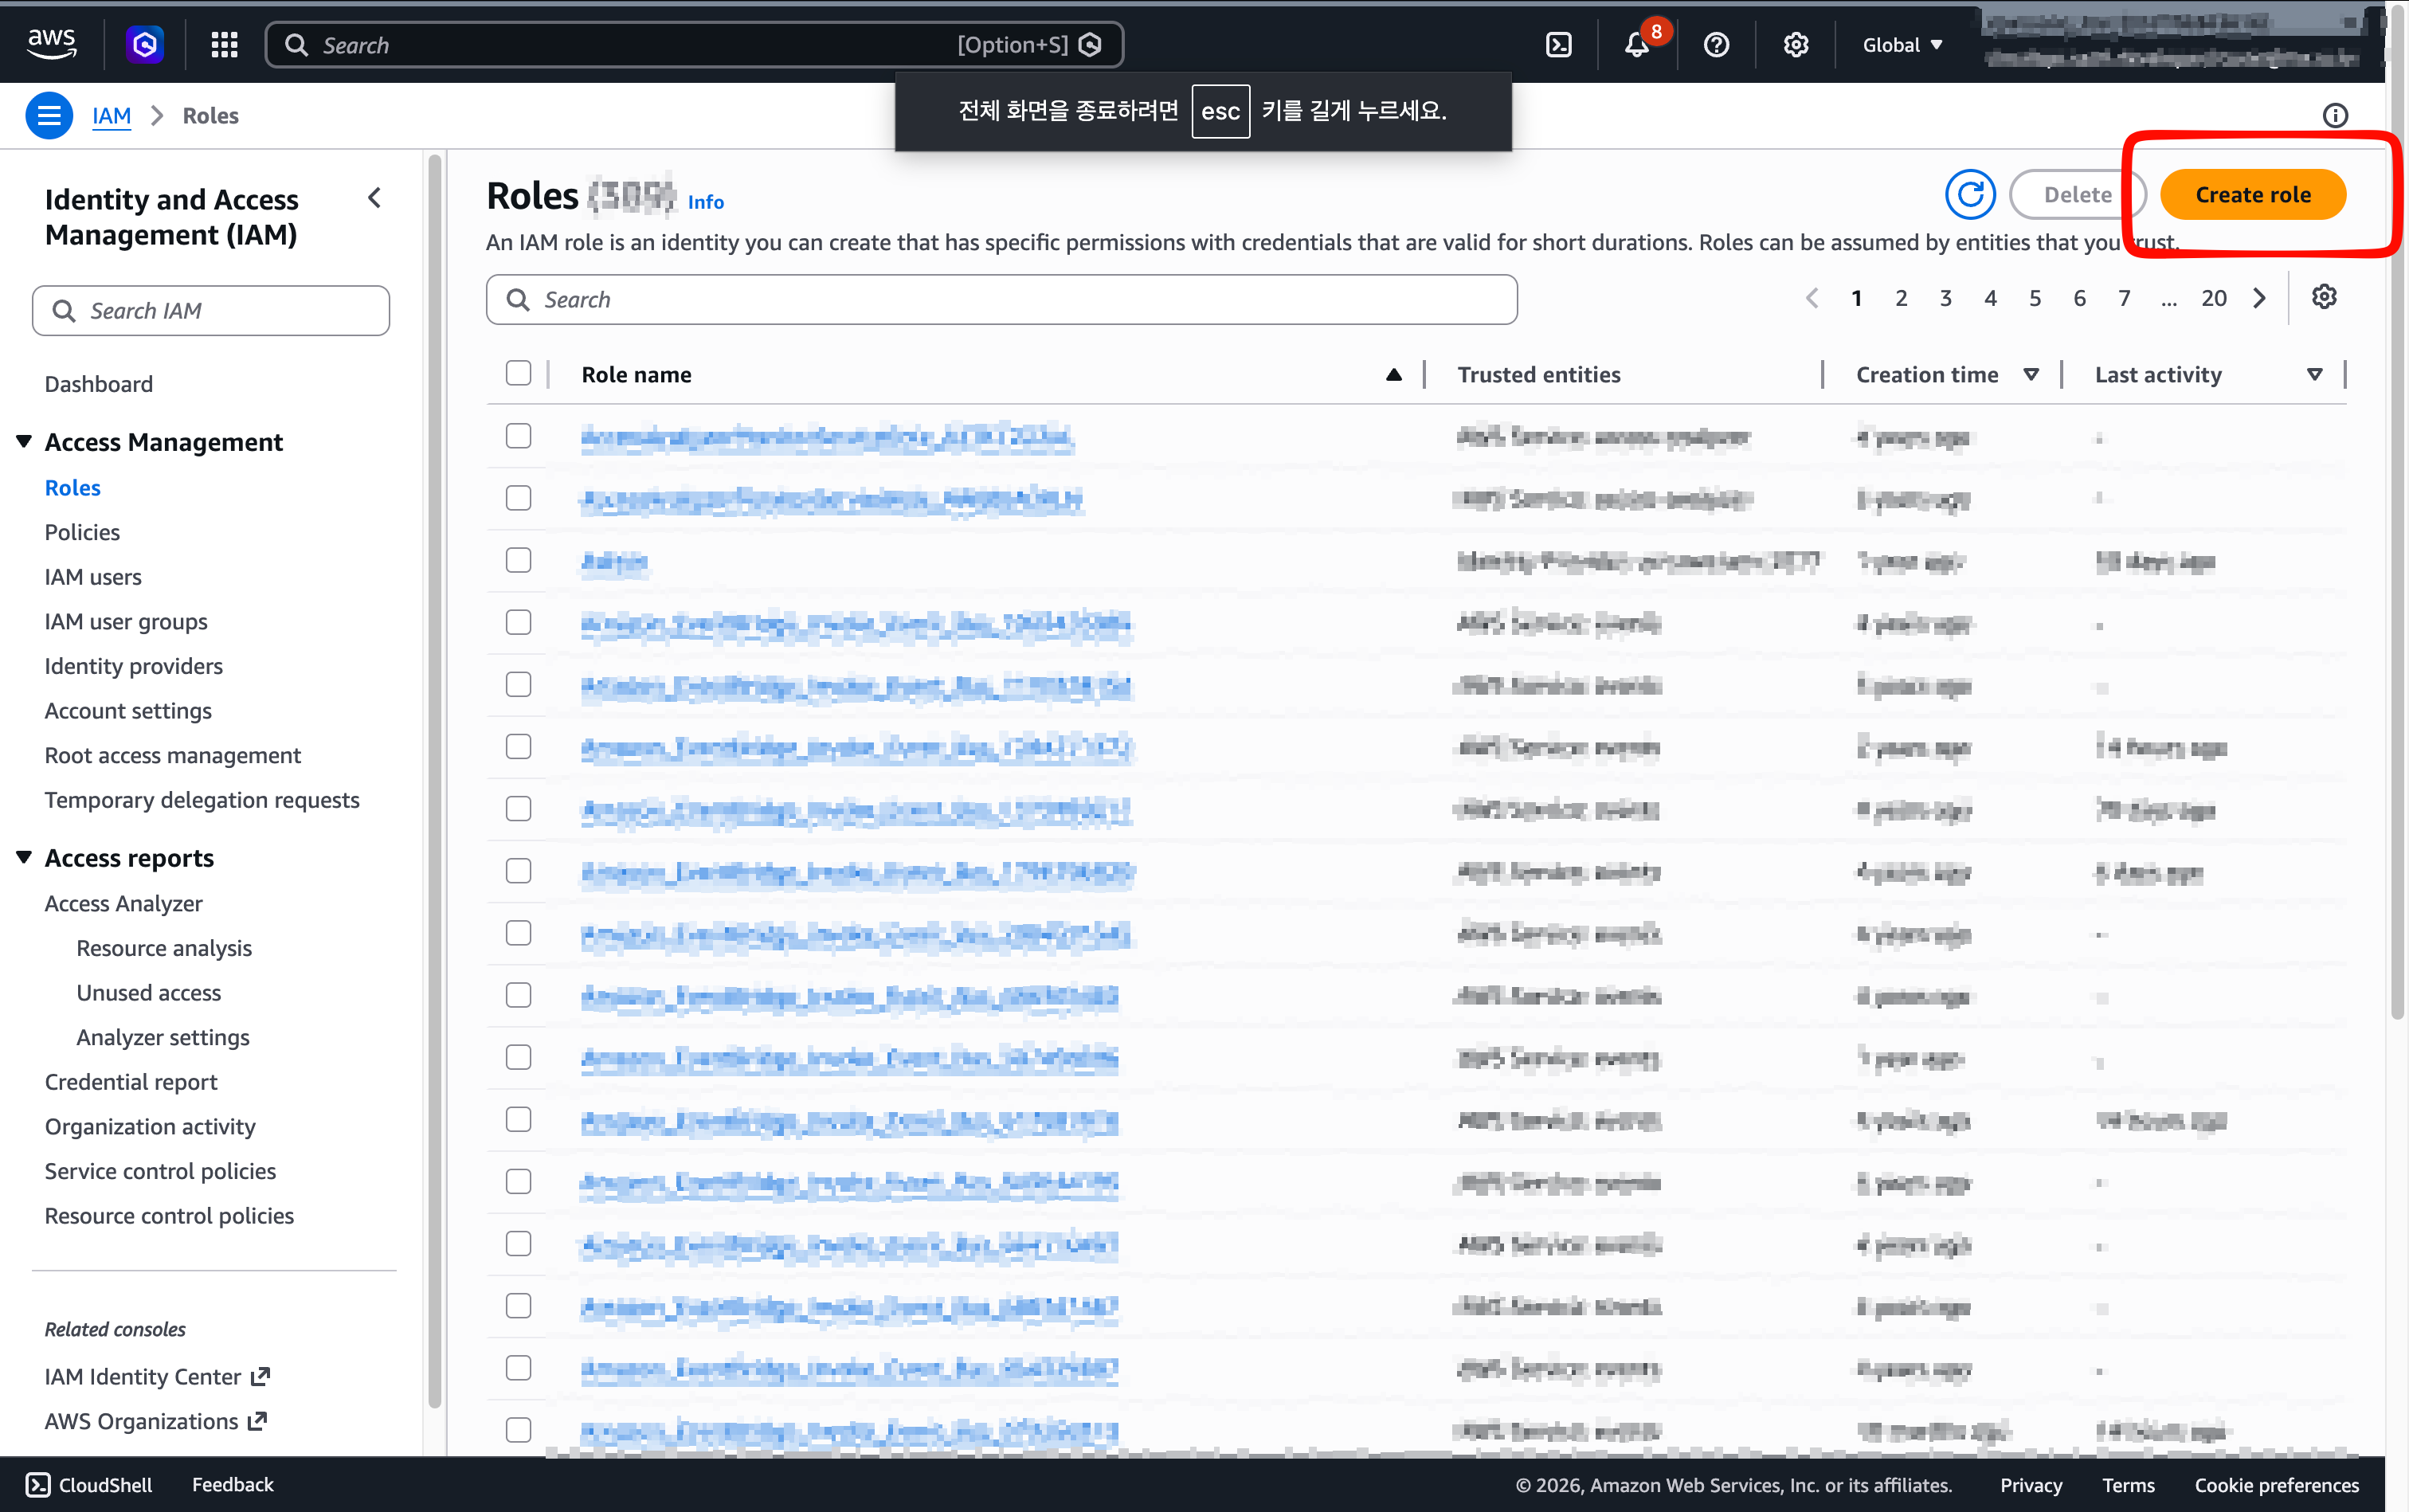
Open the AWS Console , go to [IAM > Access management > Roles], and click [Create role].
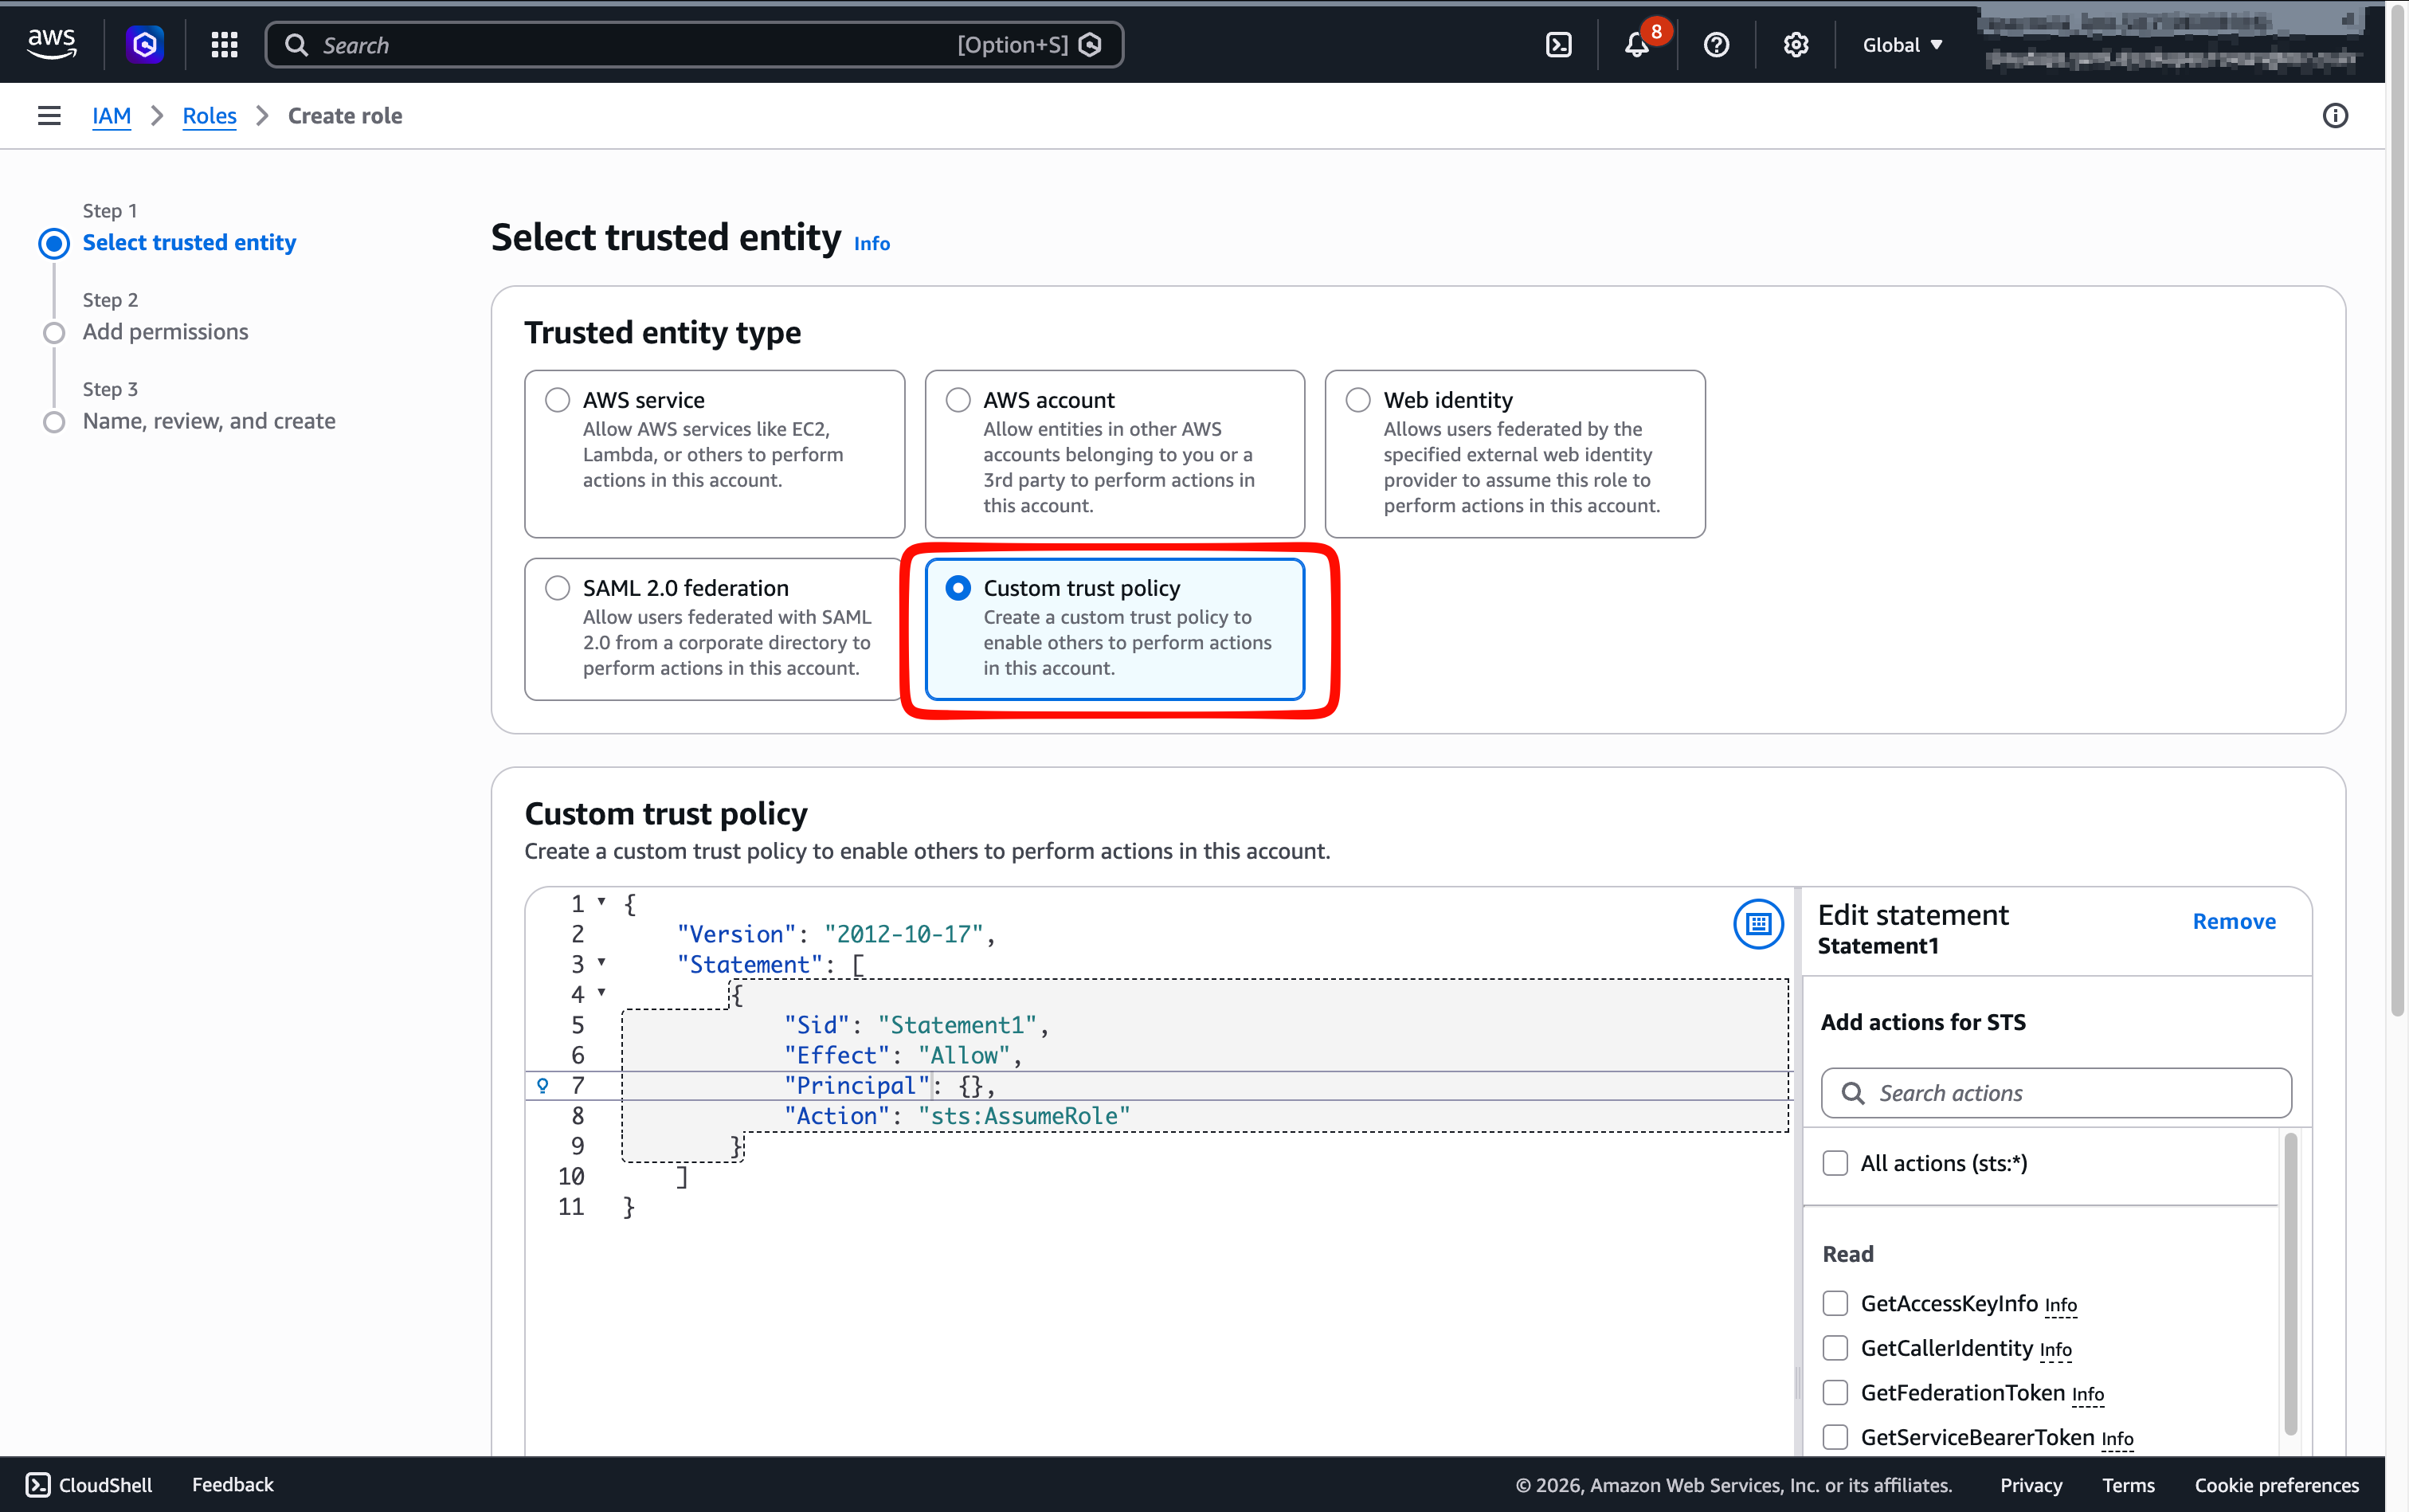
Select trusted entity — Custom trust policy
For the trusted entity type, select [Custom trust policy].
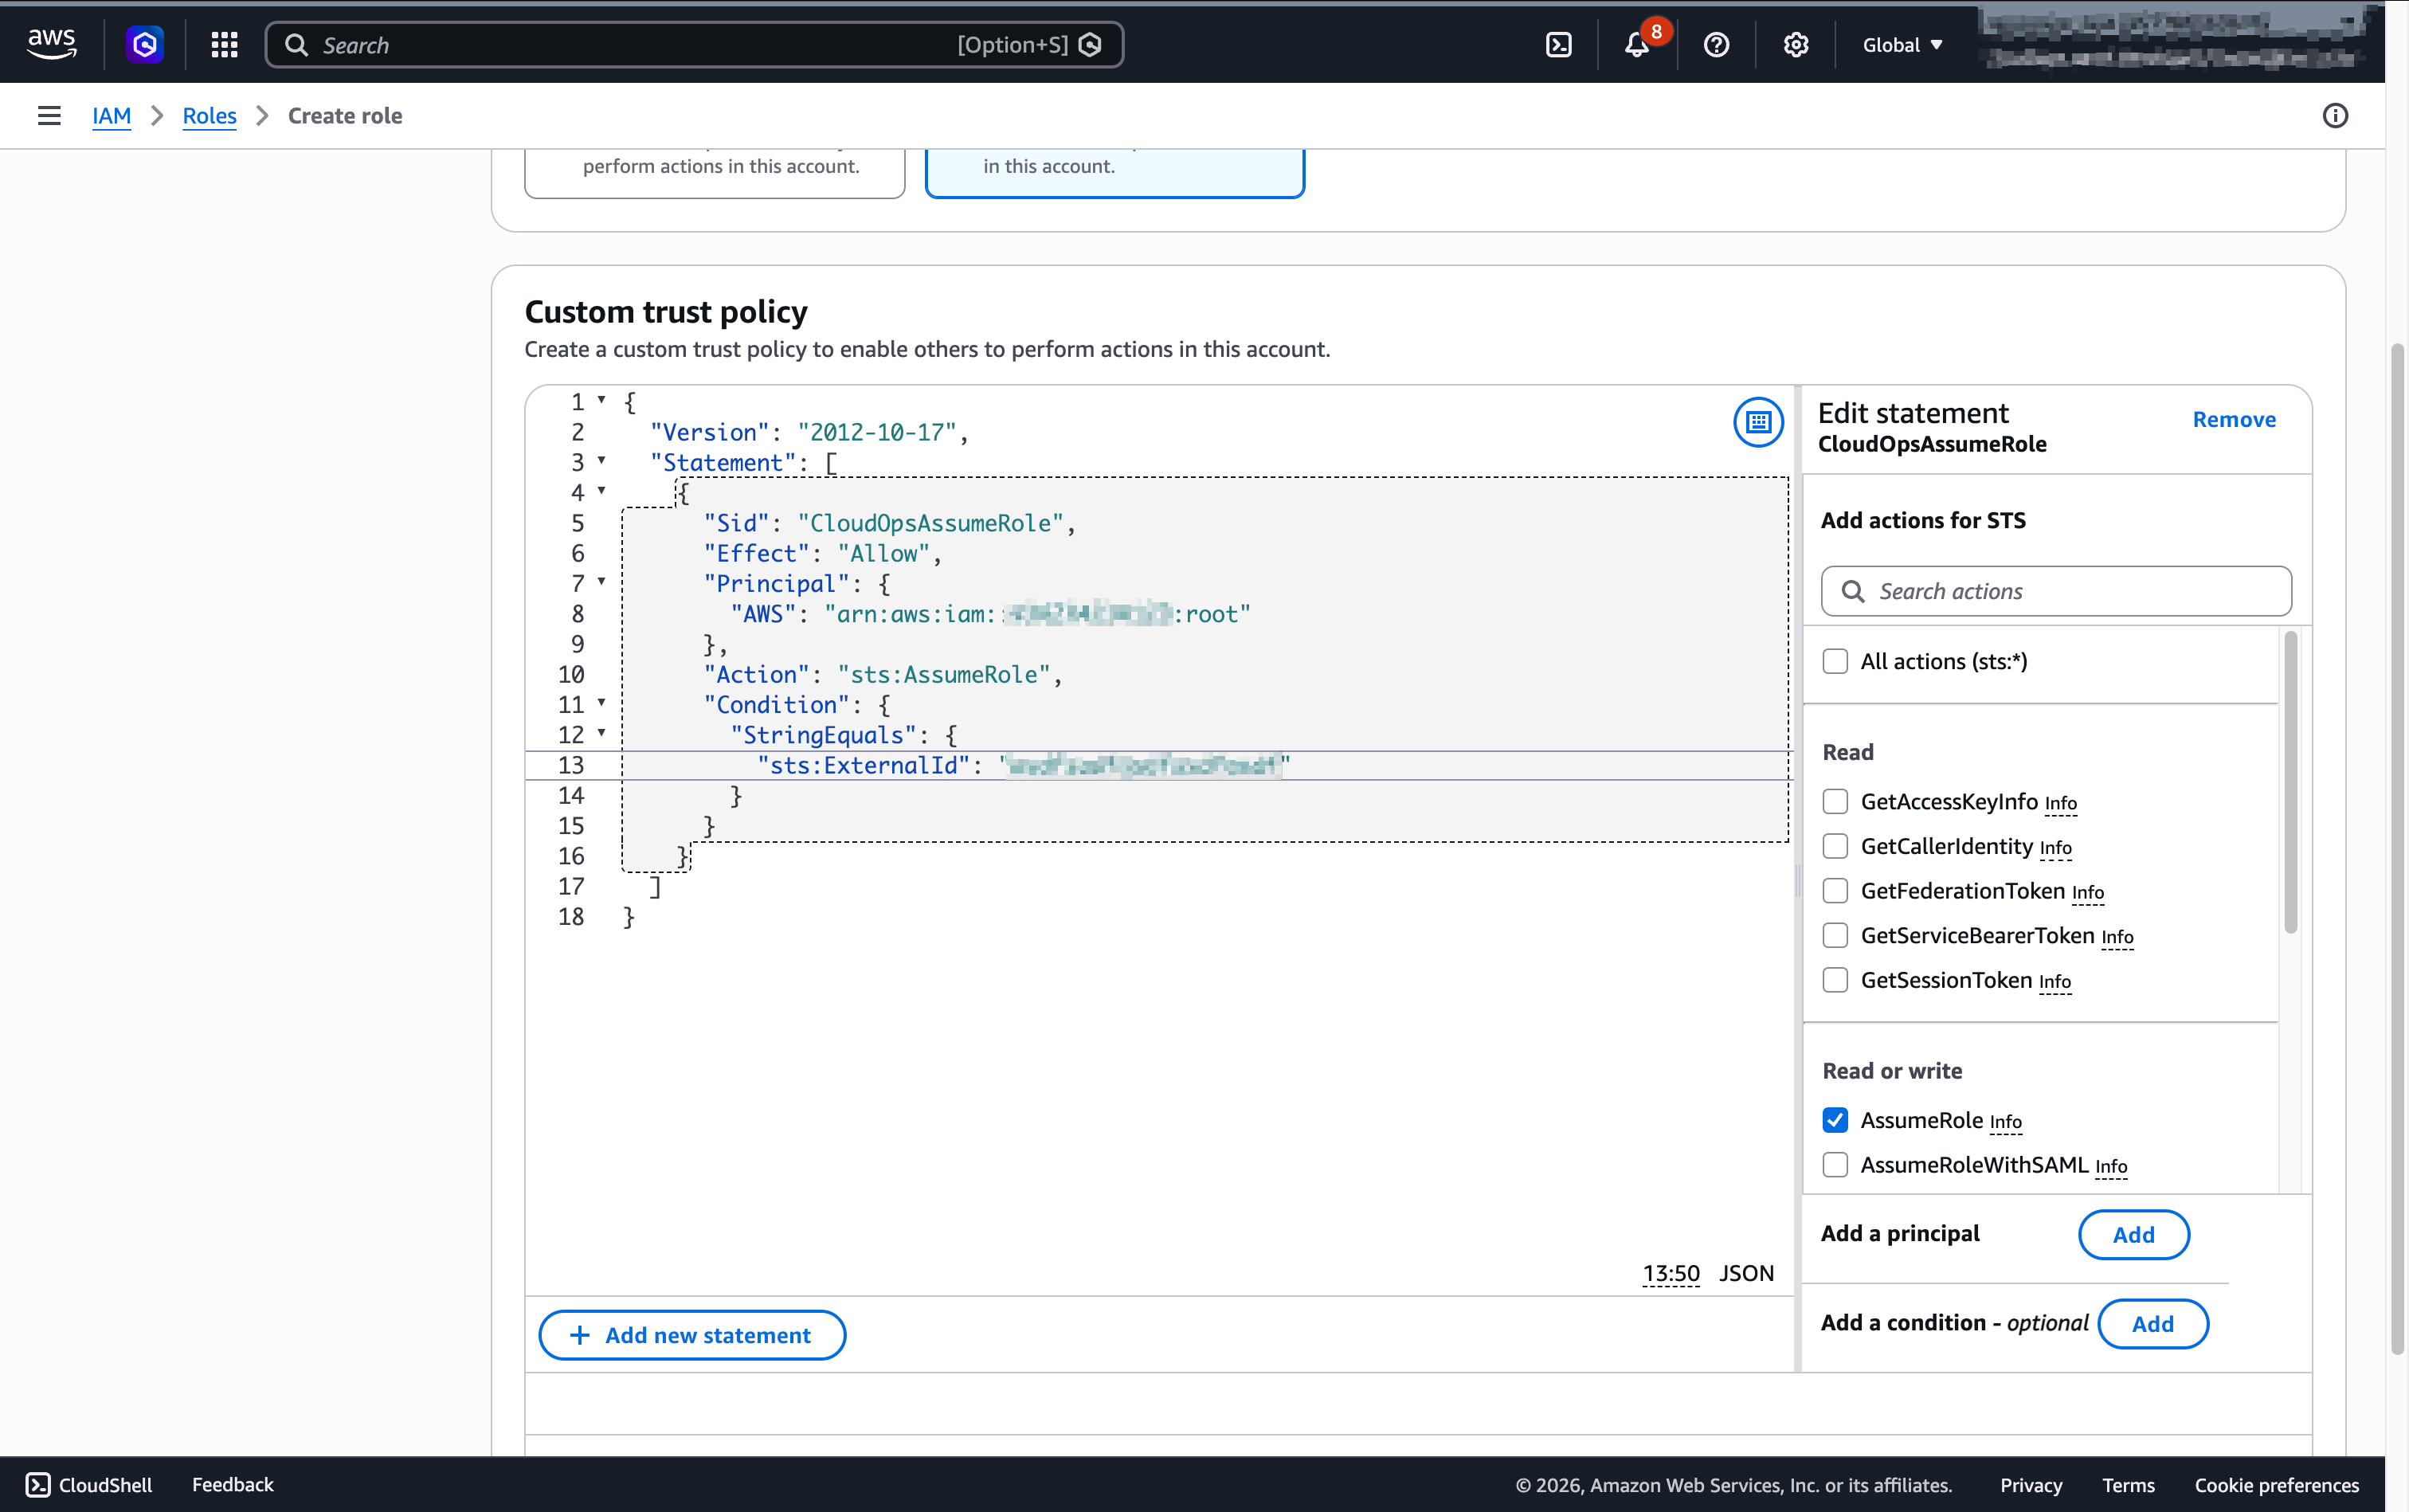
Then paste the following JSON into the trust policy editor.
{
  "Version": "2012-10-17",
  "Statement": [
    {
      "Sid": "CloudOpsAssumeRole",
      "Effect": "Allow",
      "Principal": {
        "AWS": "arn:aws:iam::<CLOUDOPS_ACCOUNT_ID>:root"
      },
      "Action": "sts:AssumeRole",
      "Condition": {
        "StringEquals": {
          "sts:ExternalId": "<EXTERNAL_ID>"
        }
      }
    }
  ]
}<CLOUDOPS_ACCOUNT_ID>: The CloudOps collector account ID provided by CloudOps.<EXTERNAL_ID>: The External ID shown on the CloudOps cloud account registration screen.
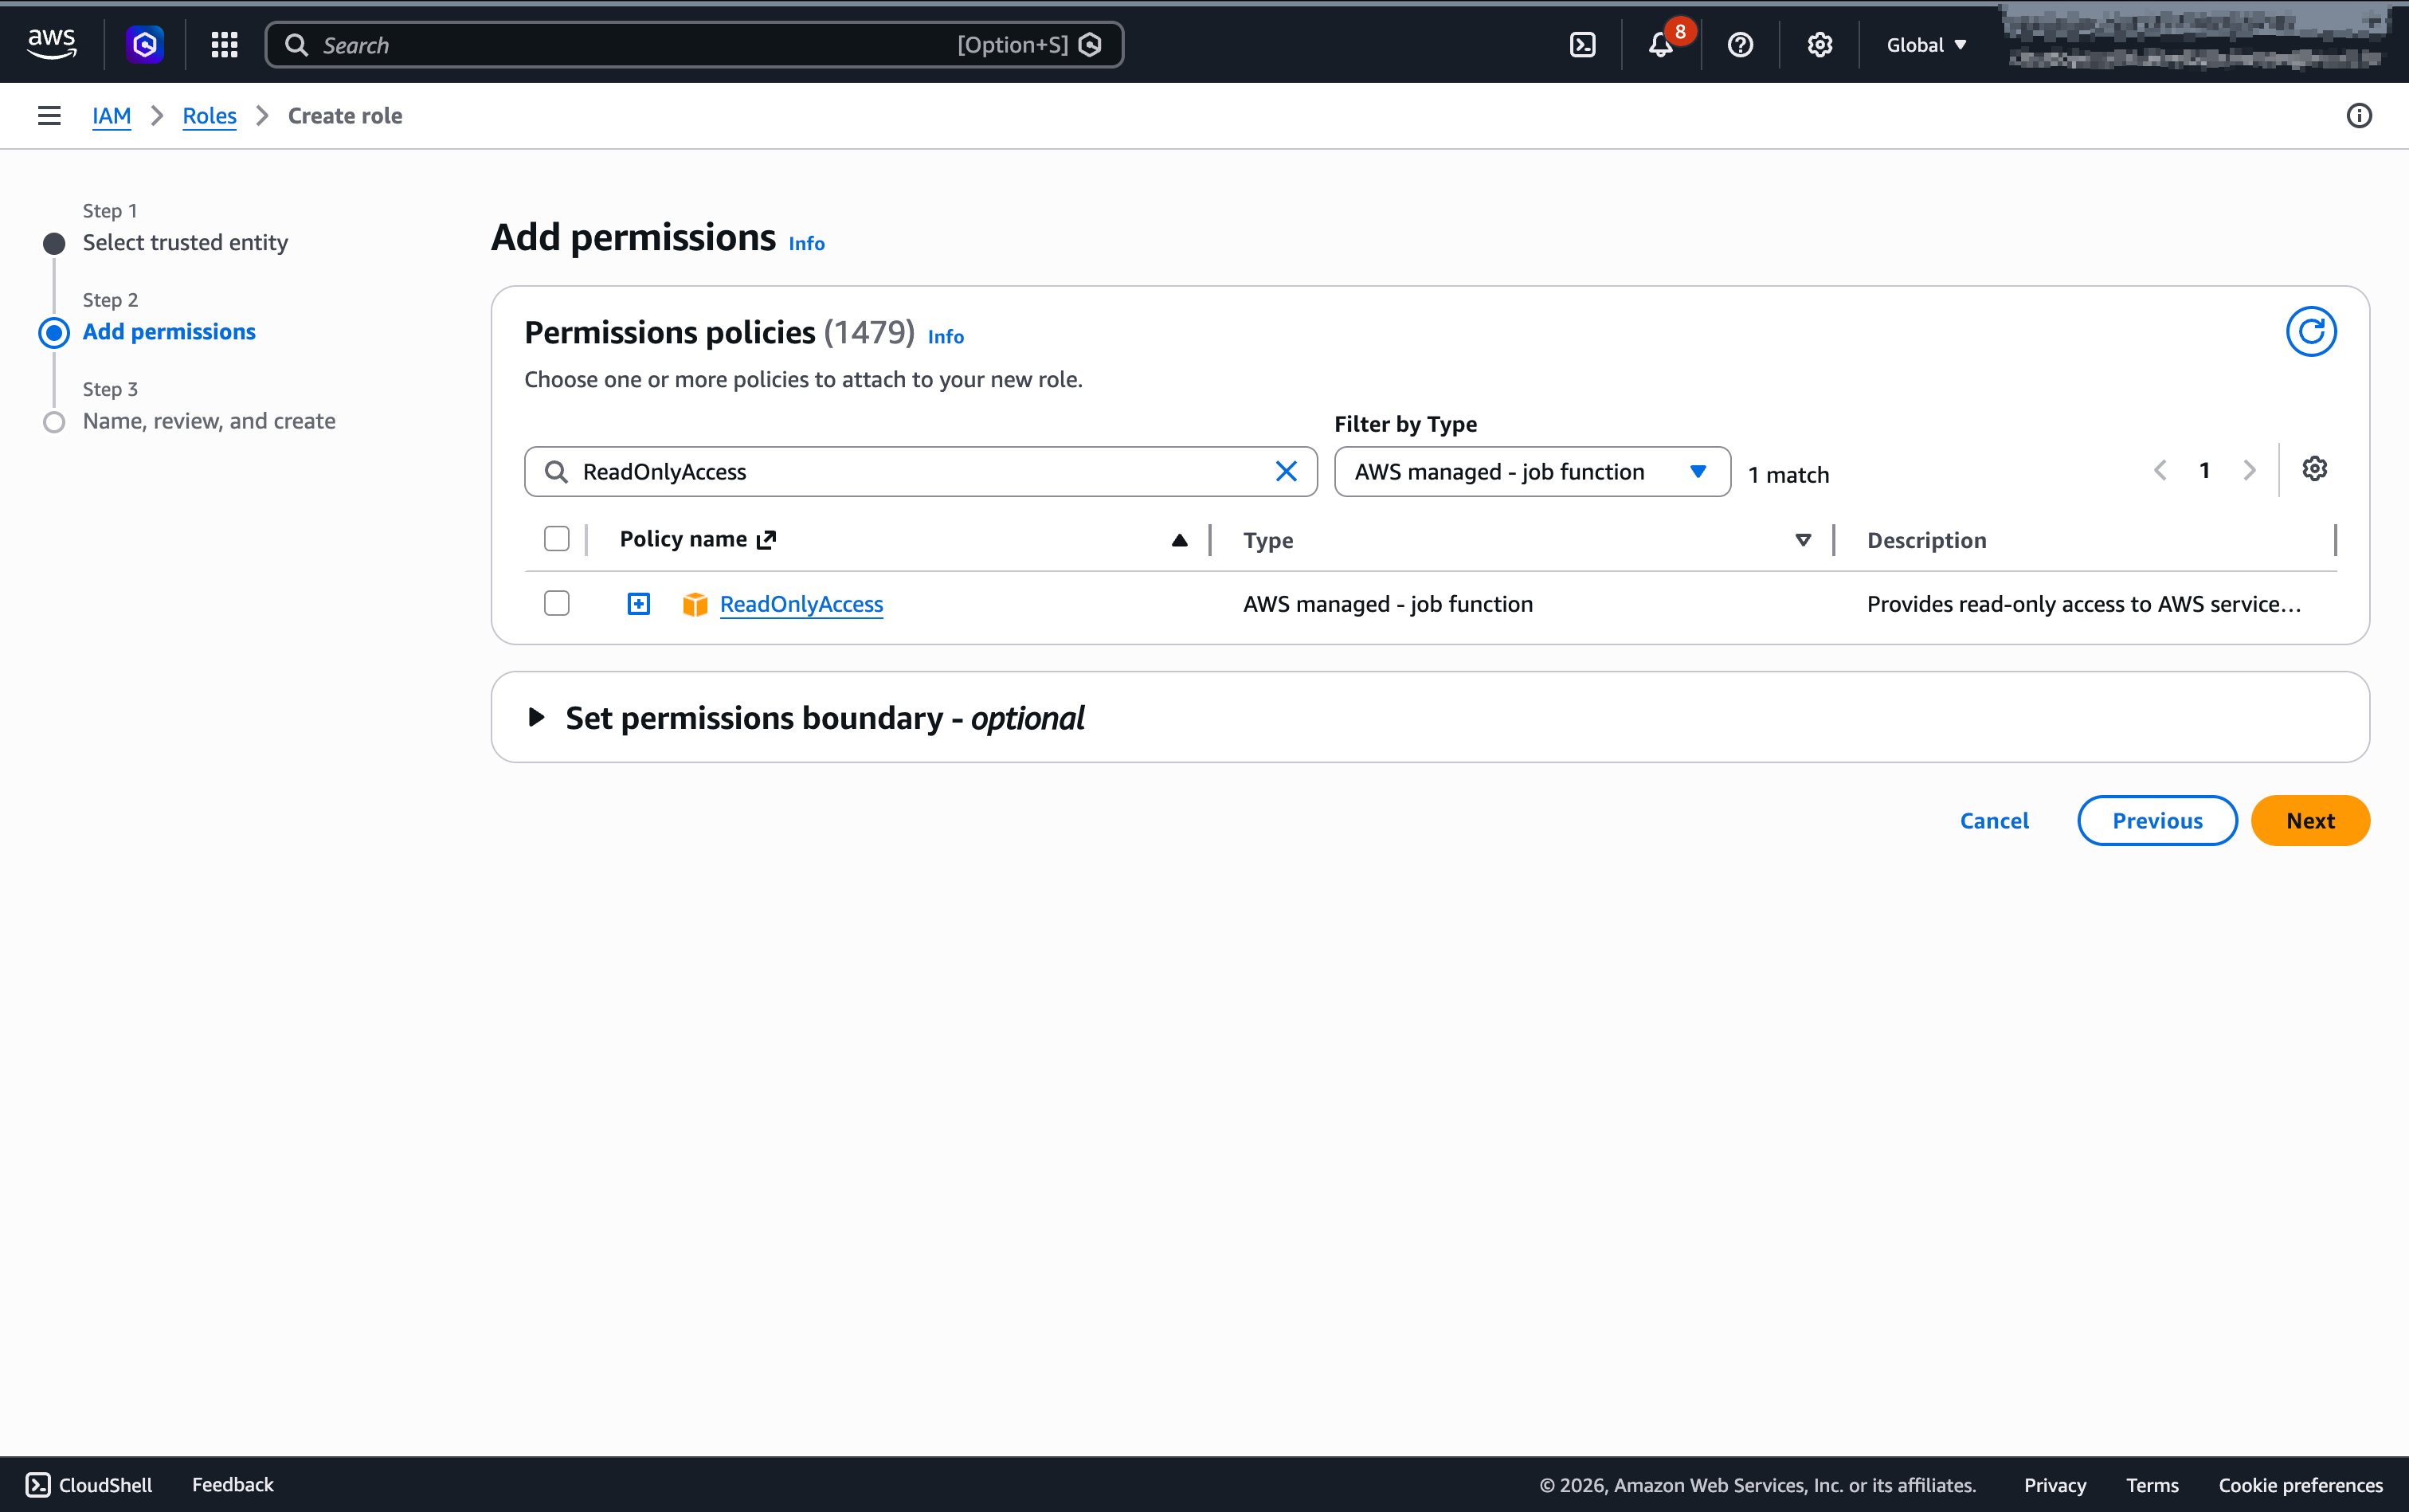
Attach a permission policy
Attach ReadOnlyAccess. Searching for ReadOnlyAccess returns many service-specific policies that contain the word, so set the Filter by Type to [AWS managed - job function] to quickly find the ReadOnlyAccess policy that grants read-only access to all services. (ARN: arn:aws:iam::aws:policy/ReadOnlyAccess)
Name and create the role
Enter a role name (e.g., CloudOpsCollectorRole), review the trust policy and permissions, then click [Create role].
Check the Role ARN
On the detail page of the created role, copy the Role ARN. You will use this value when registering with CloudOps.
arn:aws:iam::<YOUR_ACCOUNT_ID>:role/CloudOpsCollectorRole2. Creation via CloudFormation
If you want to create the role quickly without handling the detailed AWS settings yourself, use CloudFormation.
cloudformation:CreateStack, etc.) and IAM role creation permissions (iam:CreateRole, iam:AttachRolePolicy, iam:PassRole, iam:TagRole, etc.). Creating the stack requires acknowledging [IAM resource creation (CAPABILITY_NAMED_IAM)]. A user with administrator privileges (e.g., AdministratorAccess) is usually sufficient.Prepare the template
Save the following CloudFormation template as a .yaml file.
AWSTemplateFormatVersion: "2010-09-09"
Description: CloudOps cross-account collector role (read-only).

Parameters:
  CloudOpsAccountId:
    Type: String
    Description: CloudOps collector account ID (12 digits).
    AllowedPattern: "^[0-9]{12}$"
  ExternalId:
    Type: String
    Description: External ID shown in the CloudOps console.
    MinLength: 4
    NoEcho: true
  RoleName:
    Type: String
    Default: CloudOpsCollectorRole

Resources:
  CloudOpsCollectorRole:
    Type: AWS::IAM::Role
    Properties:
      RoleName: !Ref RoleName
      AssumeRolePolicyDocument:
        Version: "2012-10-17"
        Statement:
          - Effect: Allow
            Principal:
              AWS: !Sub "arn:aws:iam::${CloudOpsAccountId}:root"
            Action: "sts:AssumeRole"
            Condition:
              StringEquals:
                "sts:ExternalId": !Ref ExternalId
      ManagedPolicyArns:
        - "arn:aws:iam::aws:policy/ReadOnlyAccess"

Outputs:
  RoleArn:
    Description: The created Role ARN. Use it when registering with CloudOps.
    Value: !GetAtt CloudOpsCollectorRole.Arn
Create the stack
Go to [CloudFormation > Stacks > Create stack > With new resources (standard)] and upload the template file above.
Enter parameters
| Parameter | Value |
|---|---|
CloudOpsAccountId | CloudOps collector account ID |
ExternalId | External ID shown in the CloudOps console |
RoleName | Role name to create (default CloudOpsCollectorRole) |
Check the Role ARN
Acknowledge [IAM resource creation] and create the stack. When complete, find the RoleArn value on the [Outputs] tab.
Next step
After creating the role, integrate the account with CloudOps using the Role ARN and External ID.