Onboarding Hub
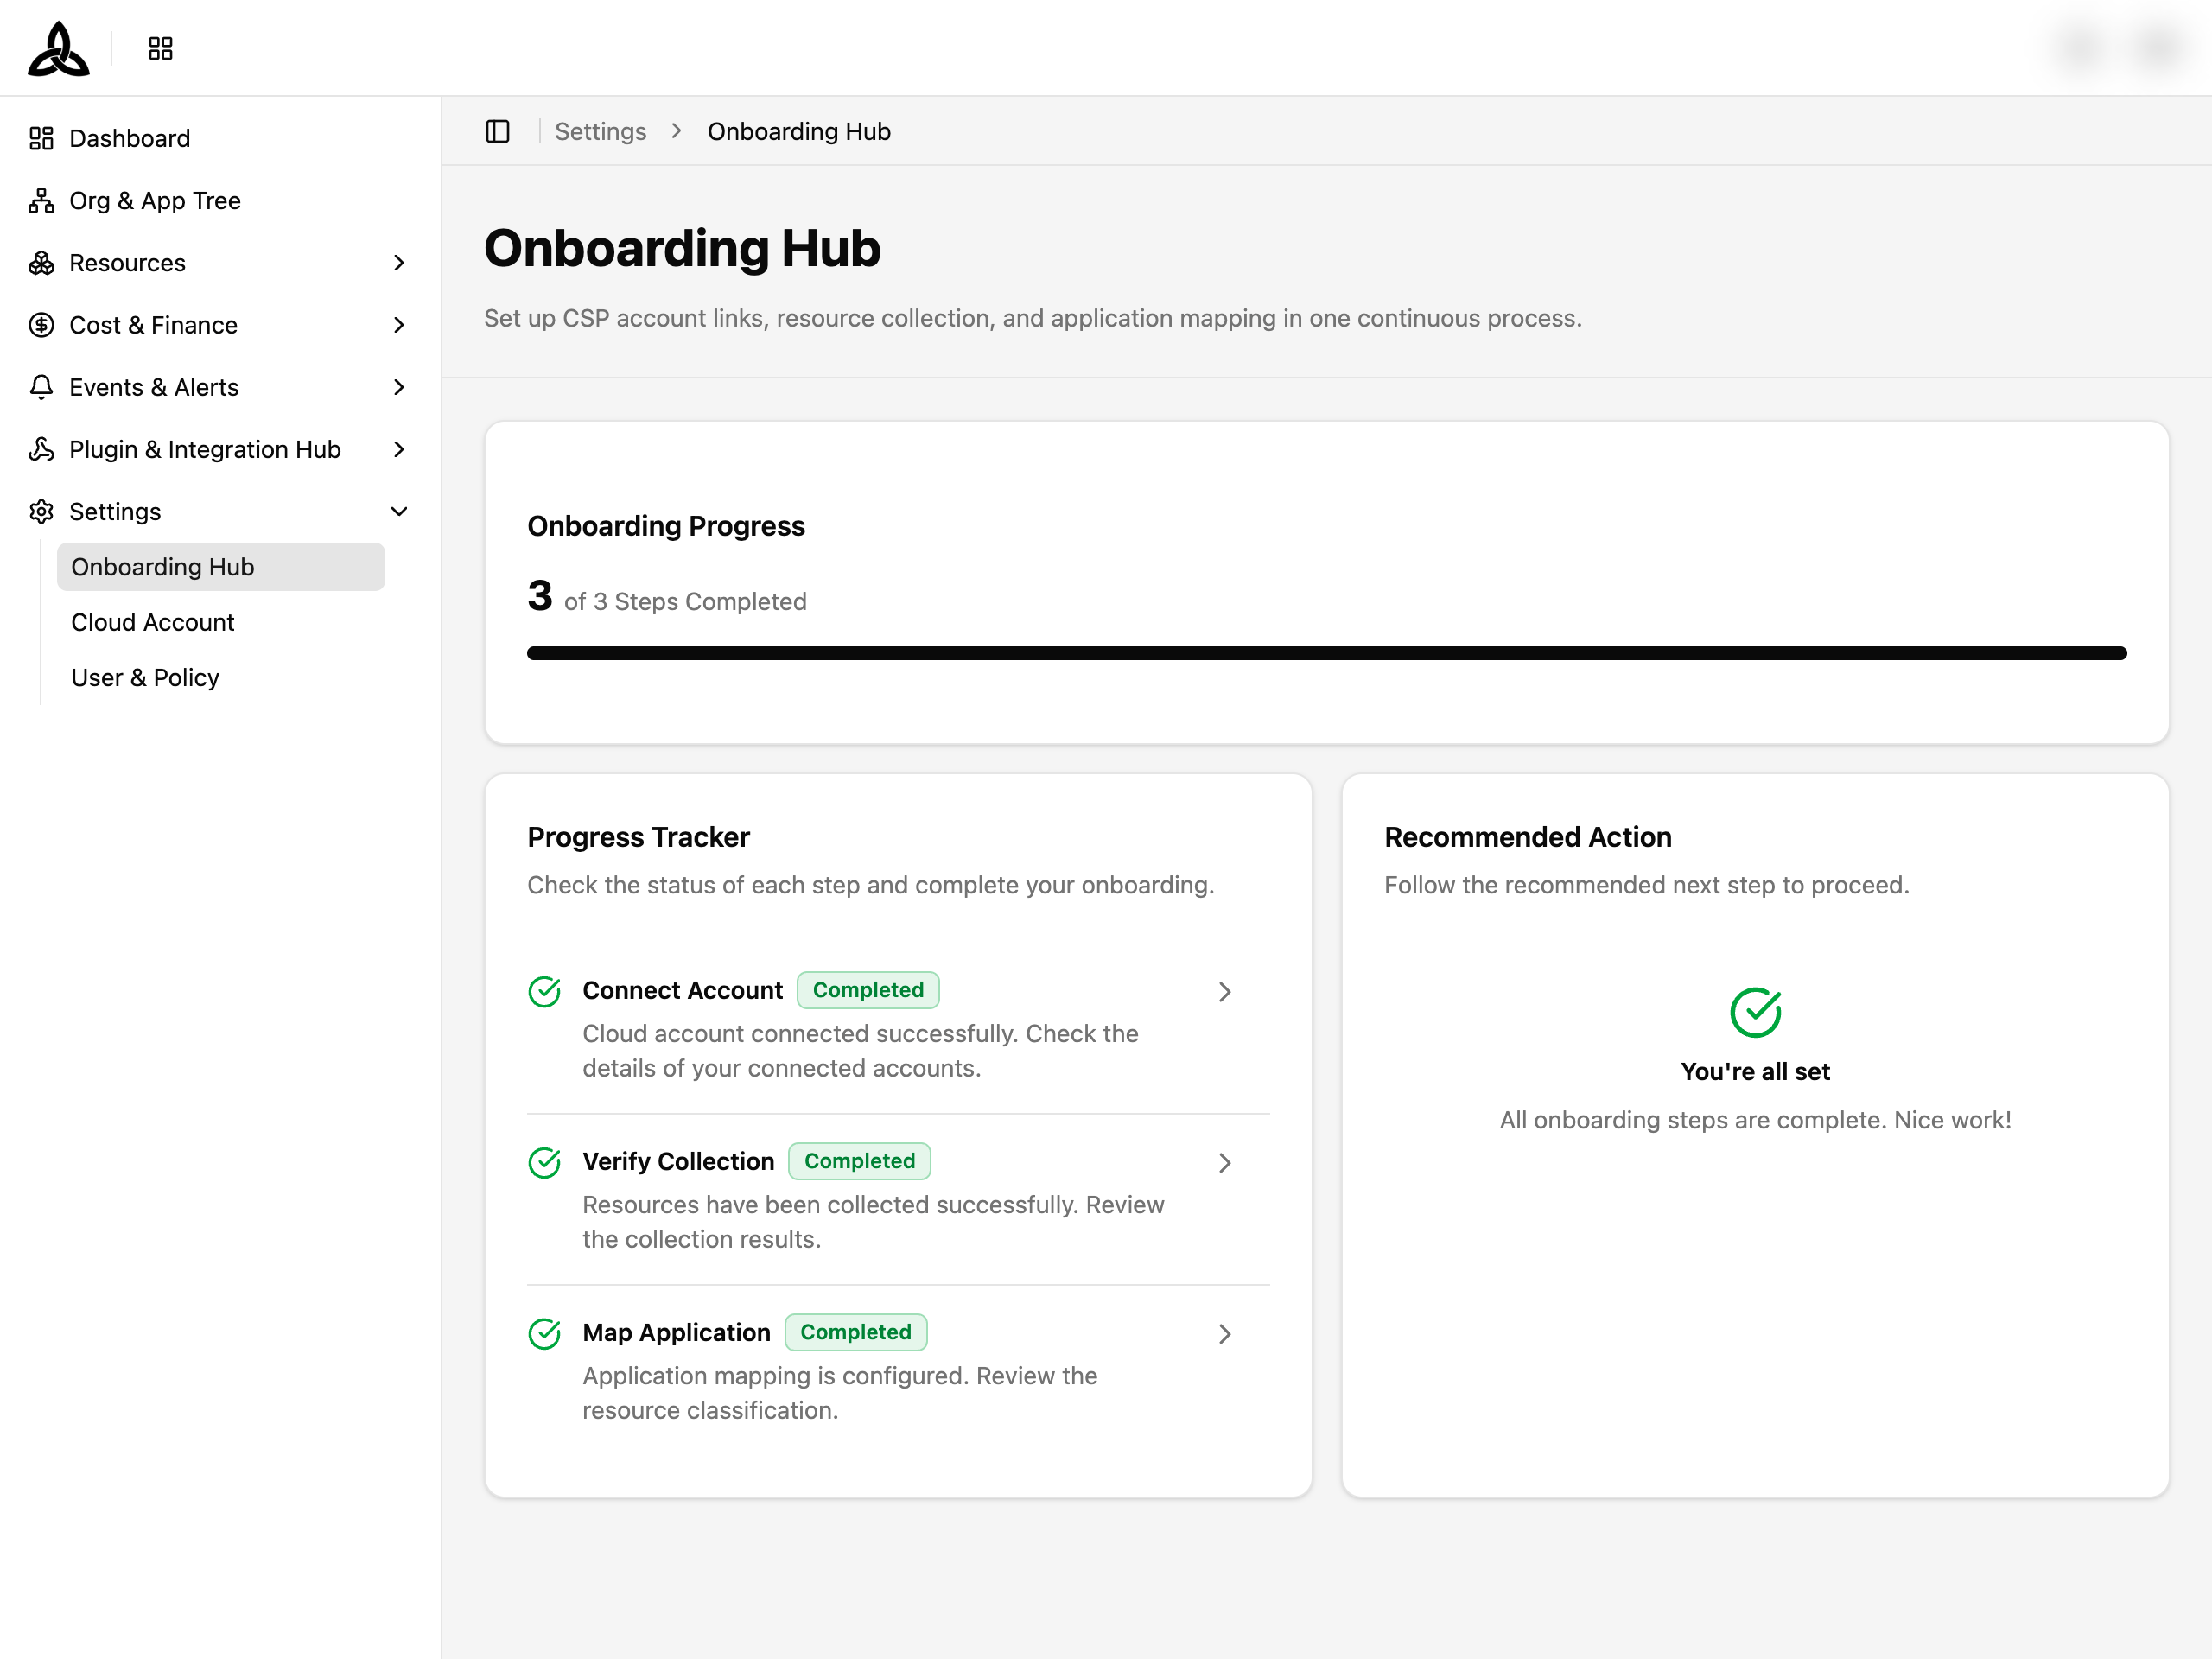
On the [Tenant & Organization > Onboarding Hub] page, you can set up CSP account links, resource collection, and application mapping in one continuous process.

Onboarding Progress
The top card shows overall onboarding progress — how many of the 3 steps are completed, displayed with a progress bar and step labels.
| Step | Name | Purpose |
|---|---|---|
| Step 1 | Connect Account | Connect a cloud service provider account |
| Step 2 | Verify Collection | Confirm that resource data was collected successfully |
| Step 3 | Map Application | Organize collected resources into applications |
Below the progress card, two side-by-side cards provide detailed guidance:
| Card | Description |
|---|---|
| Progress Tracker | Lists each step with its current status badge and a brief description. Click any step to jump directly to that step in the wizard |
| Recommended Action | Highlights the next step you should complete, with a direct action button. When all steps are done, shows a completion message |
Step Status
Each step displays one of the following status badges:
| Status | Meaning |
|---|---|
| Completed | Step finished successfully |
| Failed | Step encountered an error — action needed |
| Incomplete | Step has not been started or finished yet |
Onboarding Steps in Detail
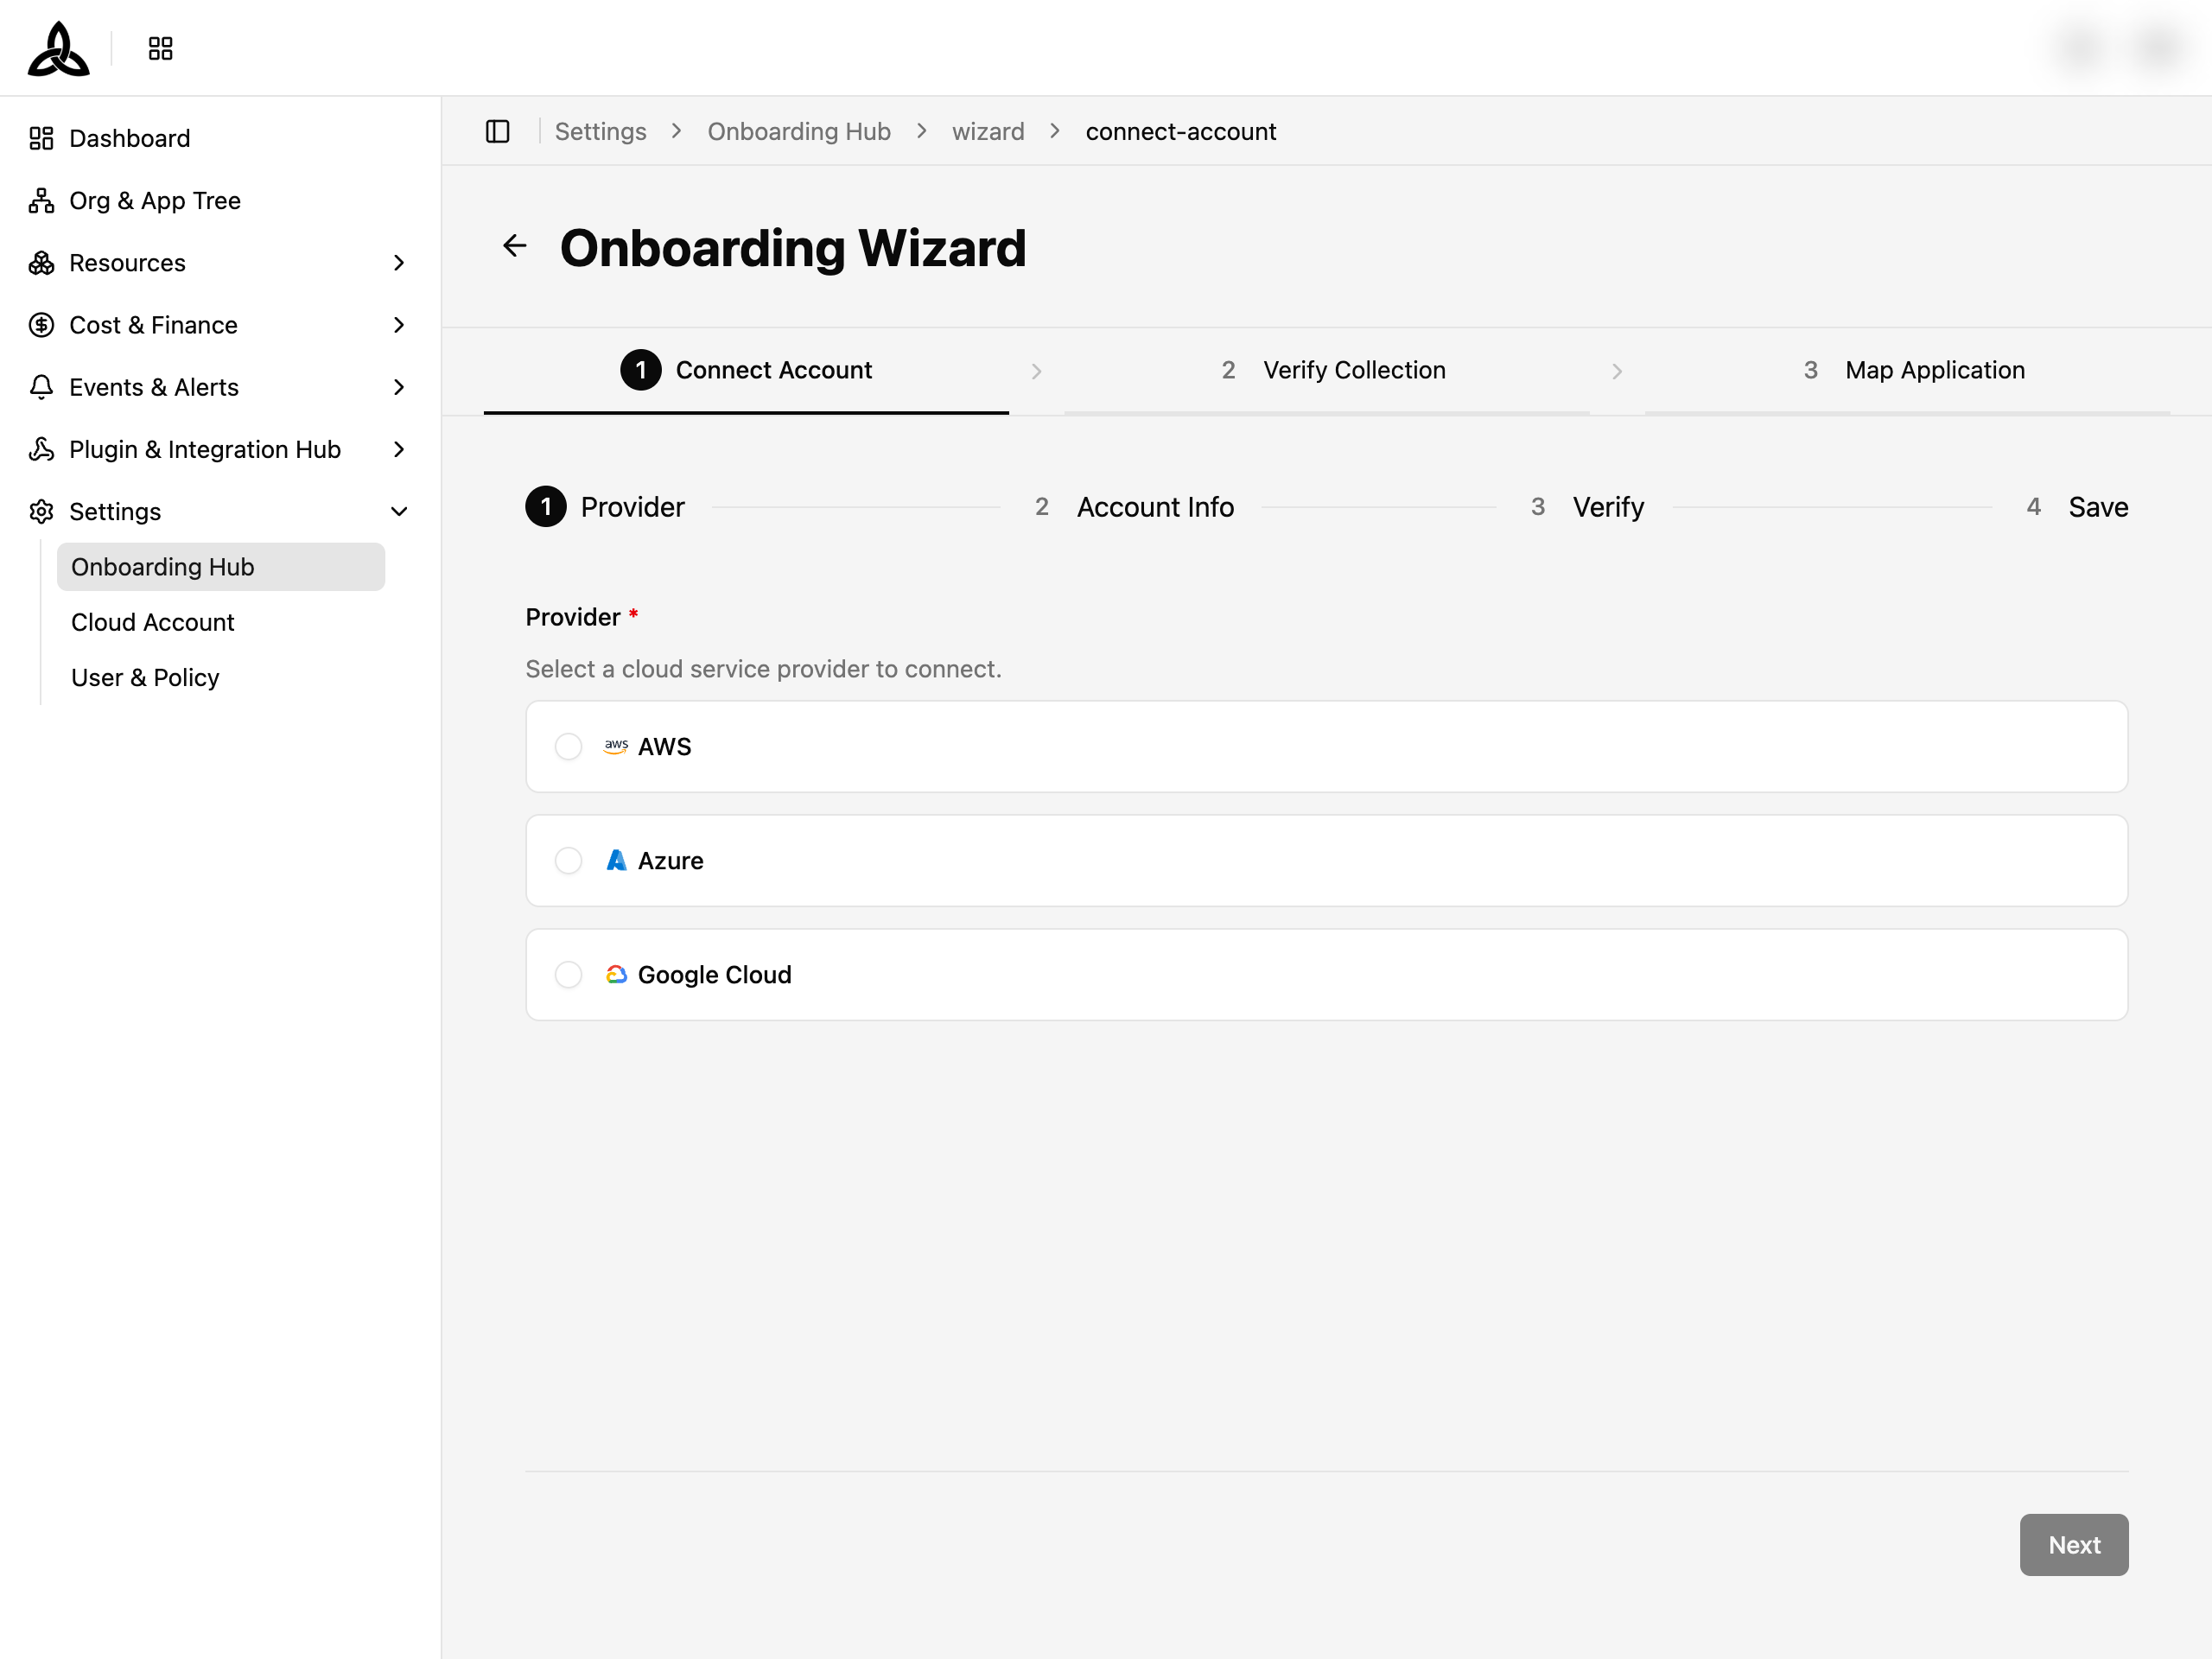
Clicking any step in the Progress Tracker — or the CTA in the Recommended Action card — opens the Onboarding Wizard. The wizard provides a stepper navigation at the top, allowing you to move between steps freely.
Step 1. Connect Account

Connect a cloud service provider account using the same multi-step flow as the [Cloud Account > Connect Account] page. Select a provider (AWS, Azure, or Google Cloud), choose the account type and connection method, enter credentials, and verify the connection.
After a successful connection, a completion screen offers two choices:
| Action | Description |
|---|---|
| Connect Another Account | Start the connection flow again for an additional account |
| Complete Connection & View Status | Finish Step 1 and proceed to Step 2 to verify collection |
Step 2. Verify Collection

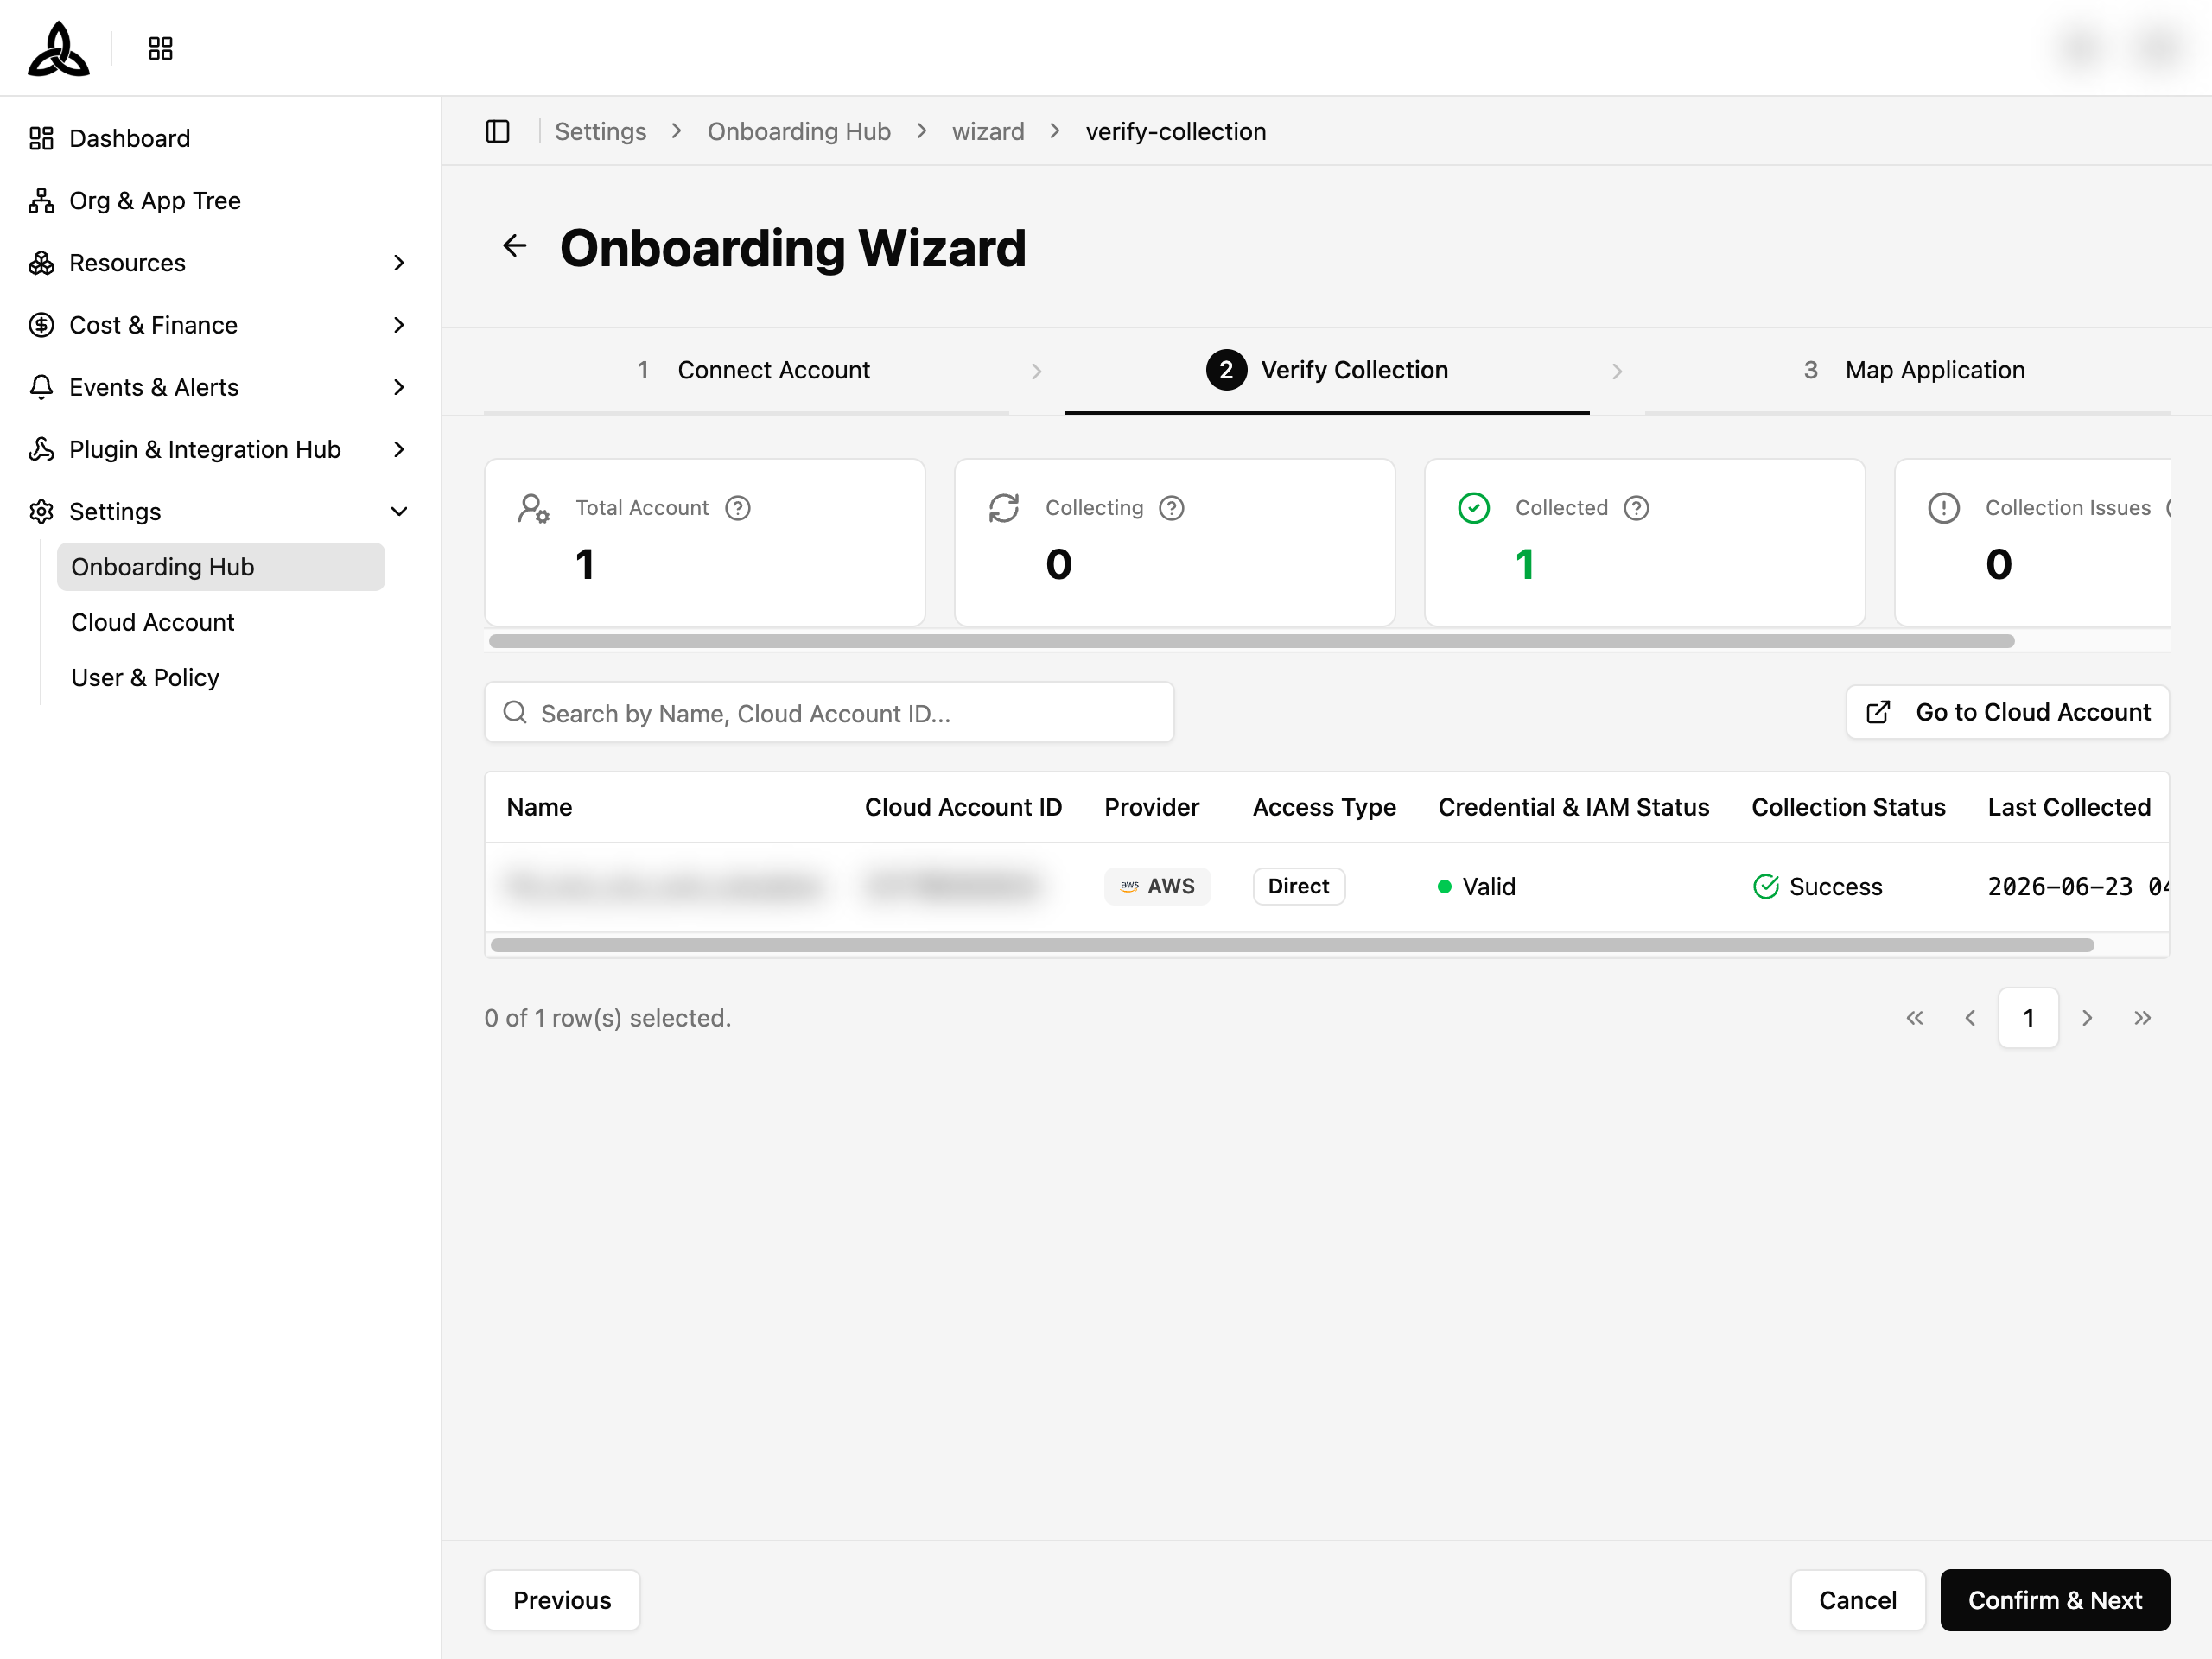
Review the resource collection status for all accounts connected through the onboarding process. Four metric cards summarize the collection state:
| Card | Description |
|---|---|
| Total Account | Total number of connected cloud accounts |
| Collecting | Accounts with collection pending or in progress |
| Collected | Accounts whose latest collection succeeded |
| Collection Issues | Accounts with failed or canceled collection |
Below the metrics, a table lists each account with its name, Cloud Account ID, provider, access type, credential status, collection status, and last collected timestamp. Click [Go to Cloud Account] to navigate to the full Cloud Account management page.
Use the footer navigation to move between steps: [Previous] returns to Step 1, [Cancel] goes back to the Hub, and [Confirm & Next] proceeds to Step 3.
Step 3. Map Application

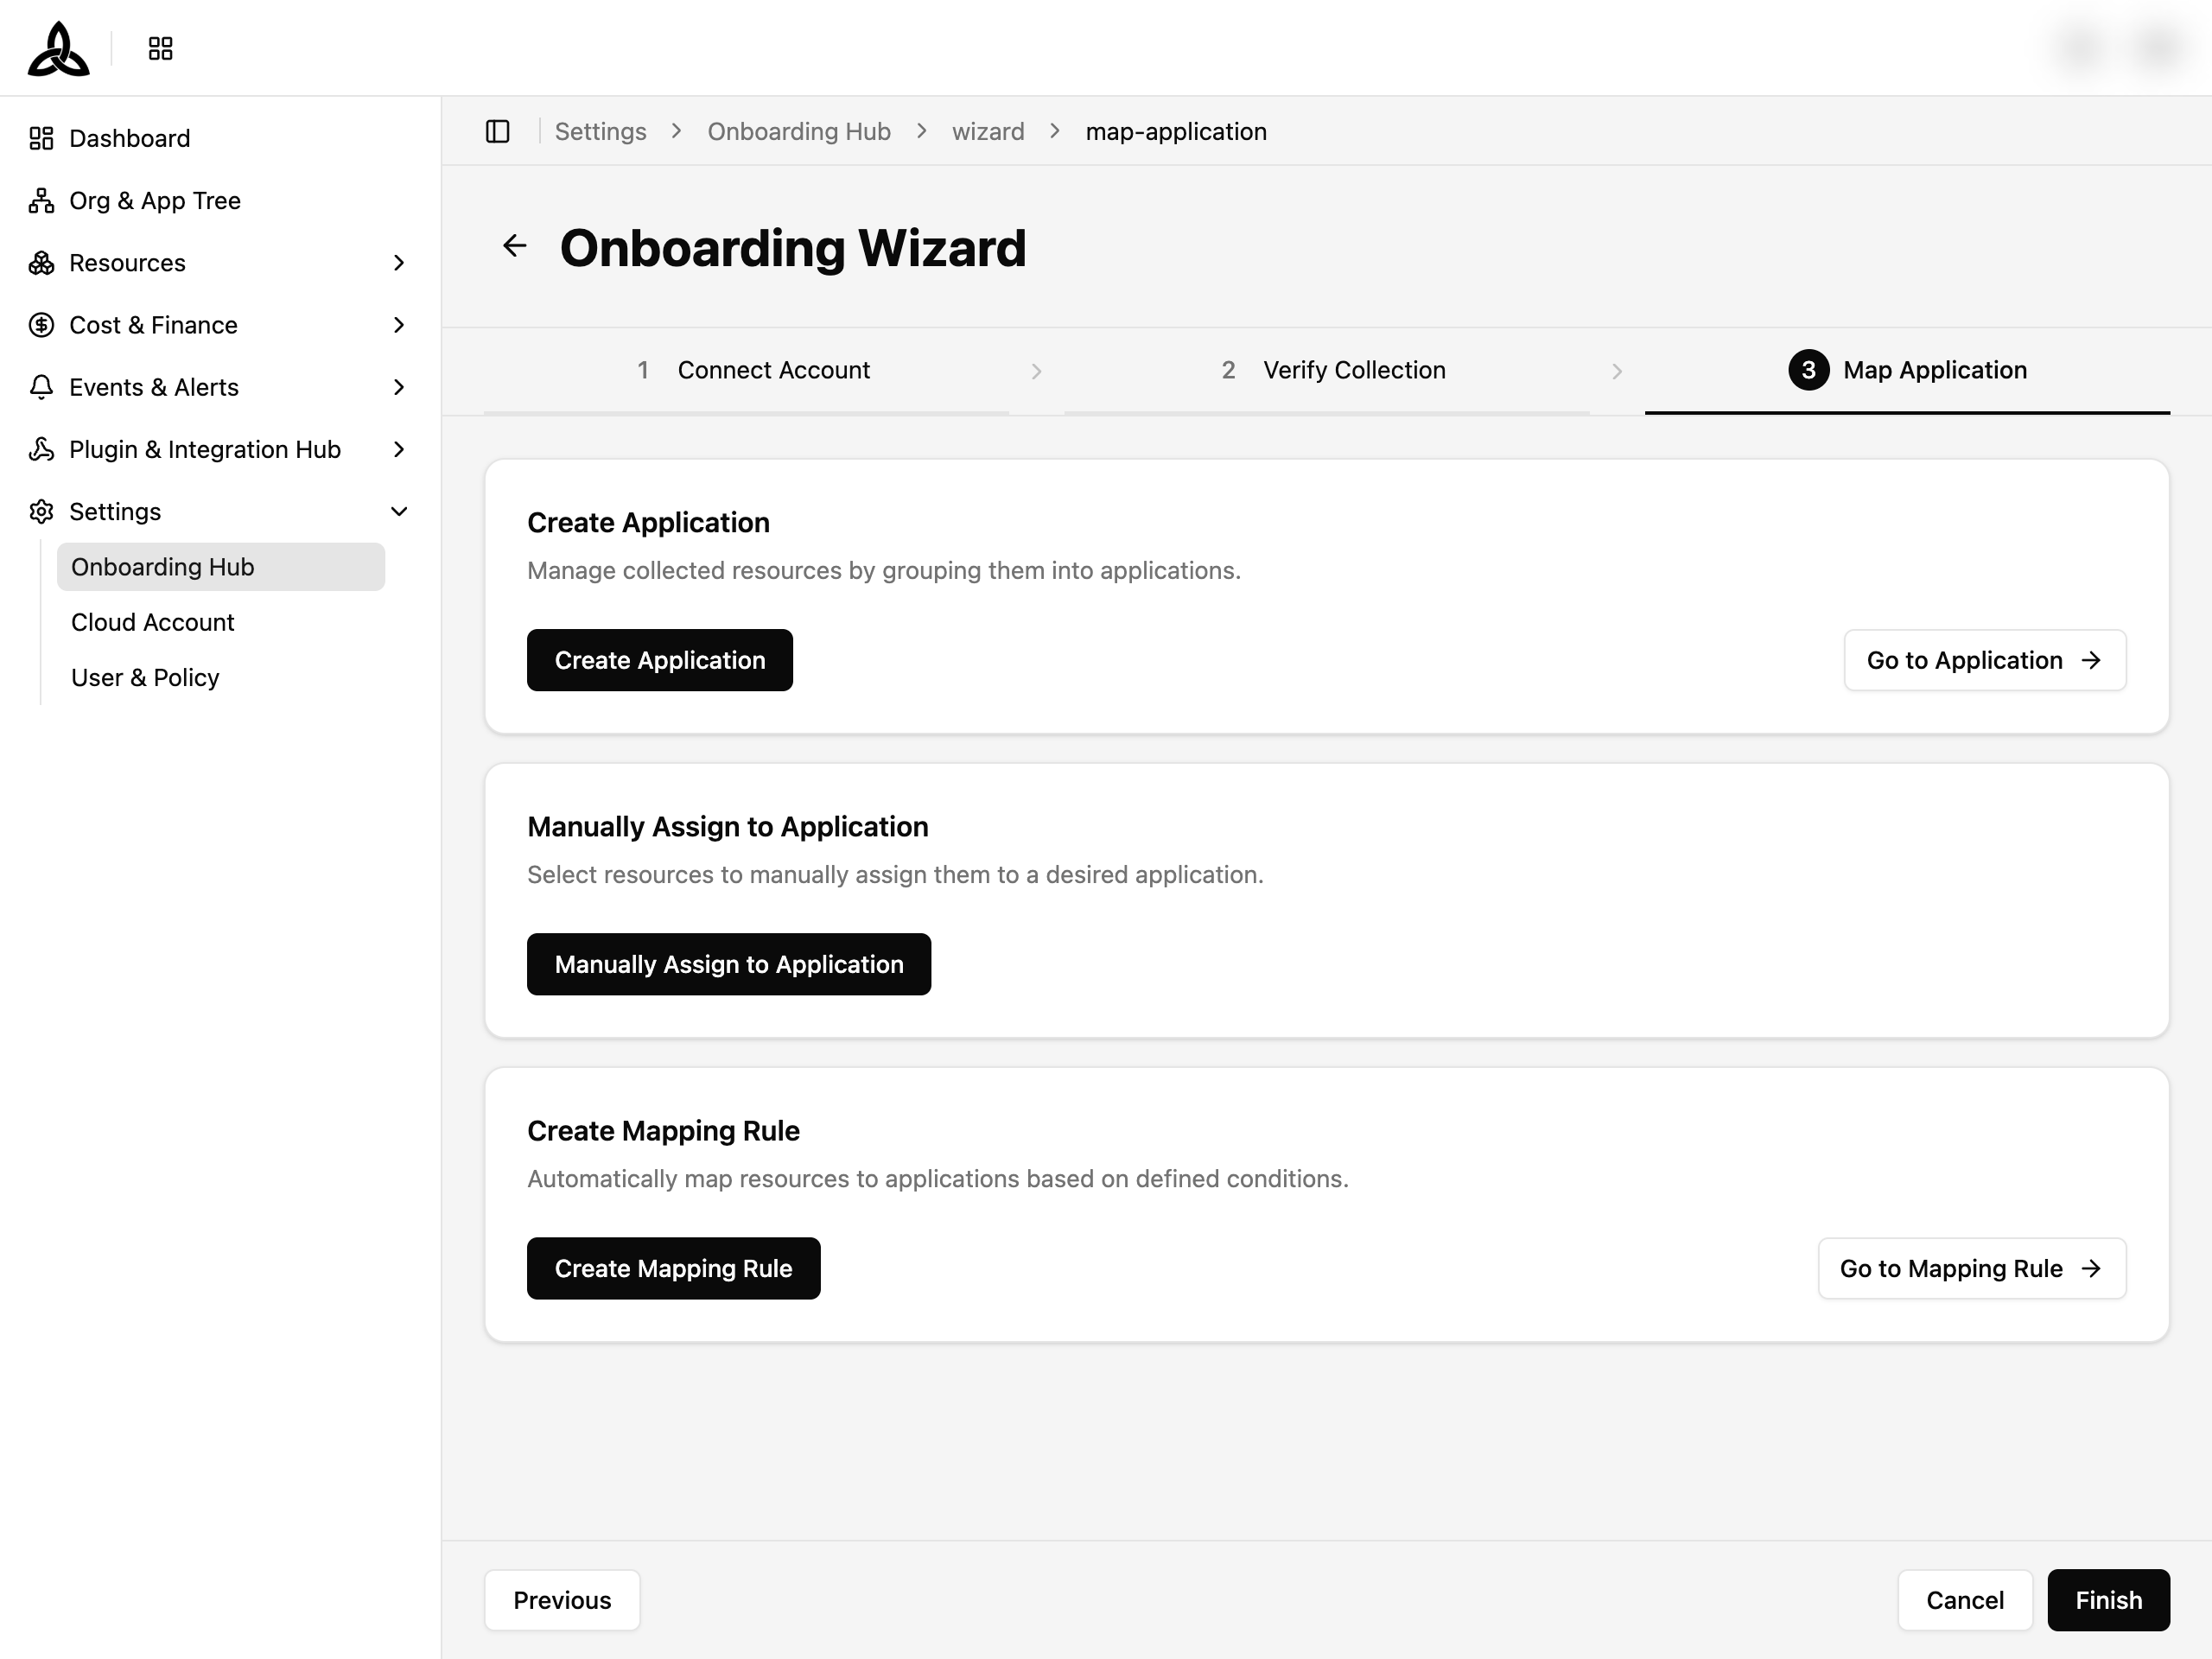
Organize collected resources by mapping them to applications. Three action cards guide you through different mapping approaches:
| Action Card | Description | Requirement |
|---|---|---|
| Create Application | Create a new application to group resources. Opens a creation dialog | Always available |
| Manually Assign to Application | Navigate to Resource Inventory to select and assign resources manually | Requires at least one application |
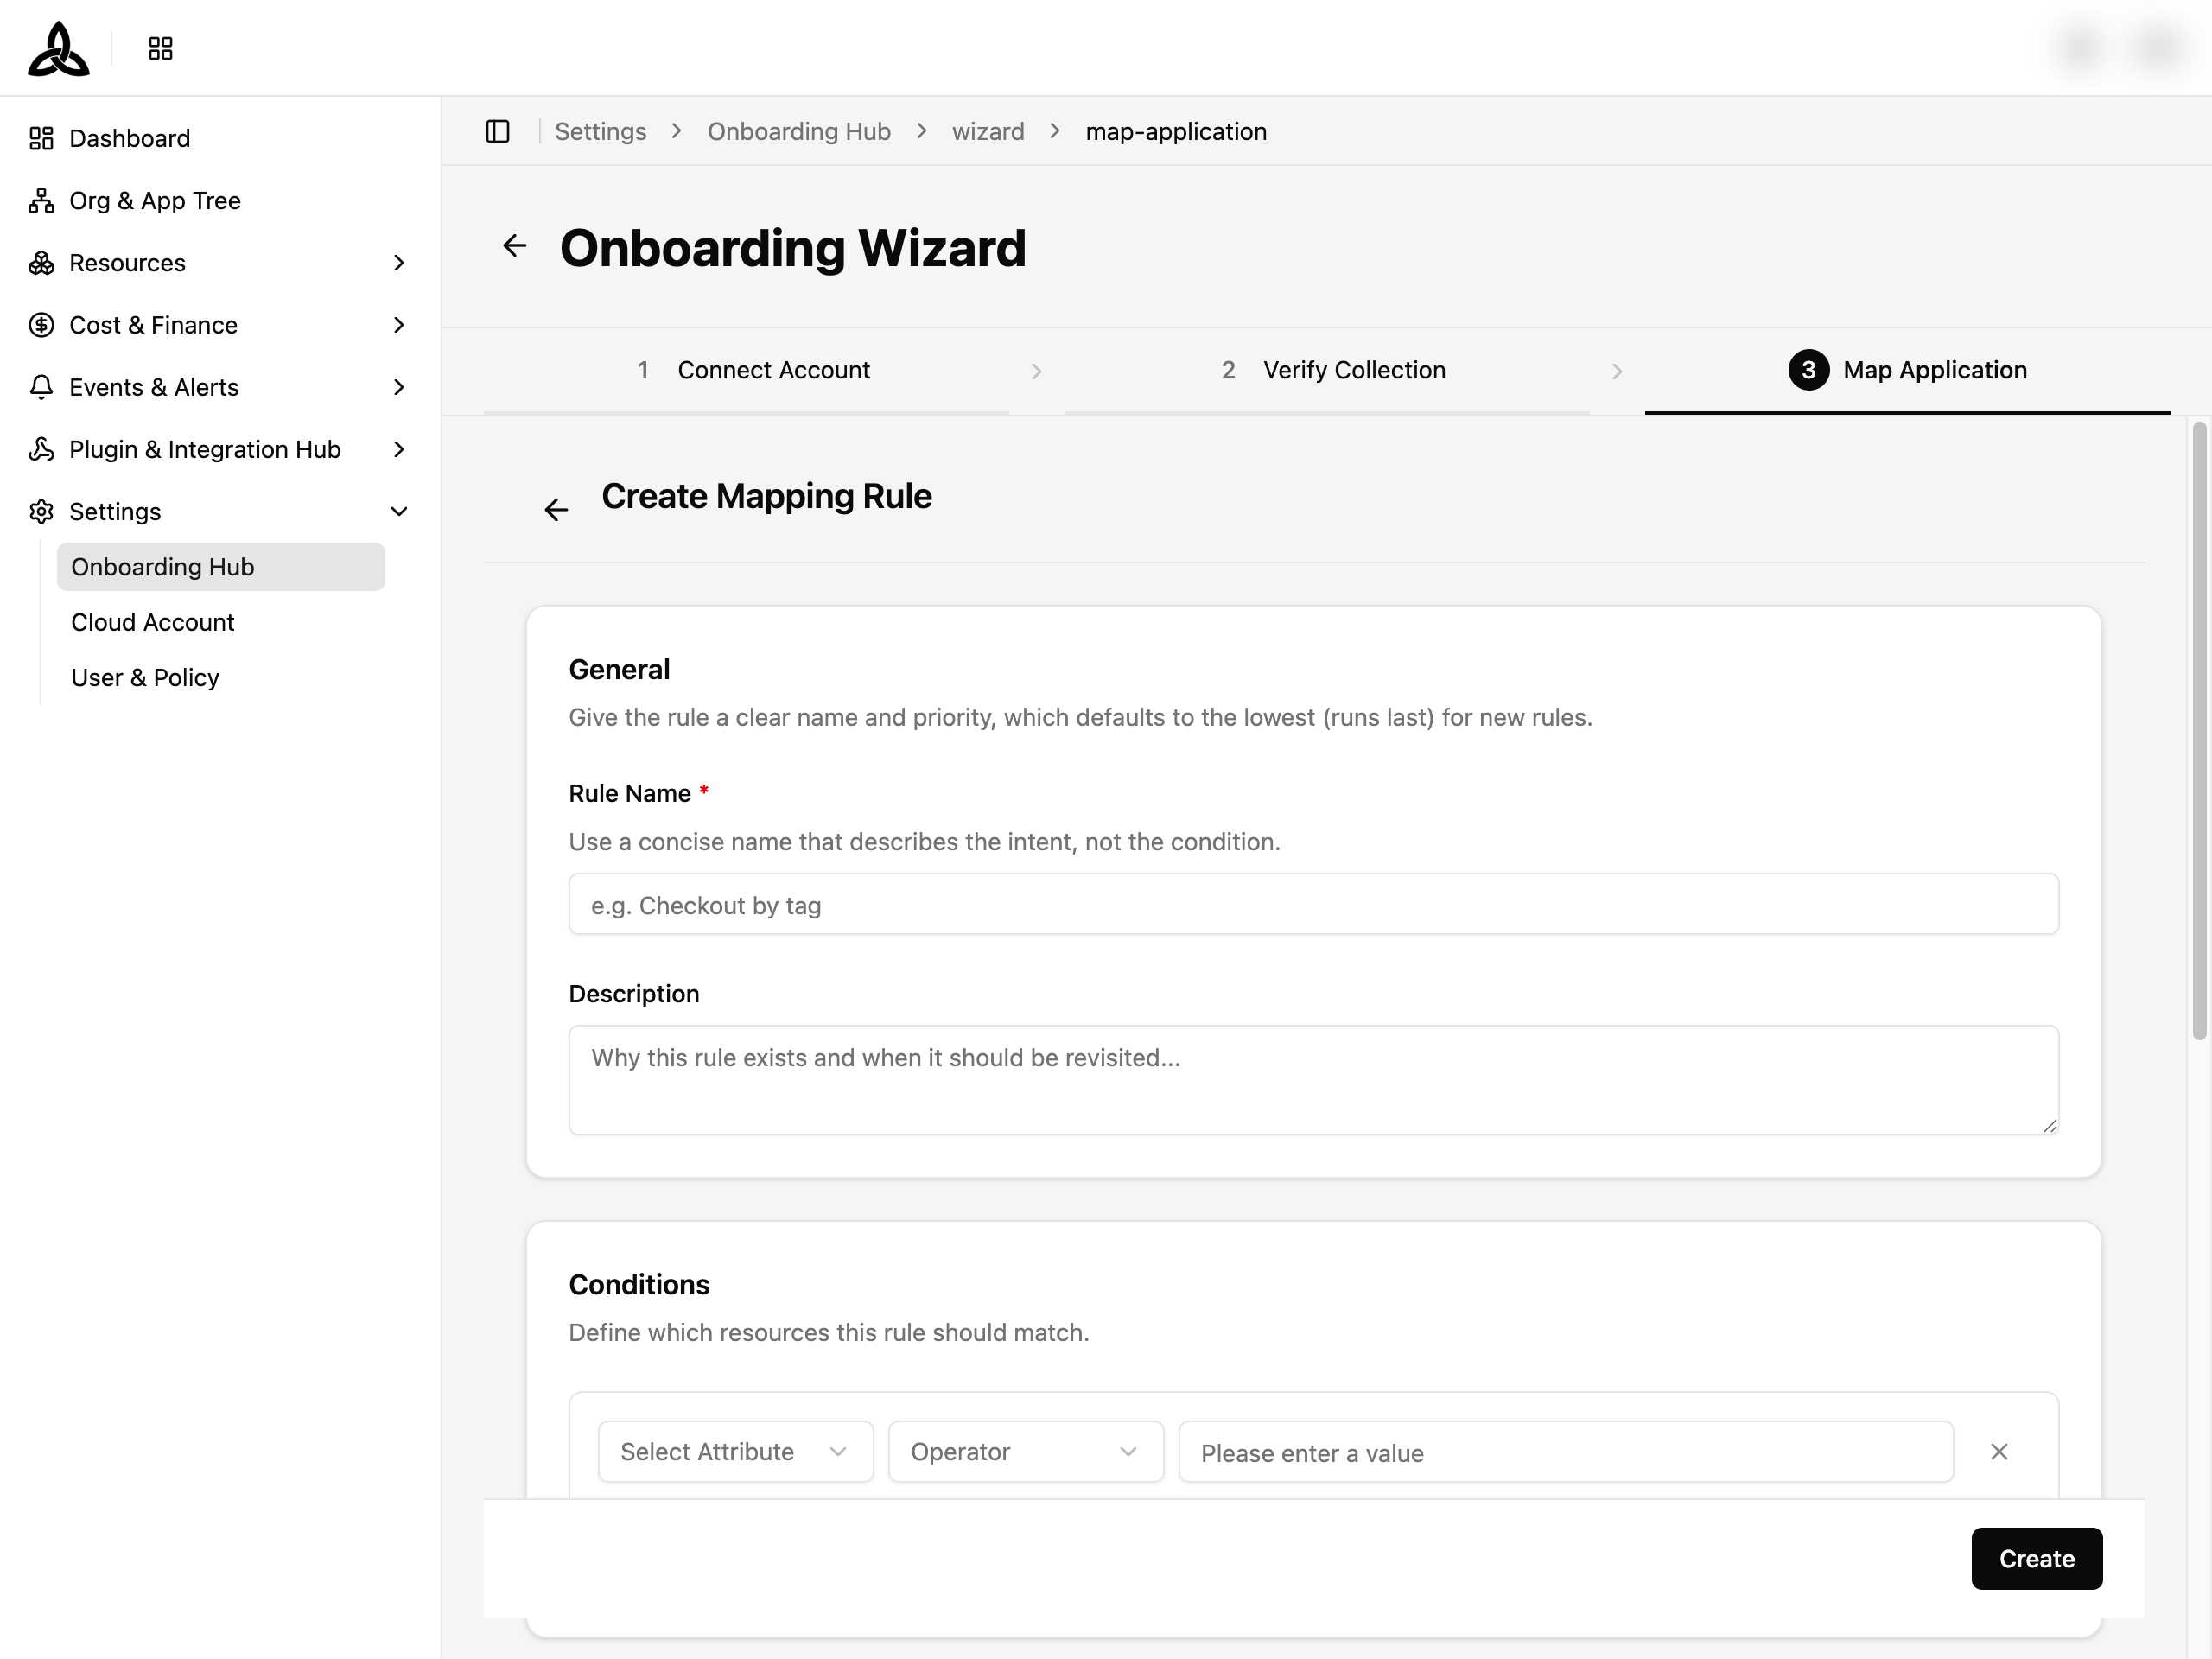
| Create Mapping Rule | Define rule-based conditions to automatically map resources to applications. Opens an inline form within the wizard | Requires at least one application |
Each card provides a primary action button and, where applicable, a secondary [Go to …] link to navigate directly to the corresponding management page.
Create Application
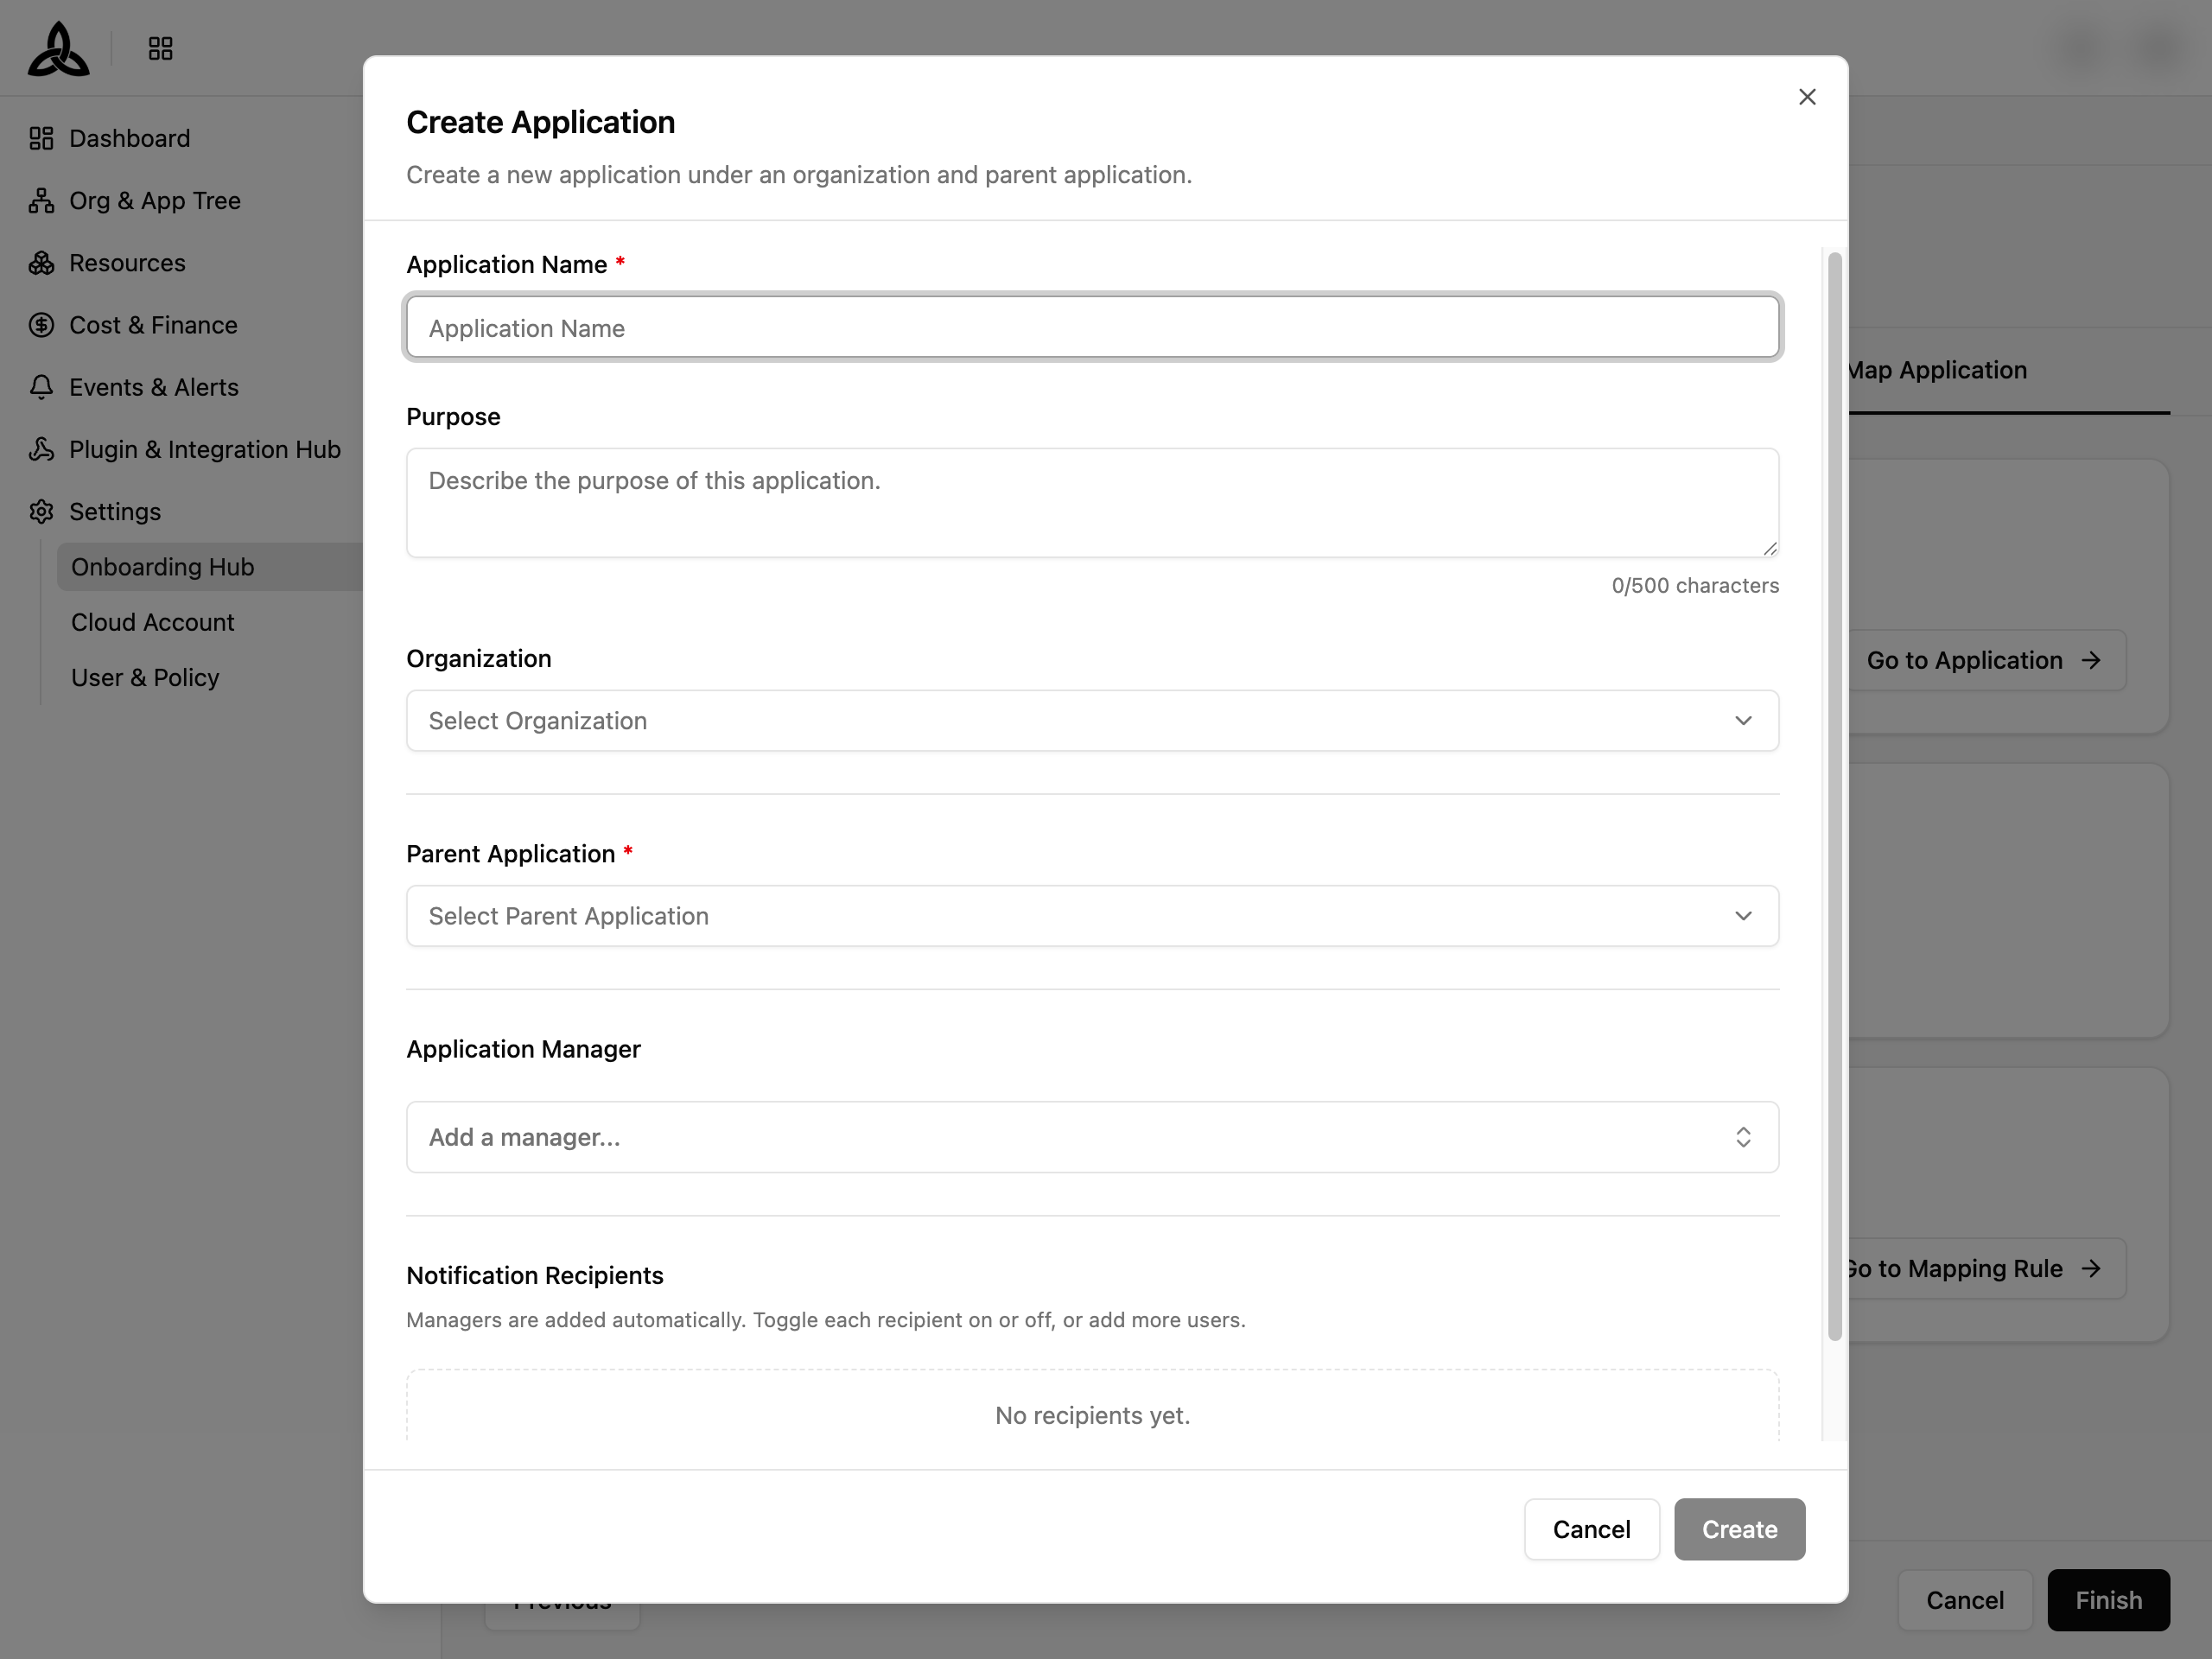
Click the [Create Application] button on the first card to open the creation dialog:

| Field | Required | Description |
|---|---|---|
| Application Name | Yes | A unique name for the application |
| Purpose | No | Description of the application’s purpose (max 500 characters) |
| Organization | No | Select an organization to associate (creates a root application). Inherited automatically for child applications |
| Parent Application | Yes | Select a parent application, or “Set as Root” to create a top-level application |
| Application Manager | No | Assign one or more managers to the application (up to 10) |
| Notification Recipients | No | Managers are added automatically. Toggle notifications on/off per recipient, or add additional users |
Click [Create] to save. The new application will be available for resource mapping immediately.
Manually Assign to Application
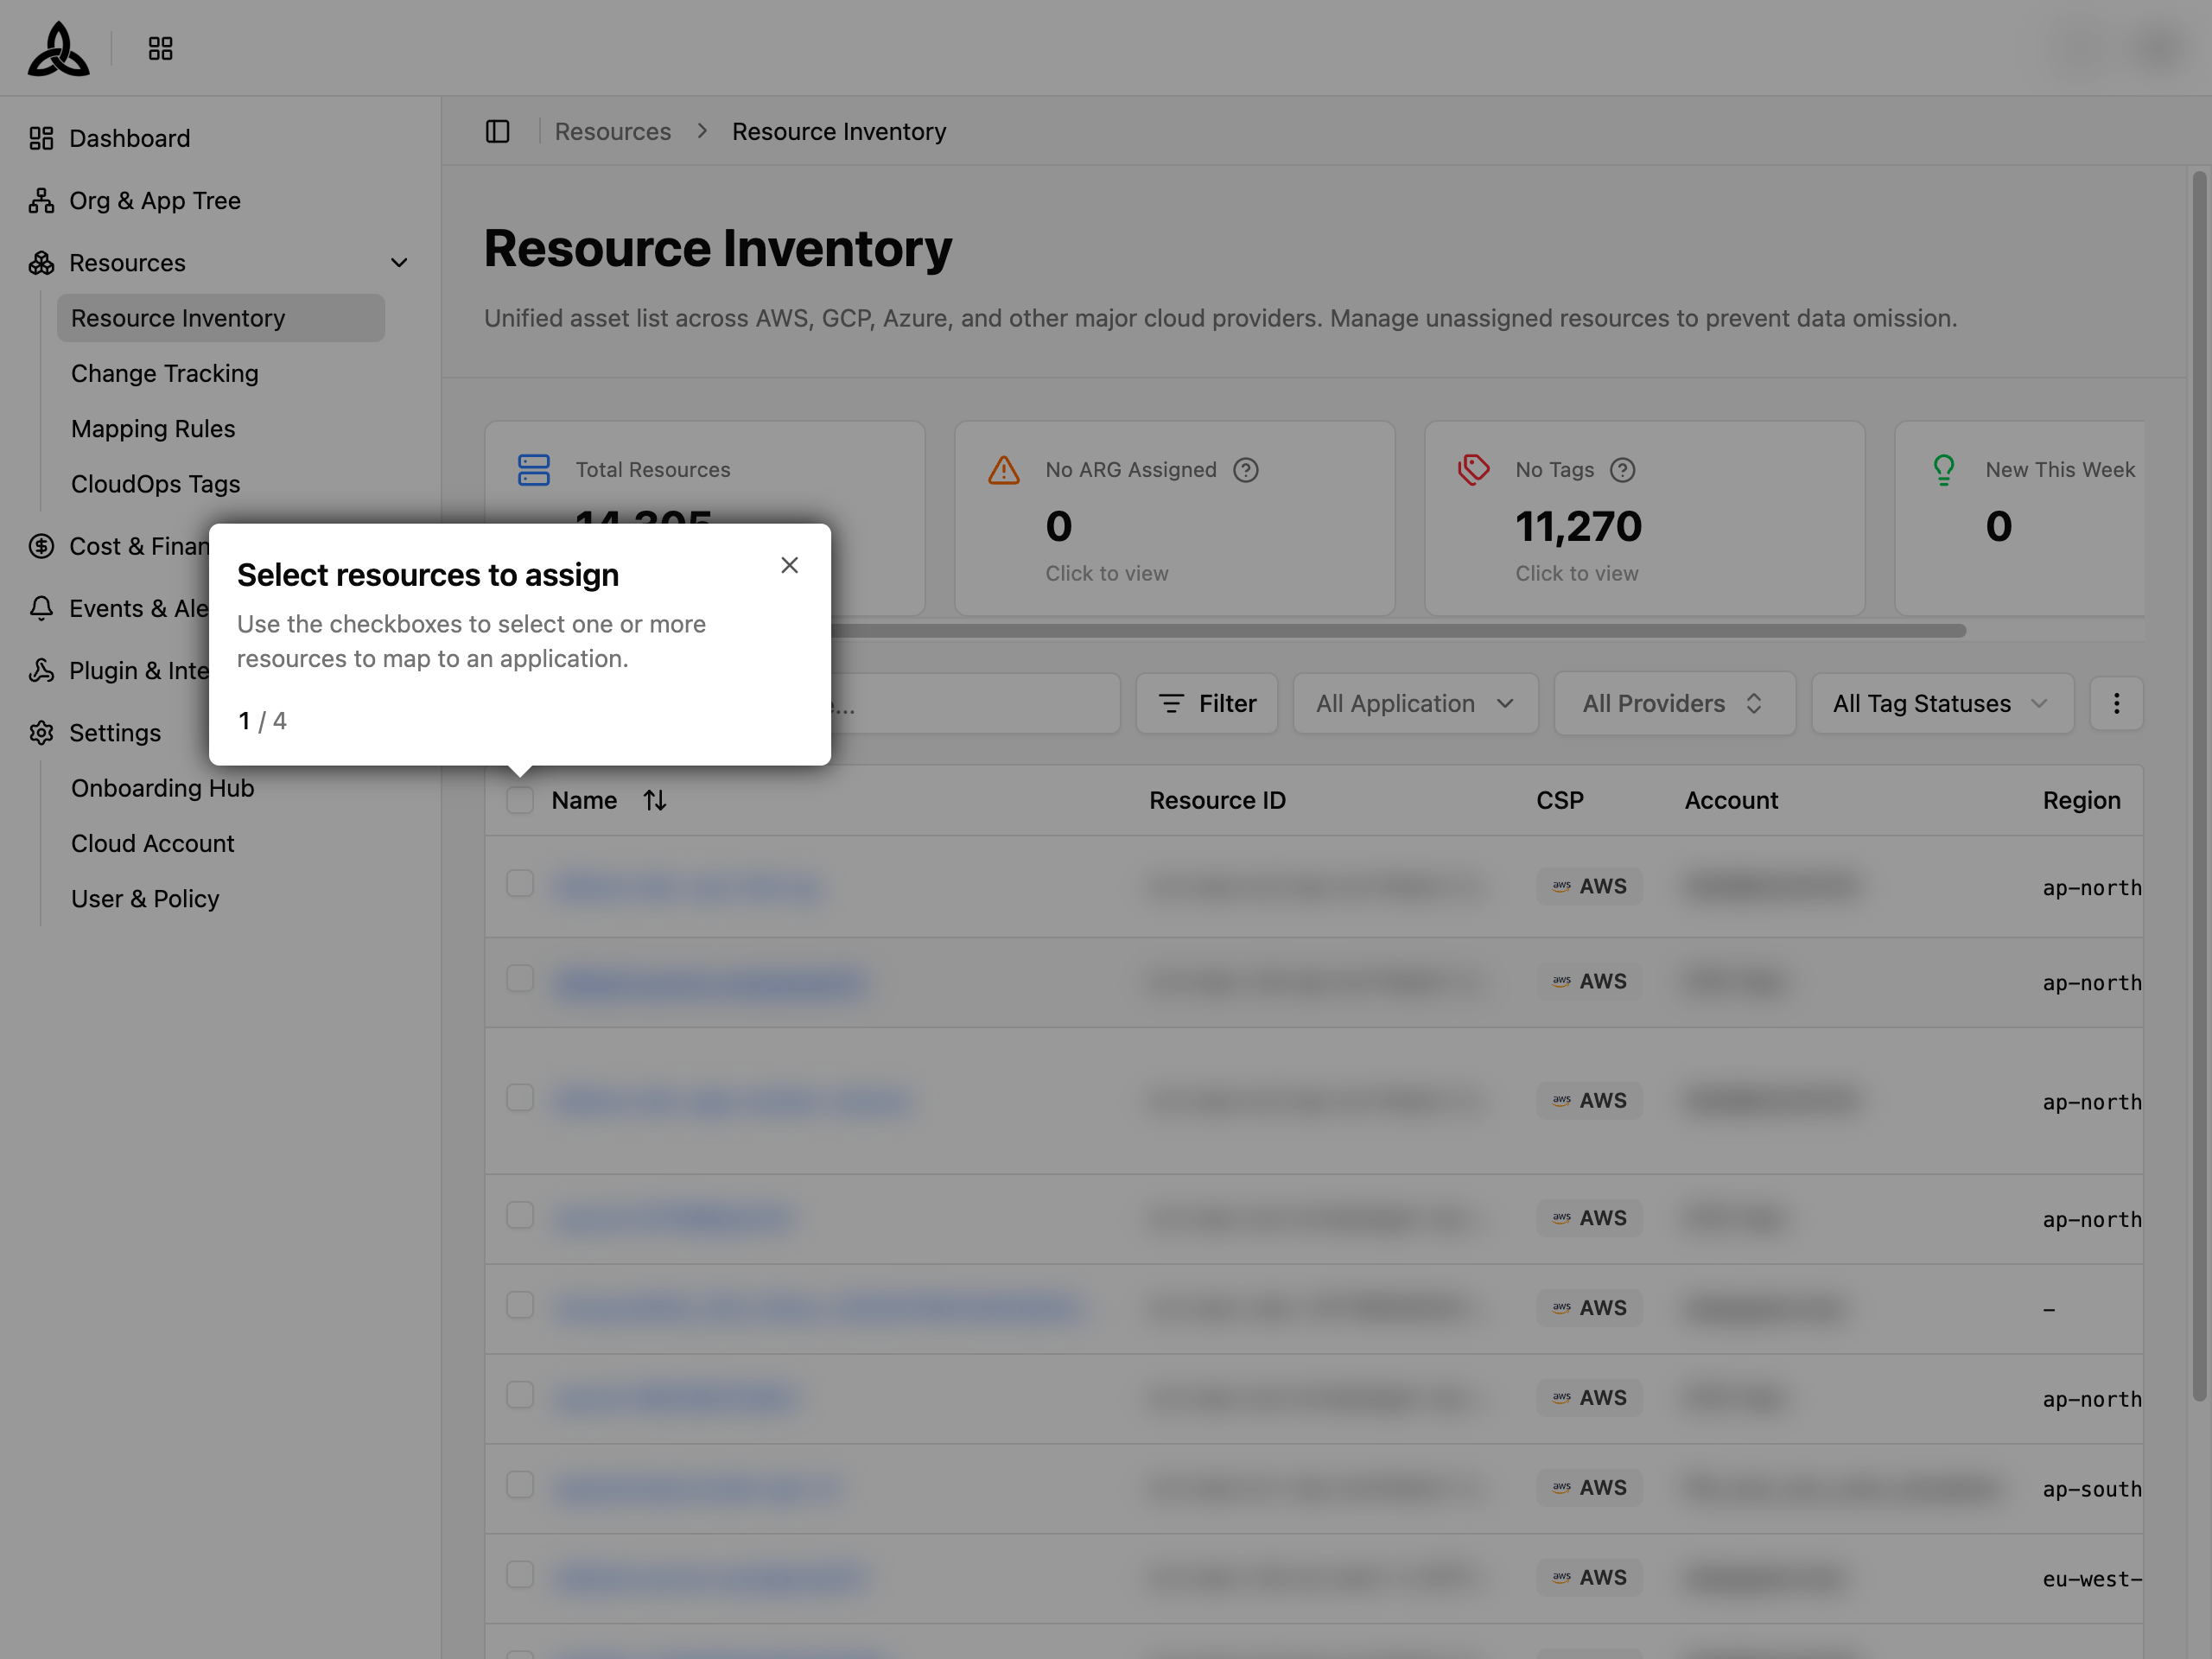
Click the [Manually Assign to Application] button to navigate to the Resource Inventory page. A guided coach mark sequence walks you through selecting resources and assigning them to an application.

Create Mapping Rule
Click the [Create Mapping Rule] button to open an inline mapping rule form directly within the wizard. Define conditions (provider, account, tags, etc.) to automatically map matching resources to a target application. Click [Go to Mapping Rule] to manage rules in the dedicated Mapping Rules page instead.

Use the footer navigation: [Previous] returns to Step 2, [Cancel] goes back to the Hub, and [Finish] completes the onboarding process.
Process Guide
Choose the path that fits your setup needs:
| Path | When to Use | Steps |
|---|---|---|
| First-time setup | No cloud accounts connected yet | Step 1 → Step 2 → Step 3 → Finish |
| Add more accounts | Already have accounts but want to connect additional ones | Step 1 (connect another) → Step 2 → Finish |
| Organize resources | Accounts already connected and collecting | Skip to Step 3 → Finish |
| Troubleshoot collection | Collection failed or credentials need updating | Step 2 (review issues) → Go to Cloud Account to fix |
Completing Onboarding
Complete all three steps
Work through each step — connect accounts, verify collection, and map applications.
Click [Finish] on Step 3
After mapping your applications, click [Finish] in the Step 3 footer. The wizard records your progress and returns you to the Onboarding Hub.
Verify on the Hub
The Onboarding Hub shows all steps as Completed with a full progress bar. The Recommended Action card displays “You’re all set — All onboarding steps are complete.”