Cloud Account
On the [Settings > Cloud Account] page (/settings/cloud-account), you can connect cloud service provider accounts and manage their credentials, collection status, and access configurations.
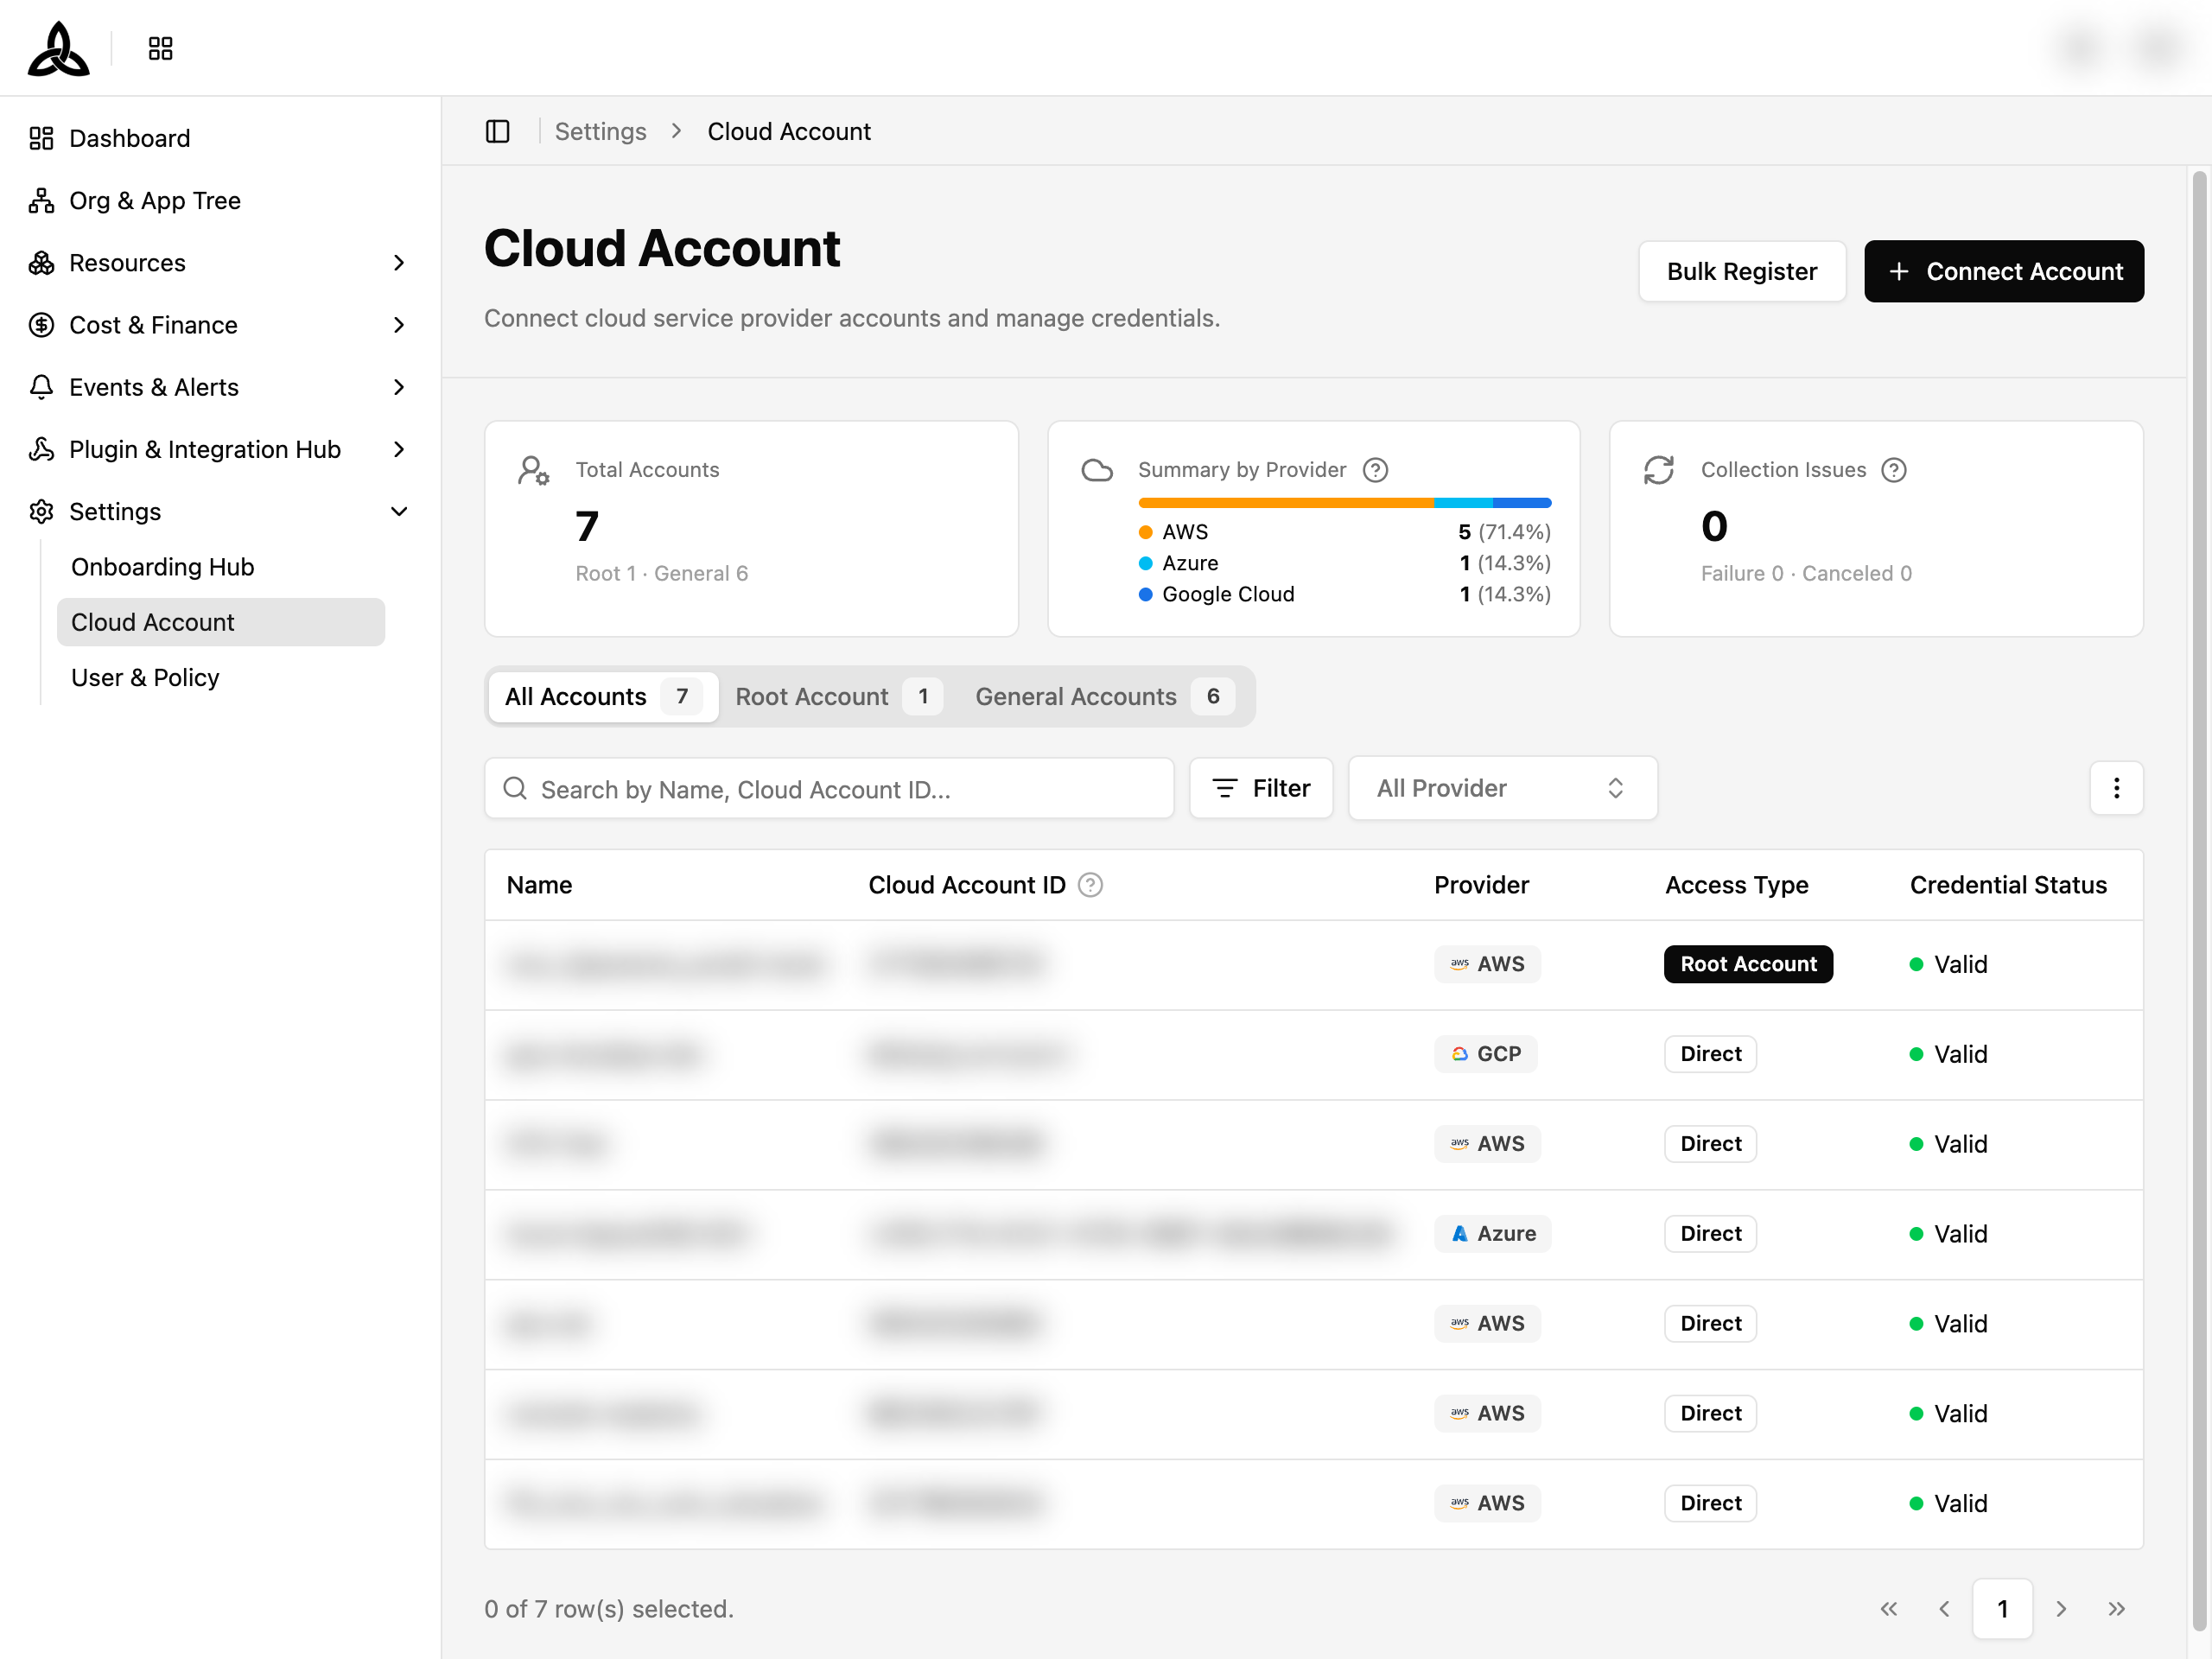
Metric Cards
Four summary cards are displayed at the top of the page:
| Card | Description |
|---|---|
| Registered Accounts | Registered out of contracted, as registered / contracted. Counted on a General-account basis — Root accounts are excluded and shown separately underneath |
| Not Registered | Contracted accounts not yet registered. Clicking the card opens the Not Registered Accounts dialog |
| Credential Issues | Accounts whose stored credentials no longer work, split into Invalid and Expired counts. Update the credentials to restore API access |
| Collection Issues | Accounts whose latest collection did not finish, split into Failure and Canceled counts |
Viewing Cloud Accounts
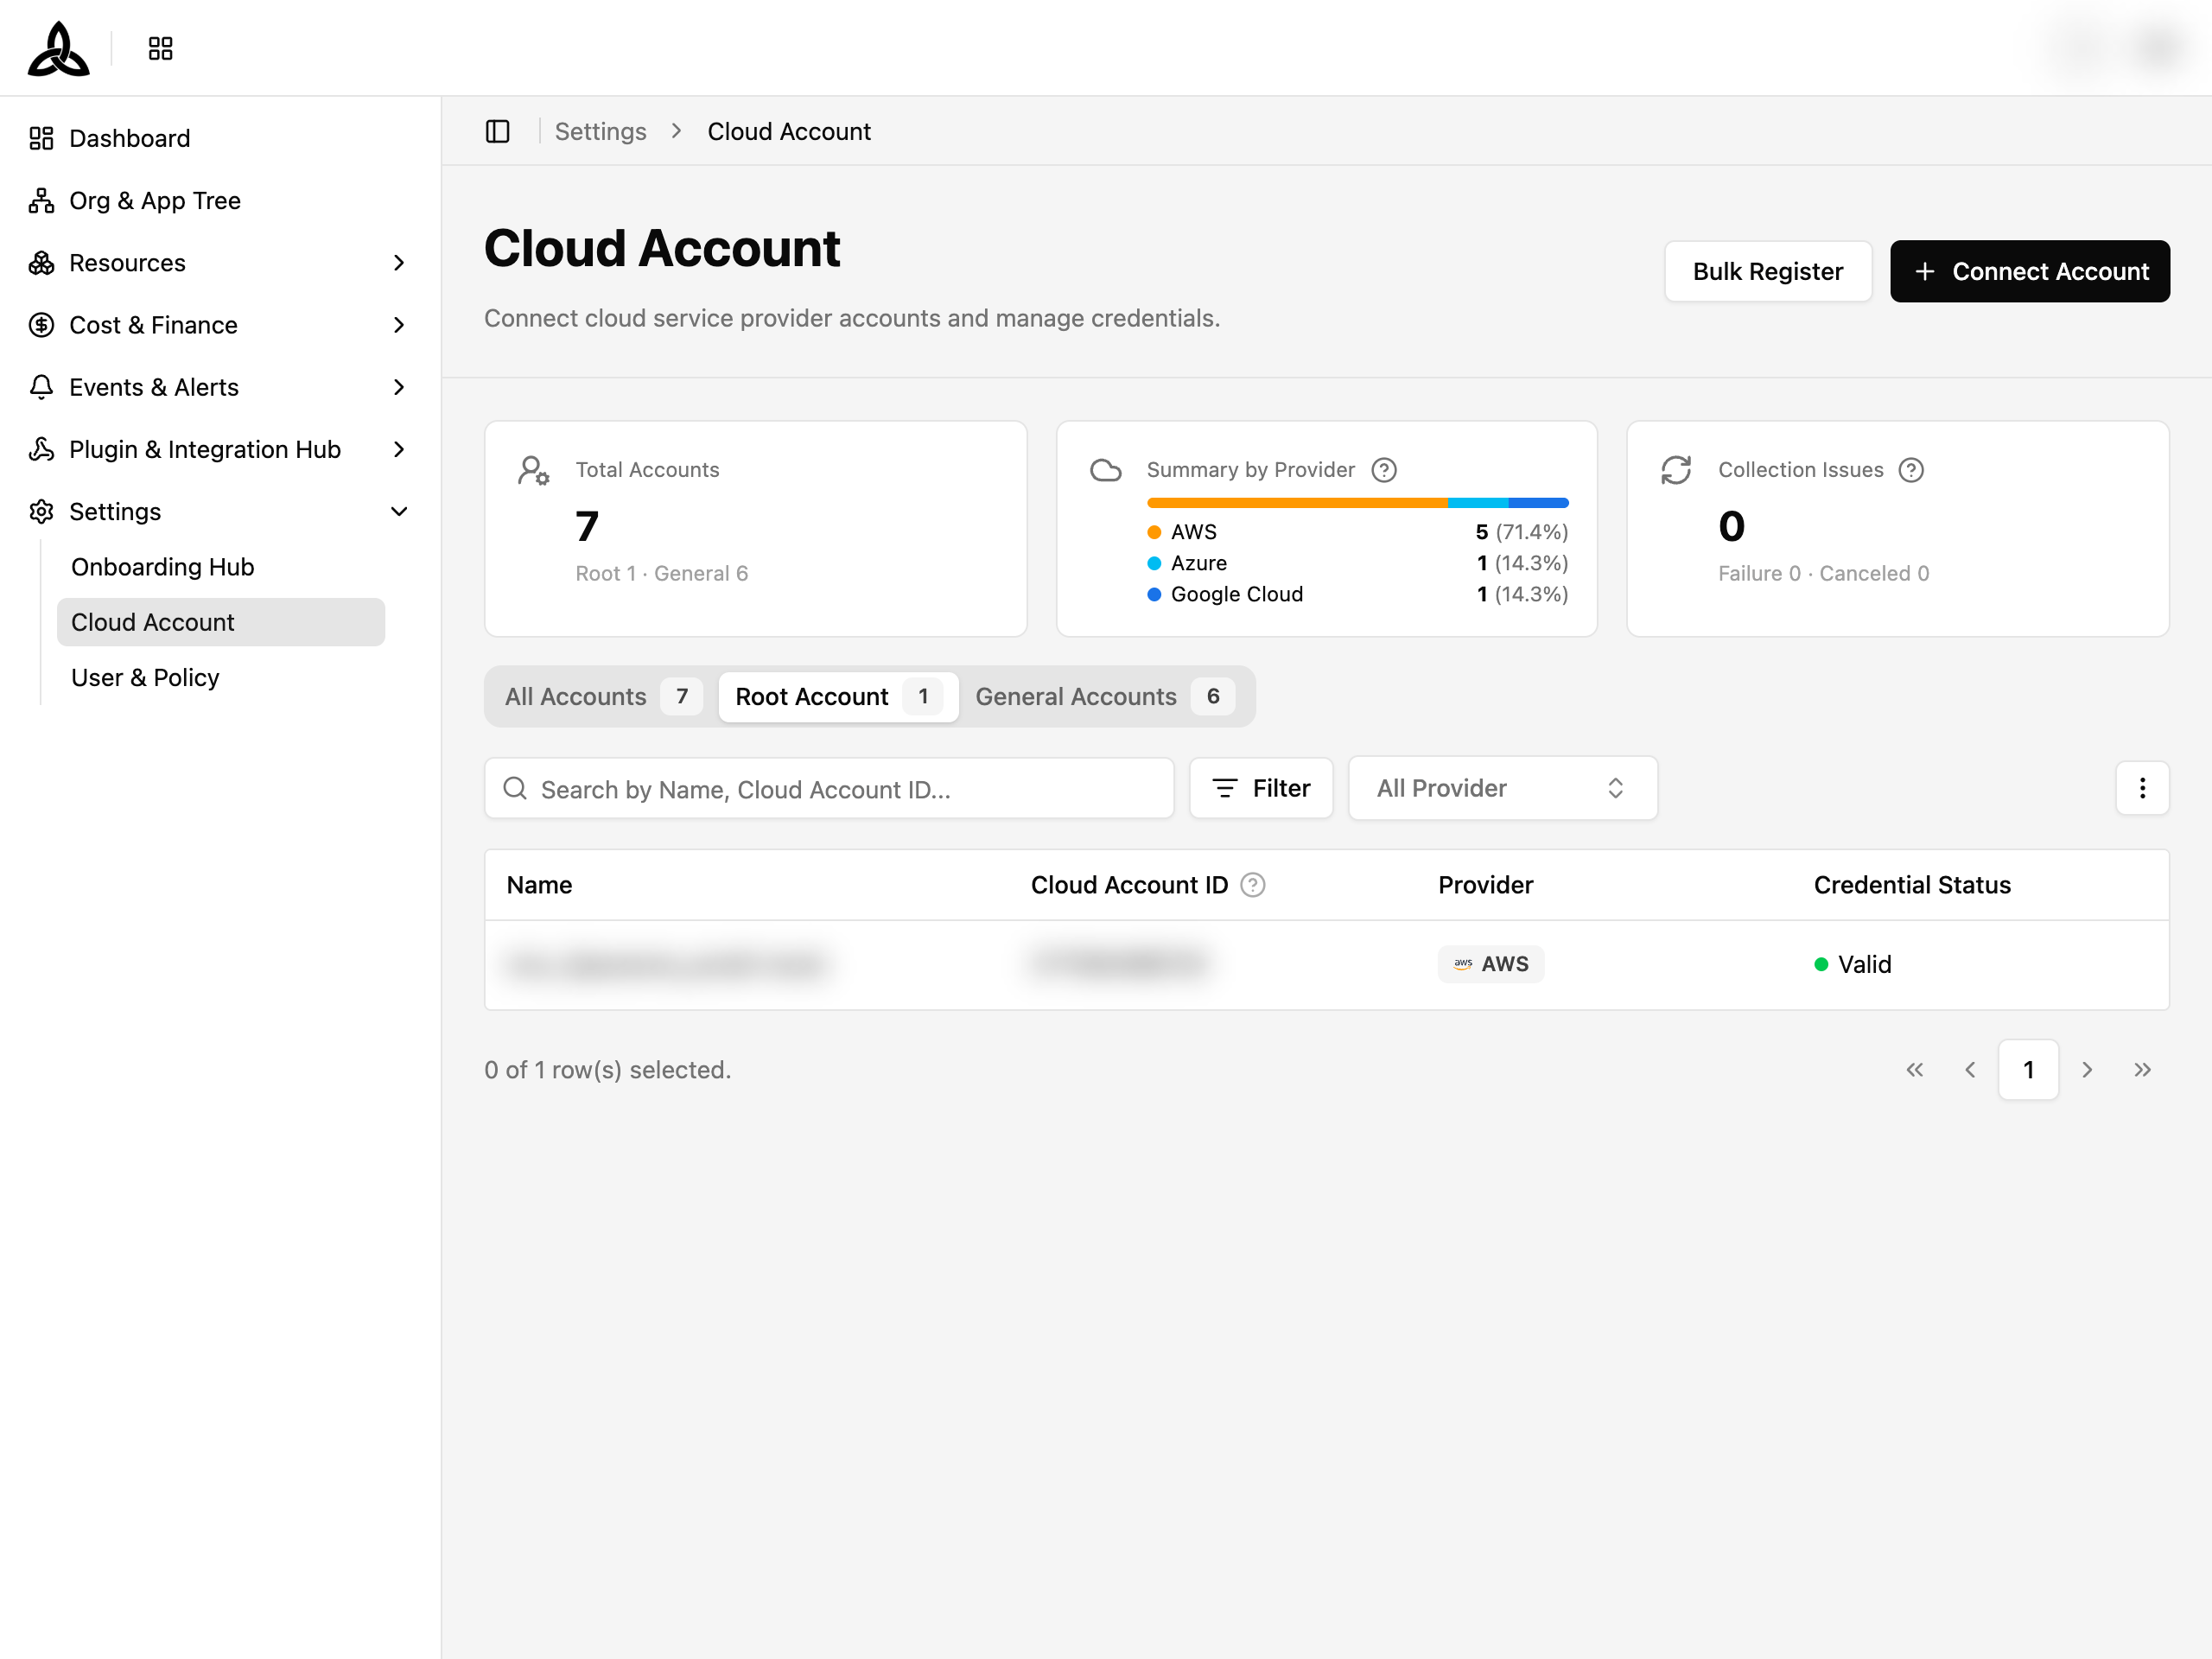
Accounts are displayed in a paginated table. Use the tab bar above the table to filter by account scope:
| Tab | Description |
|---|---|
| All Accounts | Every registered cloud account |
| Root Account | Parent accounts that manage permissions |
| General Accounts | Workload accounts (Direct or Delegated) |
Each tab shows a badge with the current count.
Table Columns
| Column | Description |
|---|---|
| Name | Account display name (alias) |
| Cloud Account ID | Provider-specific identifier — AWS Account ID, Azure Subscription ID, or Google Cloud Project ID |
| Provider | Cloud service provider (AWS, Azure, Google Cloud, NCP) |
| Access Type | Root Account, Delegated, or Direct |
| Credential Status | Current credential validity — Valid, Invalid, Expired, or Unknown |
| Collection Status | Latest collection result — Pending, Running, Success, Failure, or Canceled |
| Last Collected | Timestamp of the most recent successful collection |
Click any row to navigate to the account’s detail page.
Search and Filters

| UI Element | Description |
|---|---|
| Search | Search by Name, Cloud Account ID... — matches on account name or Cloud Account ID |
| Filter (funnel icon) | Opens the filter popover with Provider, Credential Status, and Collection Status tabs |
| More menu (⋮) | Additional options: Set Display (page size, column visibility, order, and pinning), Refresh |
| Export | Downloads the accounts matching the current tab, search, and filters as an Excel or CSV file |
Provider is no longer a standalone toolbar dropdown — it is now a tab inside the Filter popover. Any filter tab can be pinned (★) to the toolbar as a quick filter, so a pinned Provider, Credential Status, or Collection Status dropdown appears directly in the toolbar next to Search.
Column pinning
⋮ > Set Display also lets you pin up to 2 columns to the left so they stay visible while you scroll the table horizontally. Name is pinned by default. The layout is kept in your browser, and narrowing the list — a new search, filter, or tab — returns you to page 1.
Exporting the list
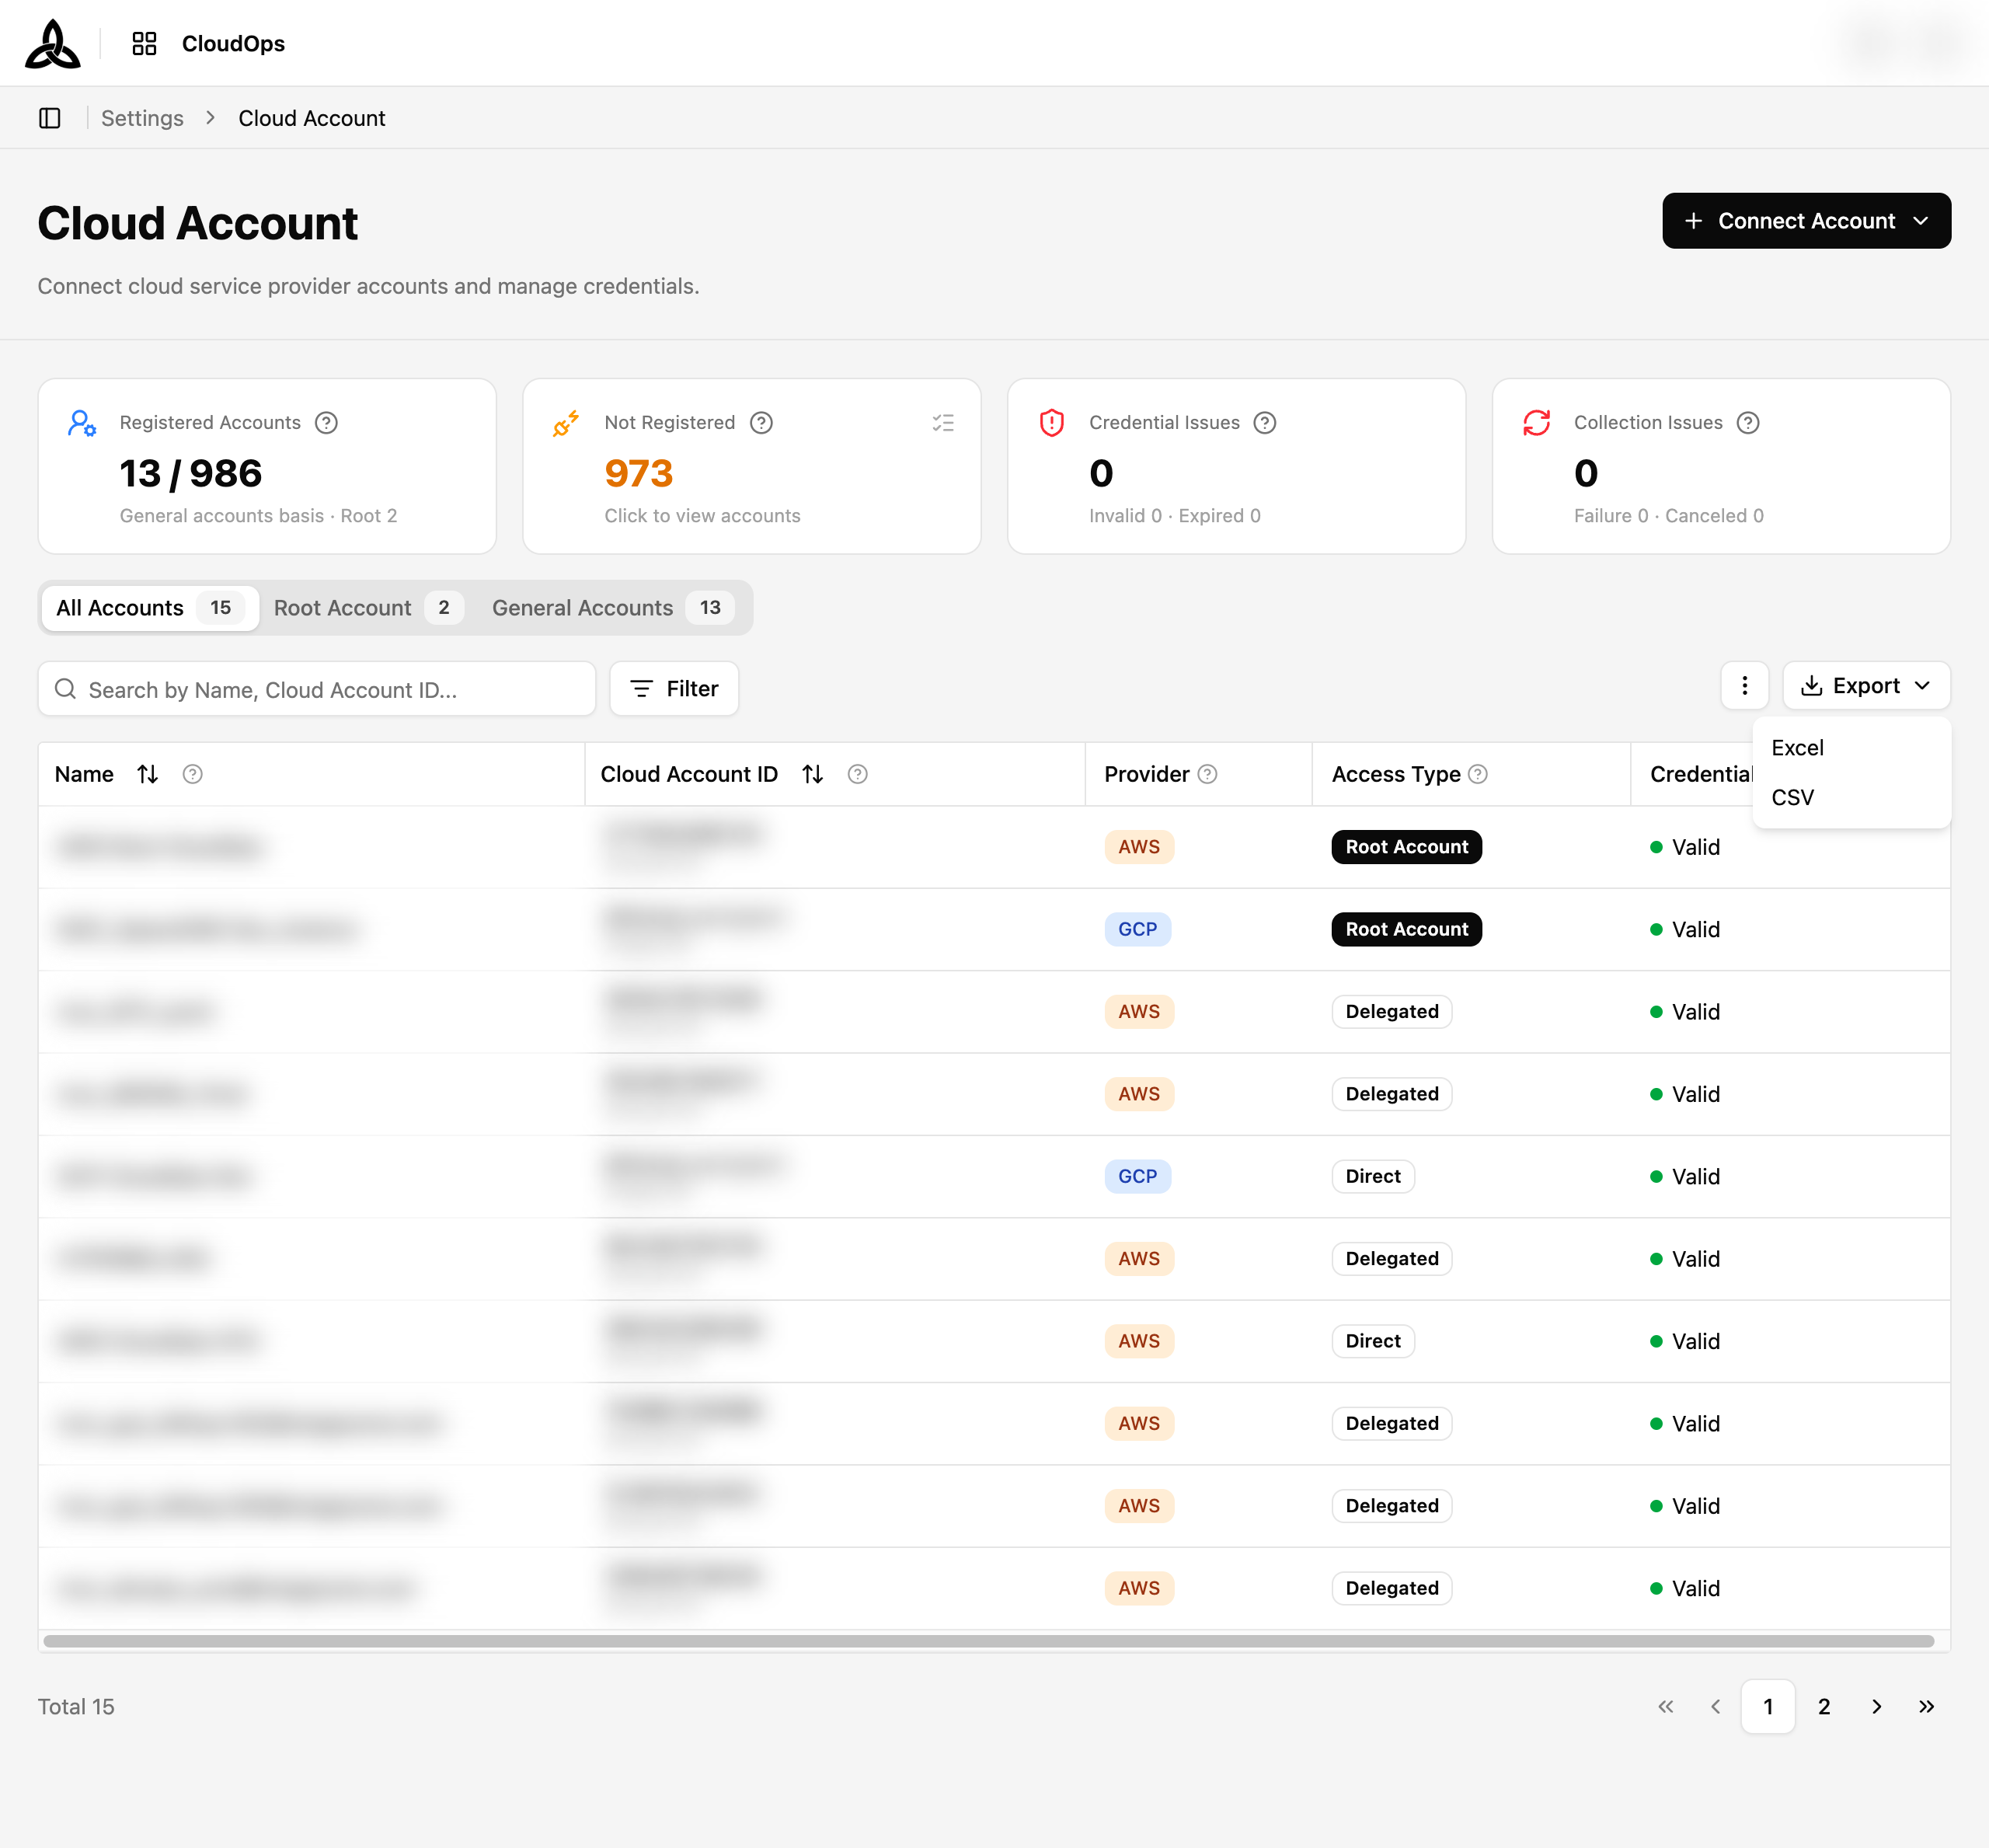
Click Export and choose Excel or CSV. The file is built from the list as you see it — the active tab, search, and filters are applied, and it contains the columns visible in Set Display in the same order, for every matching account rather than just the current page. The download starts automatically when the file is ready; if the server refuses the export (row limit, file too large, timeout), an error toast says why instead of leaving you waiting.
Filter Popover
Click [Filter] to open the filter popover. It has three tabs, and each tab has a ★ pin toggle that adds that filter to the toolbar as a quick filter:
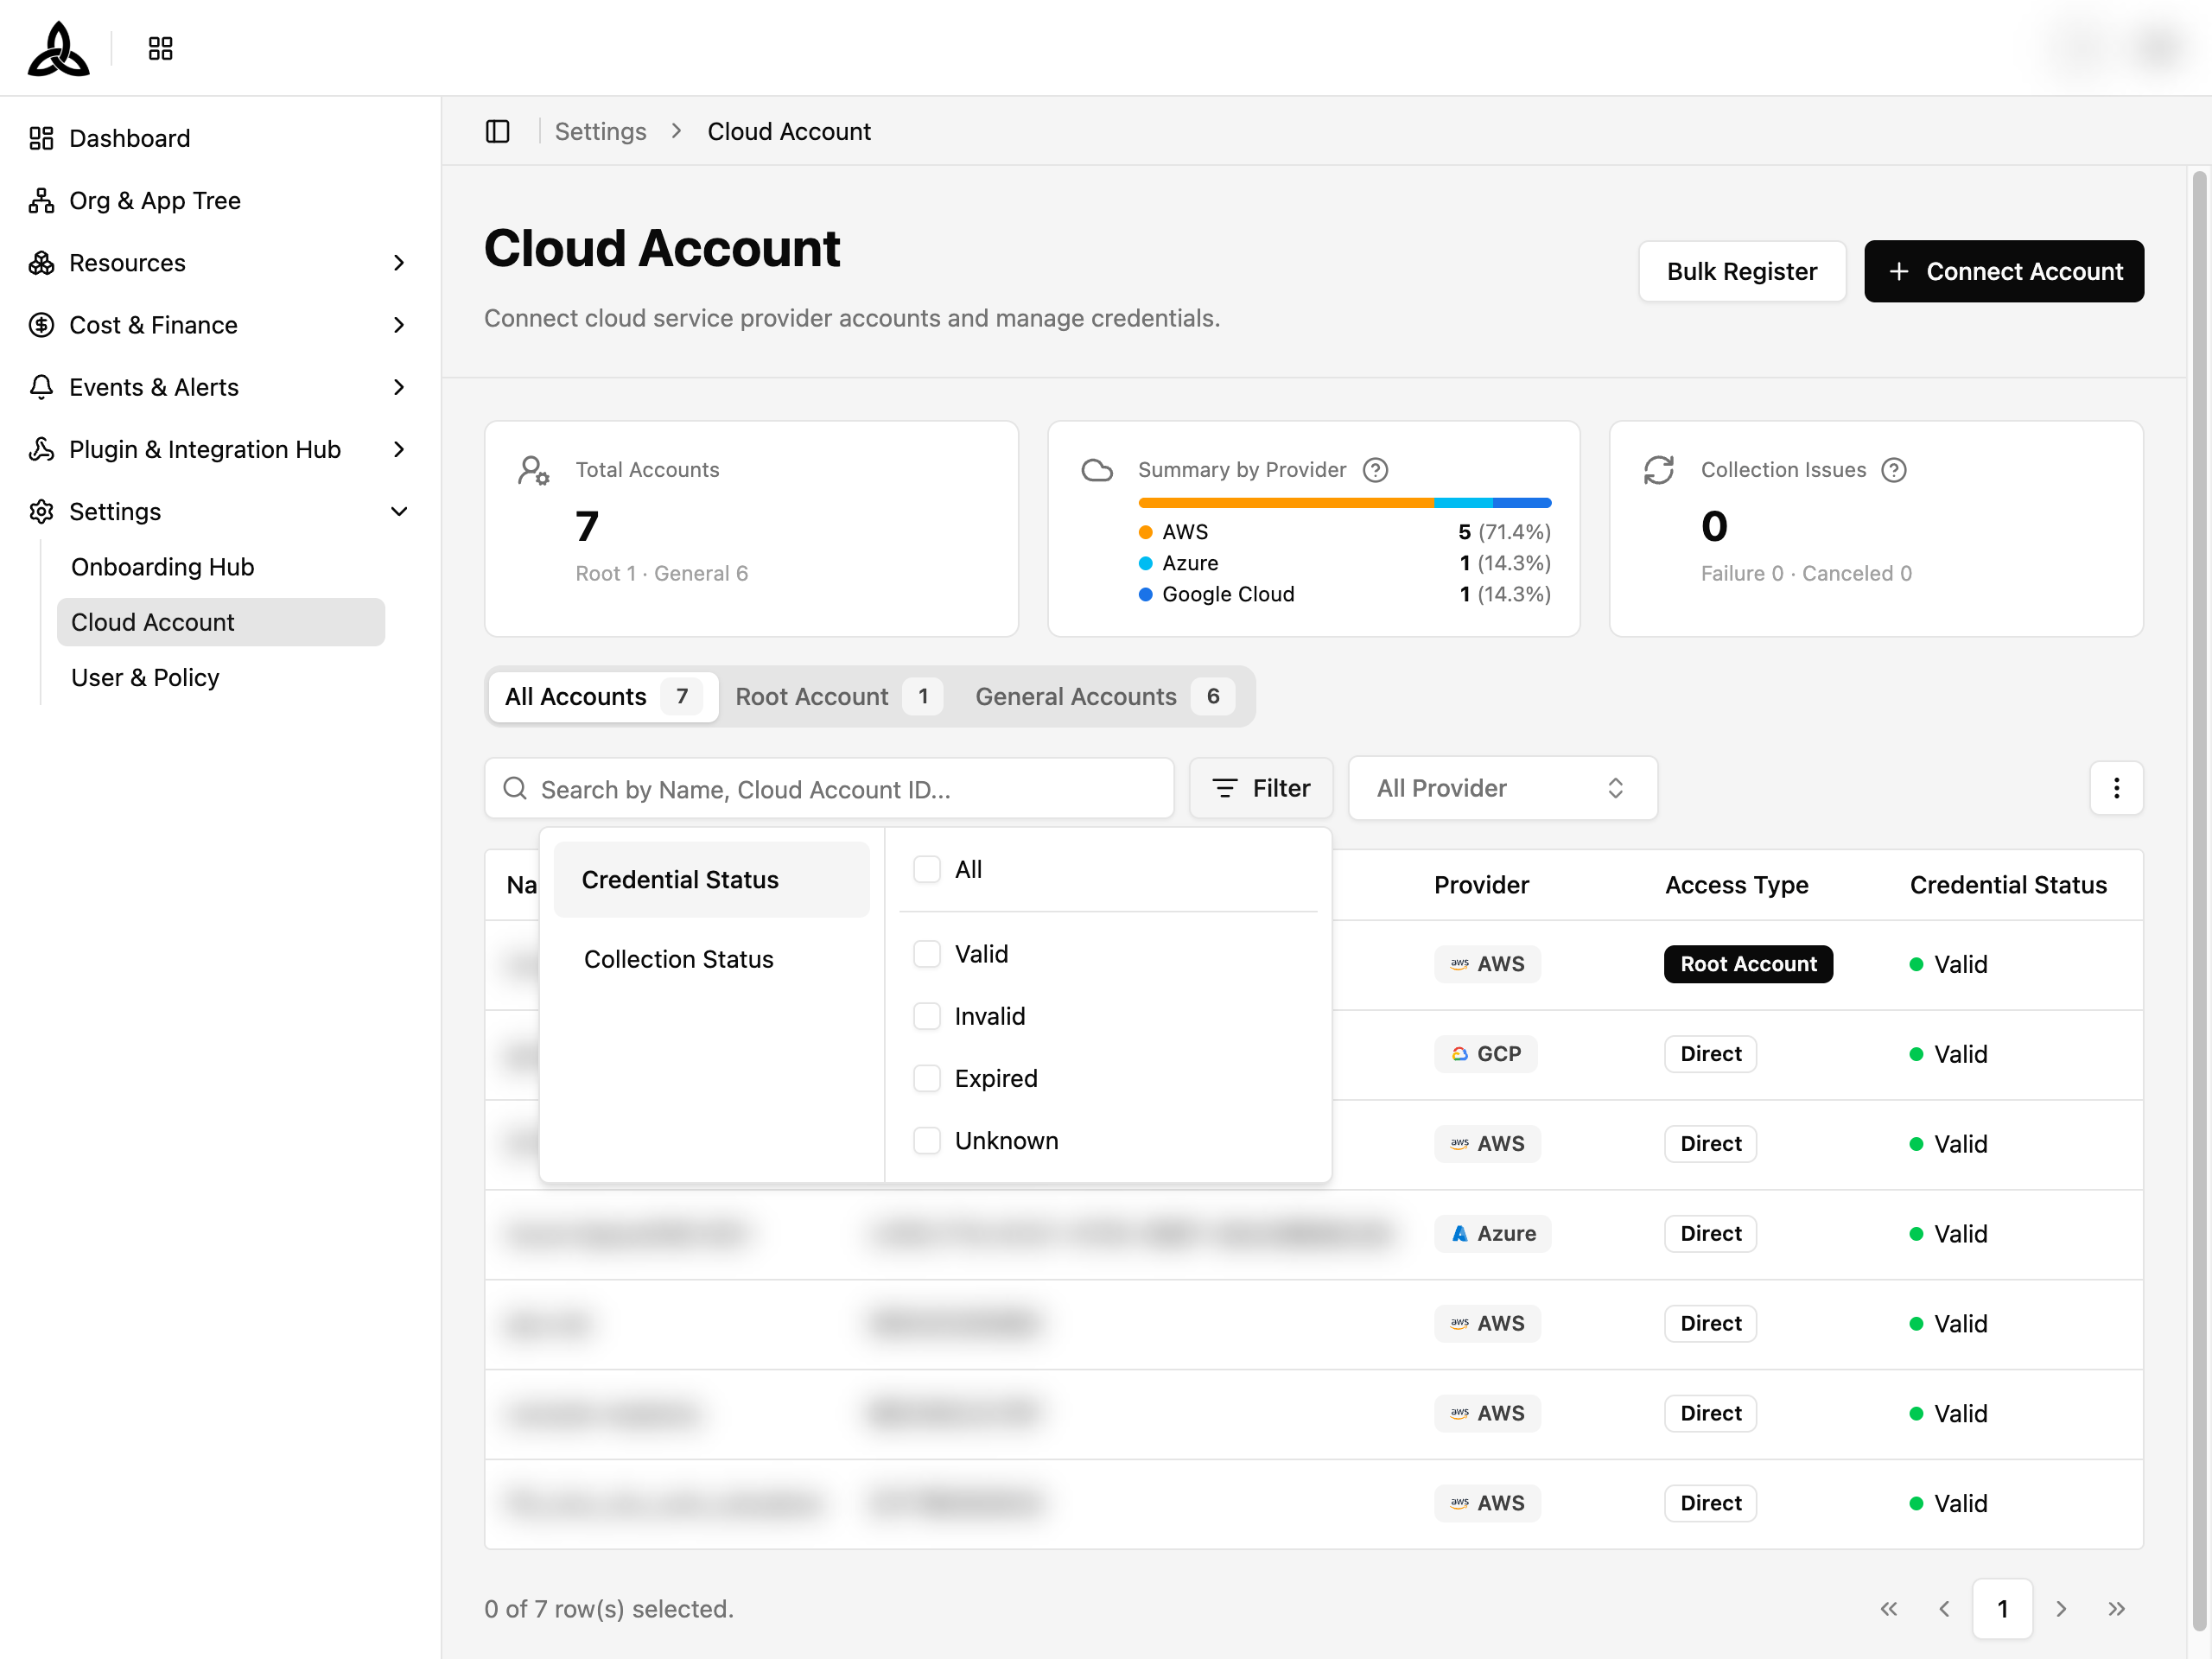
| Tab | Description |
|---|---|
| Provider | Filter by cloud provider — AWS, Azure, Google Cloud, NCP. Supports multi-select |
| Credential Status | Filter by credential validity — All, Valid, Invalid, Expired, Unknown |
| Collection Status | Filter by collection result — All, Pending, Running, Success, Failure, Canceled |
Provider is the tab the popover opens on, and it supports multi-select — the screenshot above shows it with AWS, GCP, Azure, and NCP listed.
Tab Filtering
Use the tab bar to filter accounts by scope. Each tab displays a count badge:
Account Detail
Clicking a row opens the detail page for that account. The header displays the account name, provider badge, access type badge, and creation date.
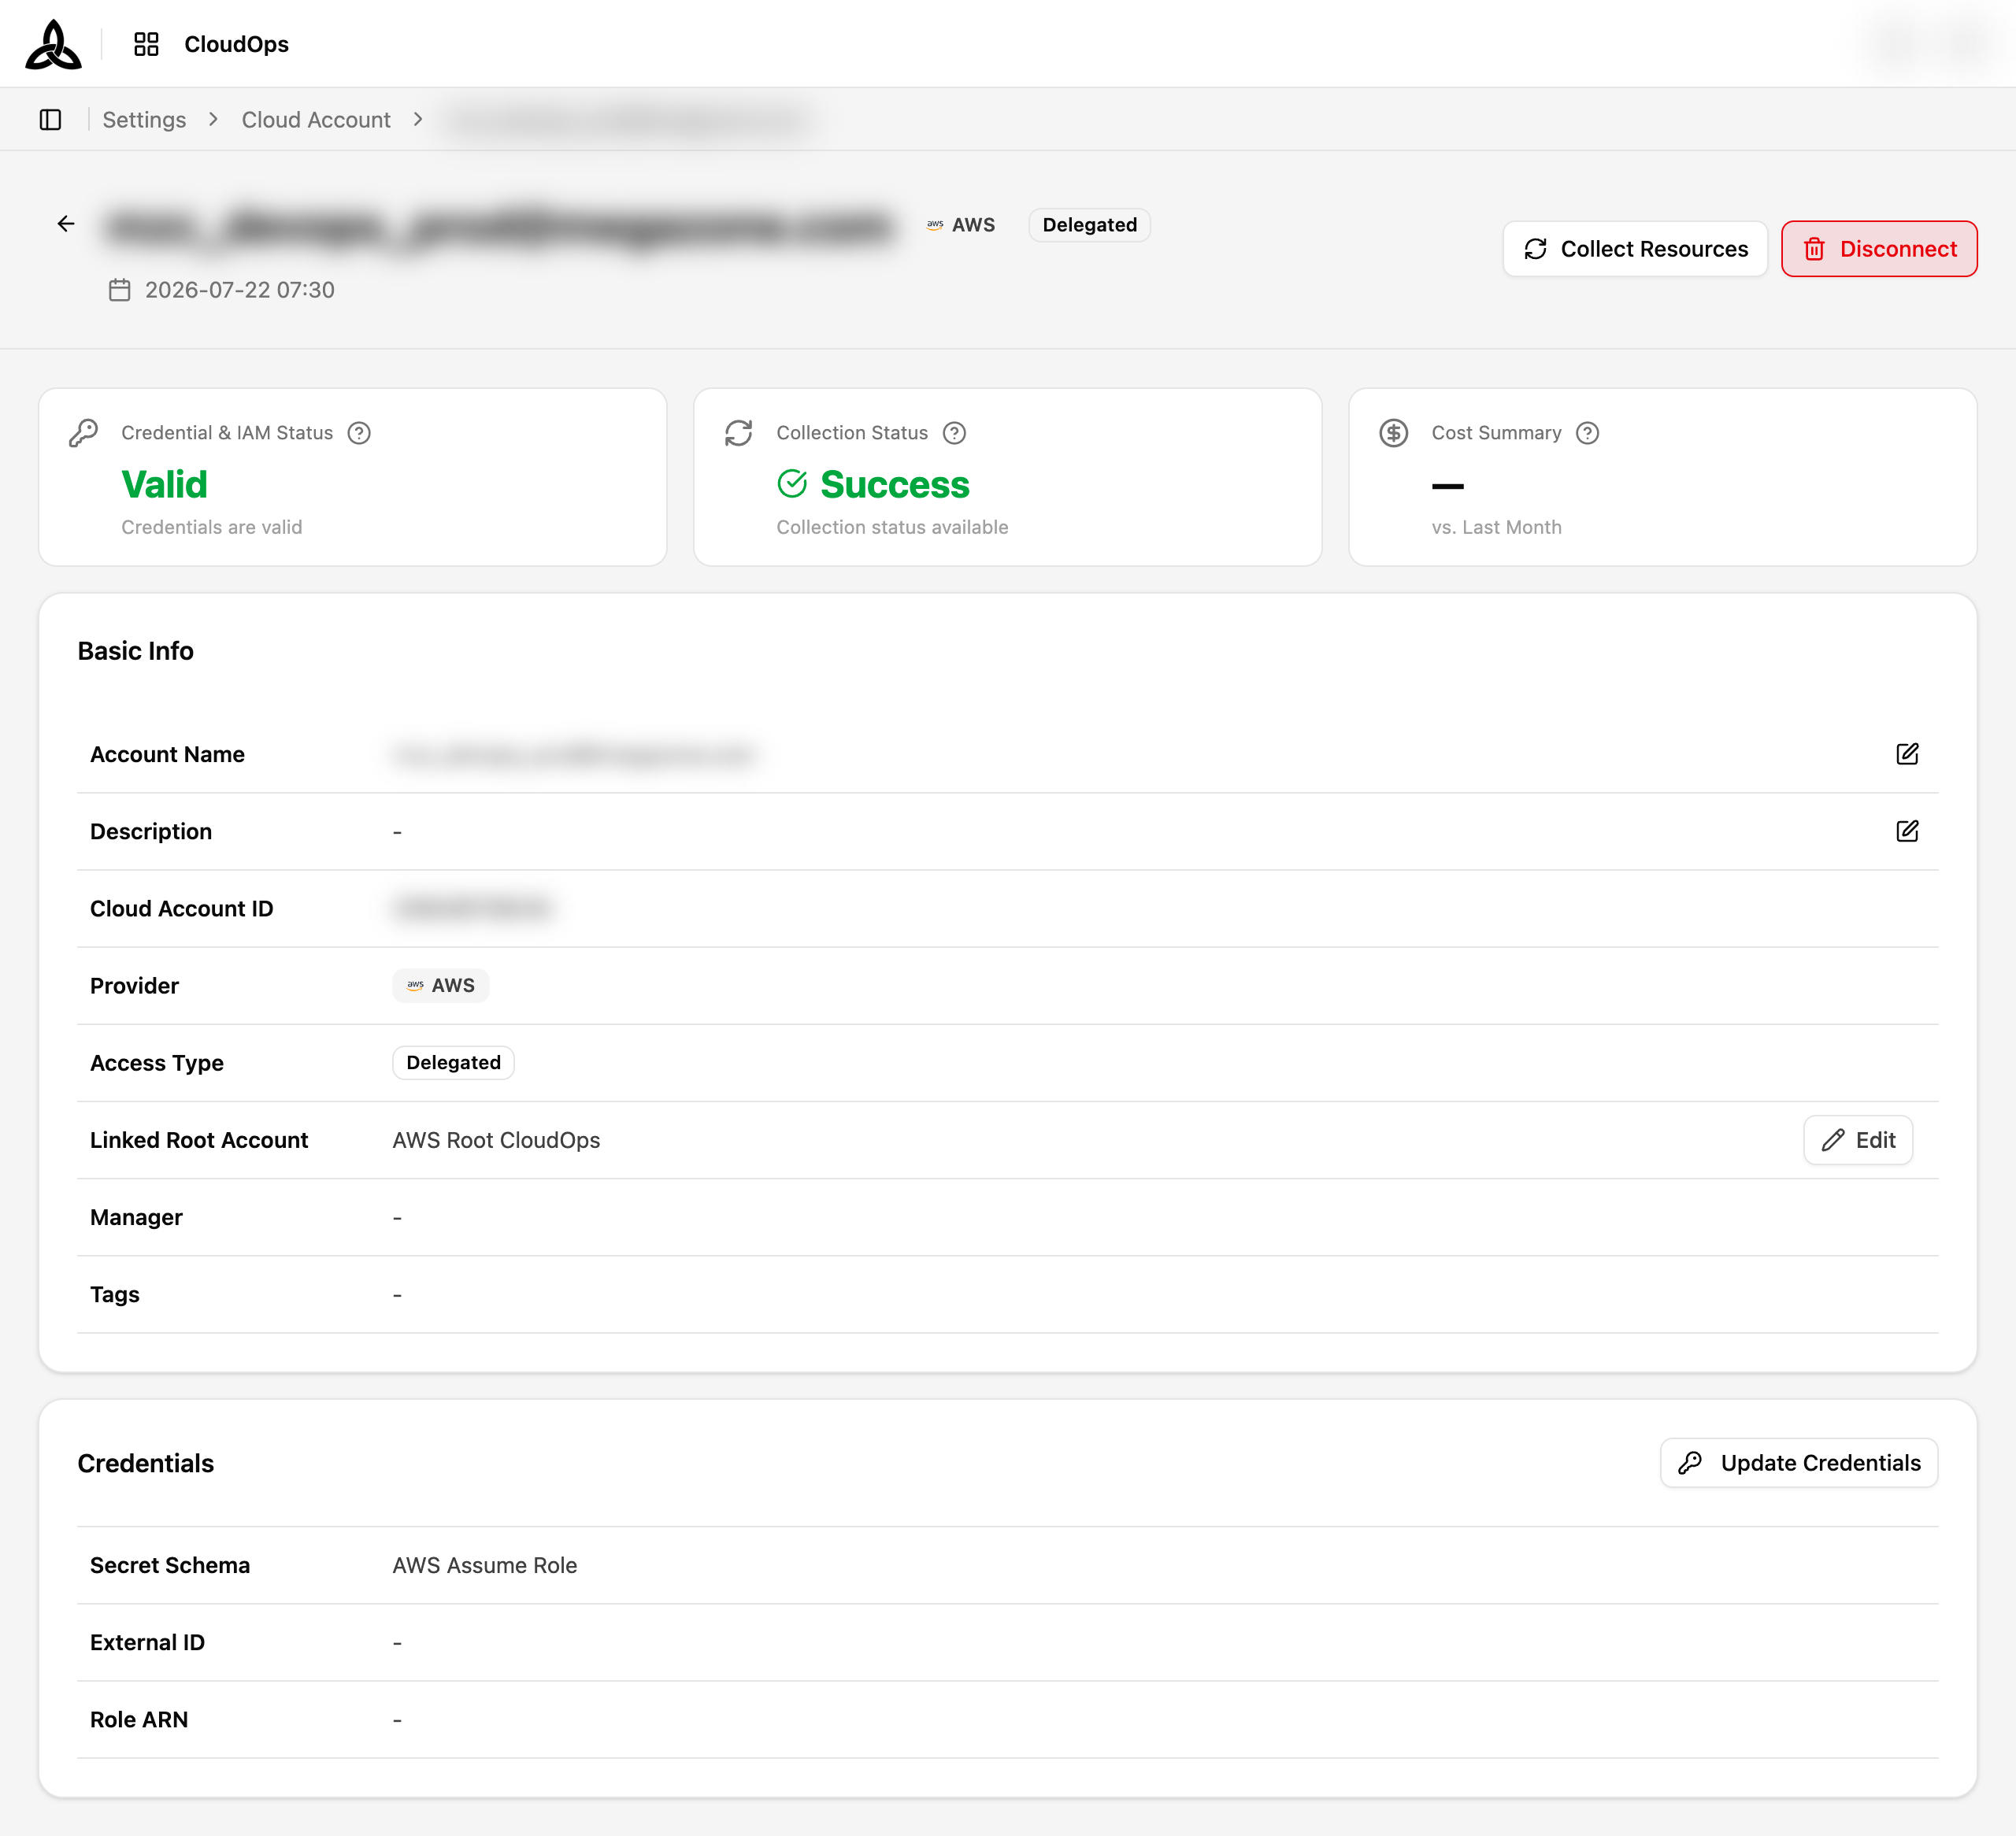
Two actions sit in the top-right corner:
| Action | Effect |
|---|---|
| Collect Resources | Runs a resource collection for this account immediately, instead of waiting for the next scheduled run |
| Disconnect | Removes the account from CloudOps |
How the collection runs
Pressing Collect Resources starts the resource stage of Flow Studio rather than a standalone job. The button reports only that the request was accepted — Resource collection started. — because a stage run answers with a run handle, not a per-account result.
The outcome therefore shows up in two places instead of a toast:
| Where | What it tells you |
|---|---|
| Collection Status on this page | Pending → Running → Success / Failure / Canceled |
| The run in Flow Studio | The step-by-step detail of that execution |
While the request is in flight the button stays disabled and says why:
| State | Message |
|---|---|
| Accepted, not yet started | Collection request accepted. Starting shortly. |
| Queued | Collection is queued for this account. |
| Already running | Collection is already in progress for this account. |
| Run definition unavailable | Couldn't load the run definition. Click to try again. — the button is not locked in this state; pressing it reloads the definition |
Collection request accepted. Starting shortly. is a distinct state from already running — the server has taken the request but has not recorded the start yet. Without it the button would look pressable again for a moment, and a second press would do nothing visible.The in-progress state comes from what the server records for the account, so it clears on its own once the run ends — you never need to reload the page to get the button back. A request that arrives while a previous run is still wrapping up is answered with already in progress and is not an error.
Detail Metric Cards
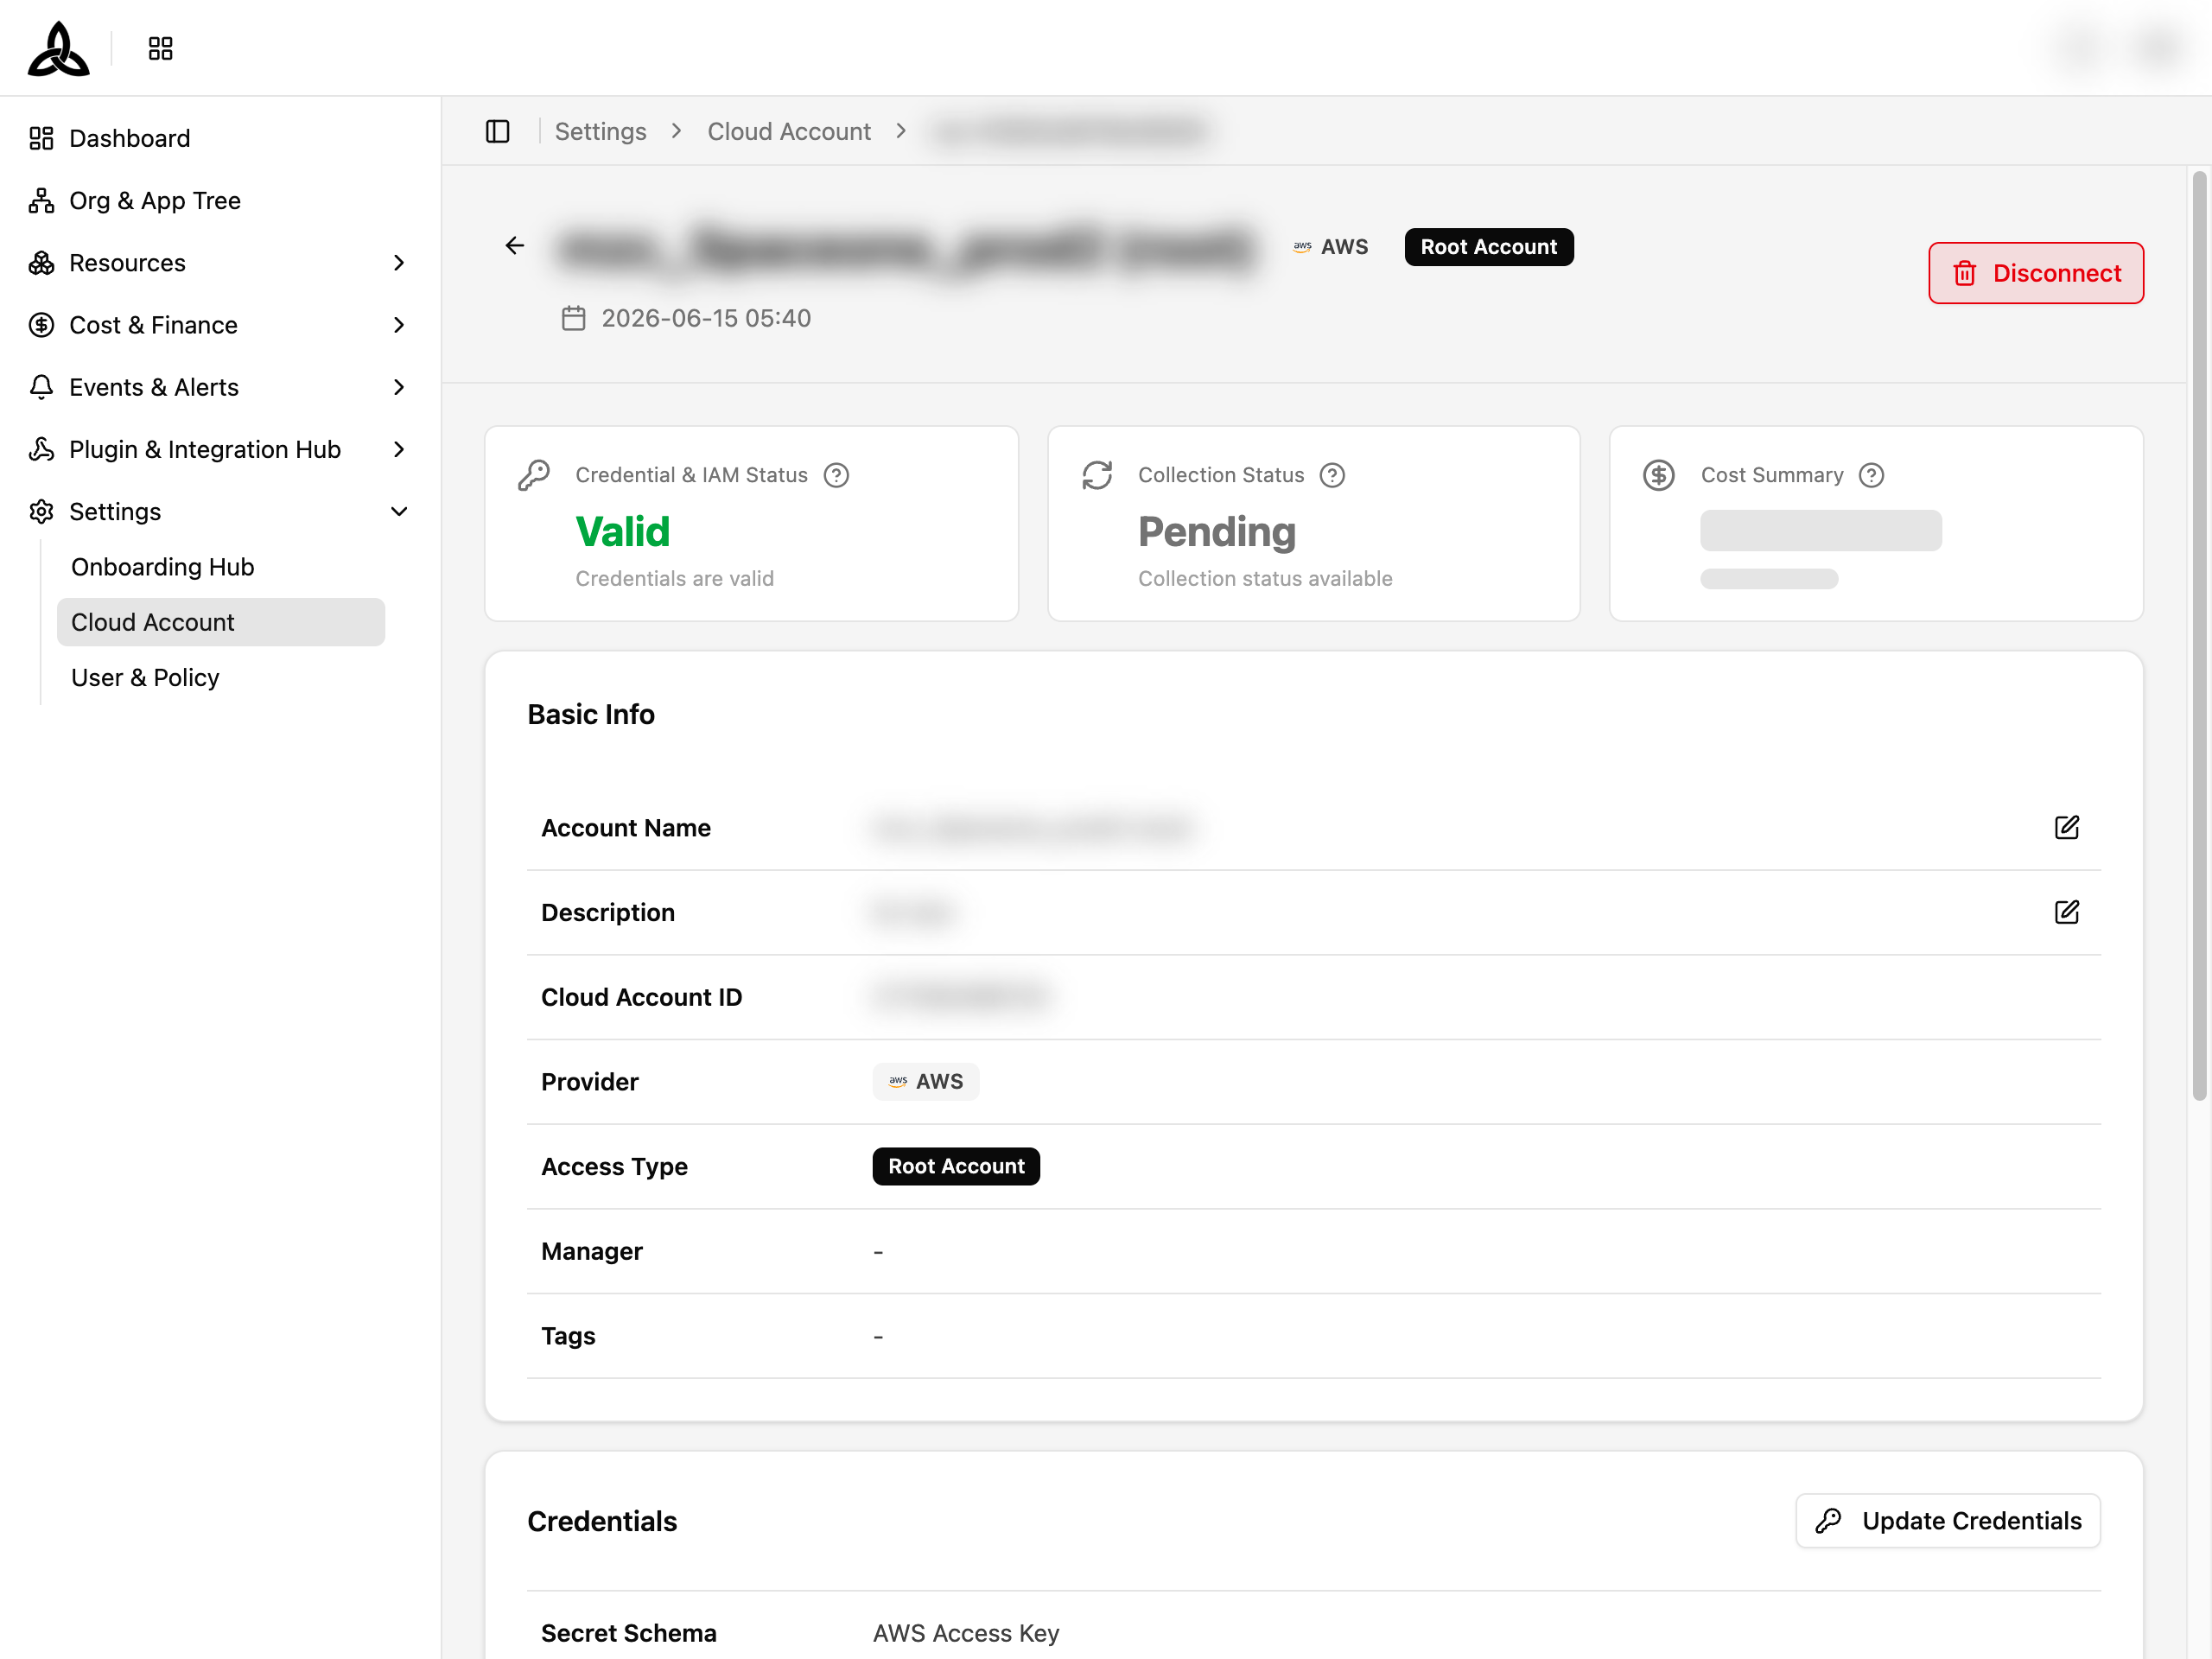
Three metric cards summarize the account’s health:
| Card | Description |
|---|---|
| Credential & IAM Status | Current validity of credentials and IAM permissions |
| Collection Status | Latest resource collection status across all resource types |
| Cost Summary | Month-to-date cost with trend comparison against the previous month |
Basic Info
The Basic Info card shows account properties. Account Name and Description support inline editing — click the edit icon, modify the value, and save.
| Field | Editable | Description |
|---|---|---|
| Account Name | Yes | Display name for the account |
| Description | Yes | Free-text description of the account’s purpose |
| Cloud Account ID | No | Provider-specific account identifier |
| Provider | No | AWS, Azure, Google Cloud, or NCP |
| Access Type | No | Root Account, Delegated, or Direct |
| Manager | No | Assigned account manager |
| Tags | No | Applied tags displayed as badges |
| Created by / Updated by | No | Who connected the account and who last changed it |
Linked Root Account
General accounts display a Linked Root Account field showing how the account connects:
| State | Meaning |
|---|---|
| Delegated | Access is delegated through the linked Root Account |
| Direct | The account connects directly with its own credentials |
| Not linked | No Root Account is linked |
Click [Edit] to open the Edit Linked Root Account dialog, where you can change the delegated Root Account or switch to Direct. Switching to Direct re-issues the account’s credentials.
Credentials
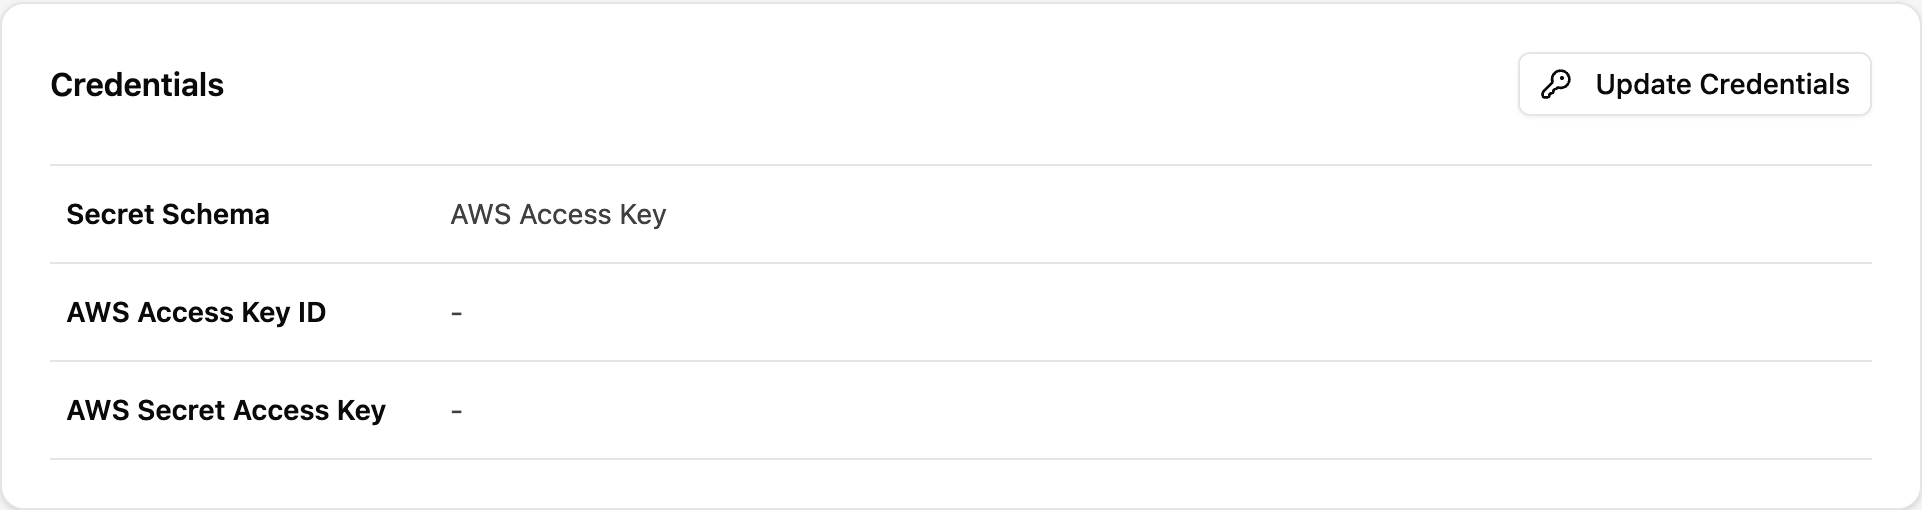
The Credentials card displays the secret schema type and masked credential fields. Click [Update Credentials] to replace the stored credentials with new values.
Attached General Accounts
For Root Account type accounts, an additional Attached General Accounts section appears below the Credentials card. It lists all general accounts linked to this root account in a searchable, filterable table.
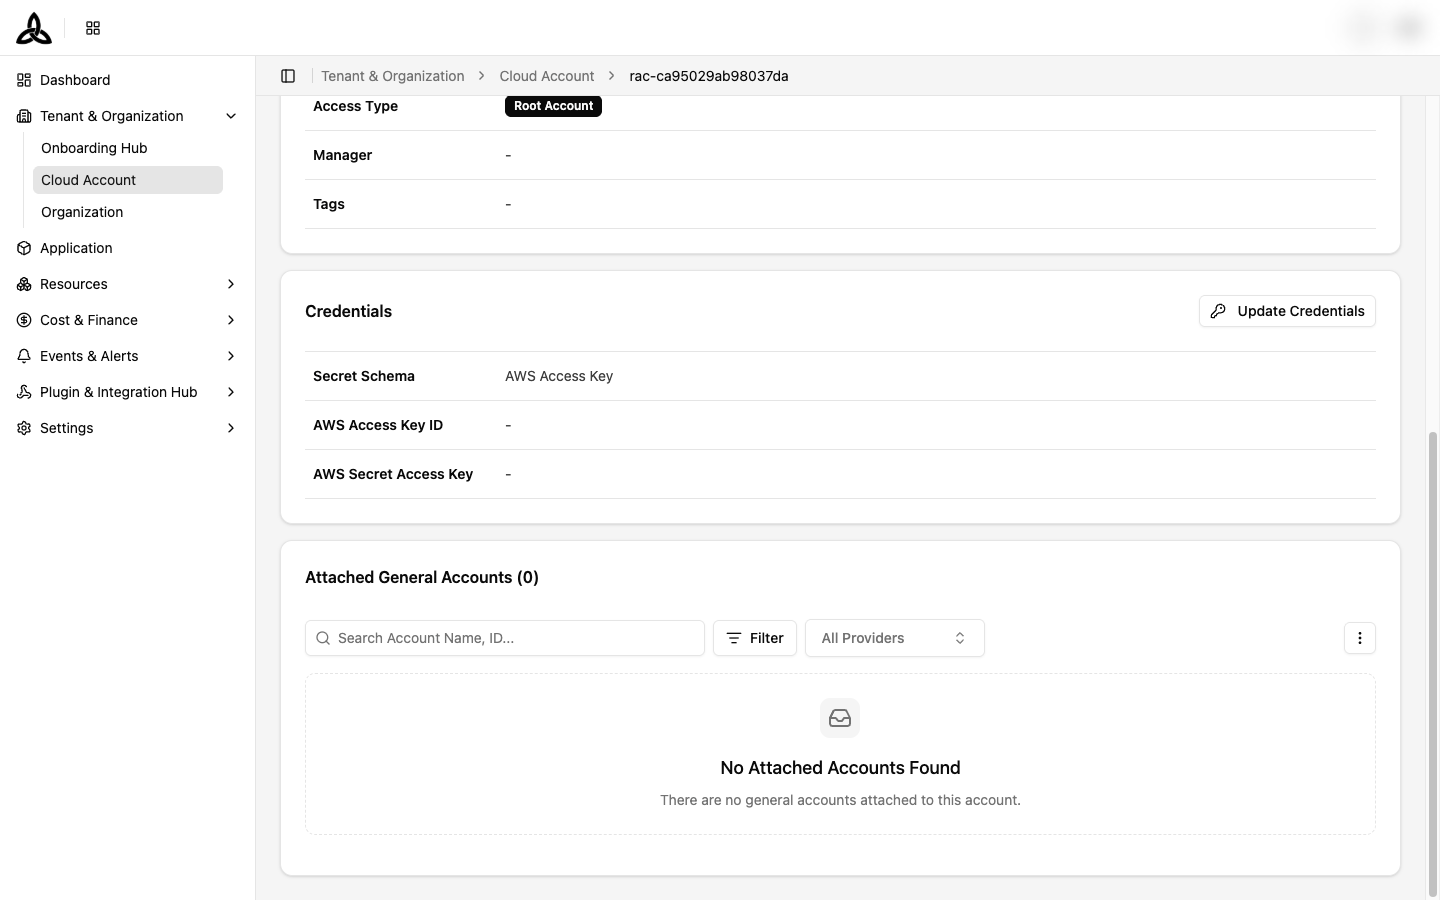
| Column | Description |
|---|---|
| Name | General account display name |
| Cloud Account ID | Provider-specific identifier |
| Provider | Cloud service provider |
| Access Type | Delegated or Direct |
| Credential Status | Credential validity of the attached account |
| Collection Status | Latest collection result of the attached account |
Connecting an Account
Click [+ Connect Account ▾] and choose an account type
Click the [+ Connect Account ▾] dropdown at the top right of the list page and choose Connect Root Account (under the Root Account section) or Connect General Account (under the General Account section). The account type is chosen here, before the wizard — not inside it.
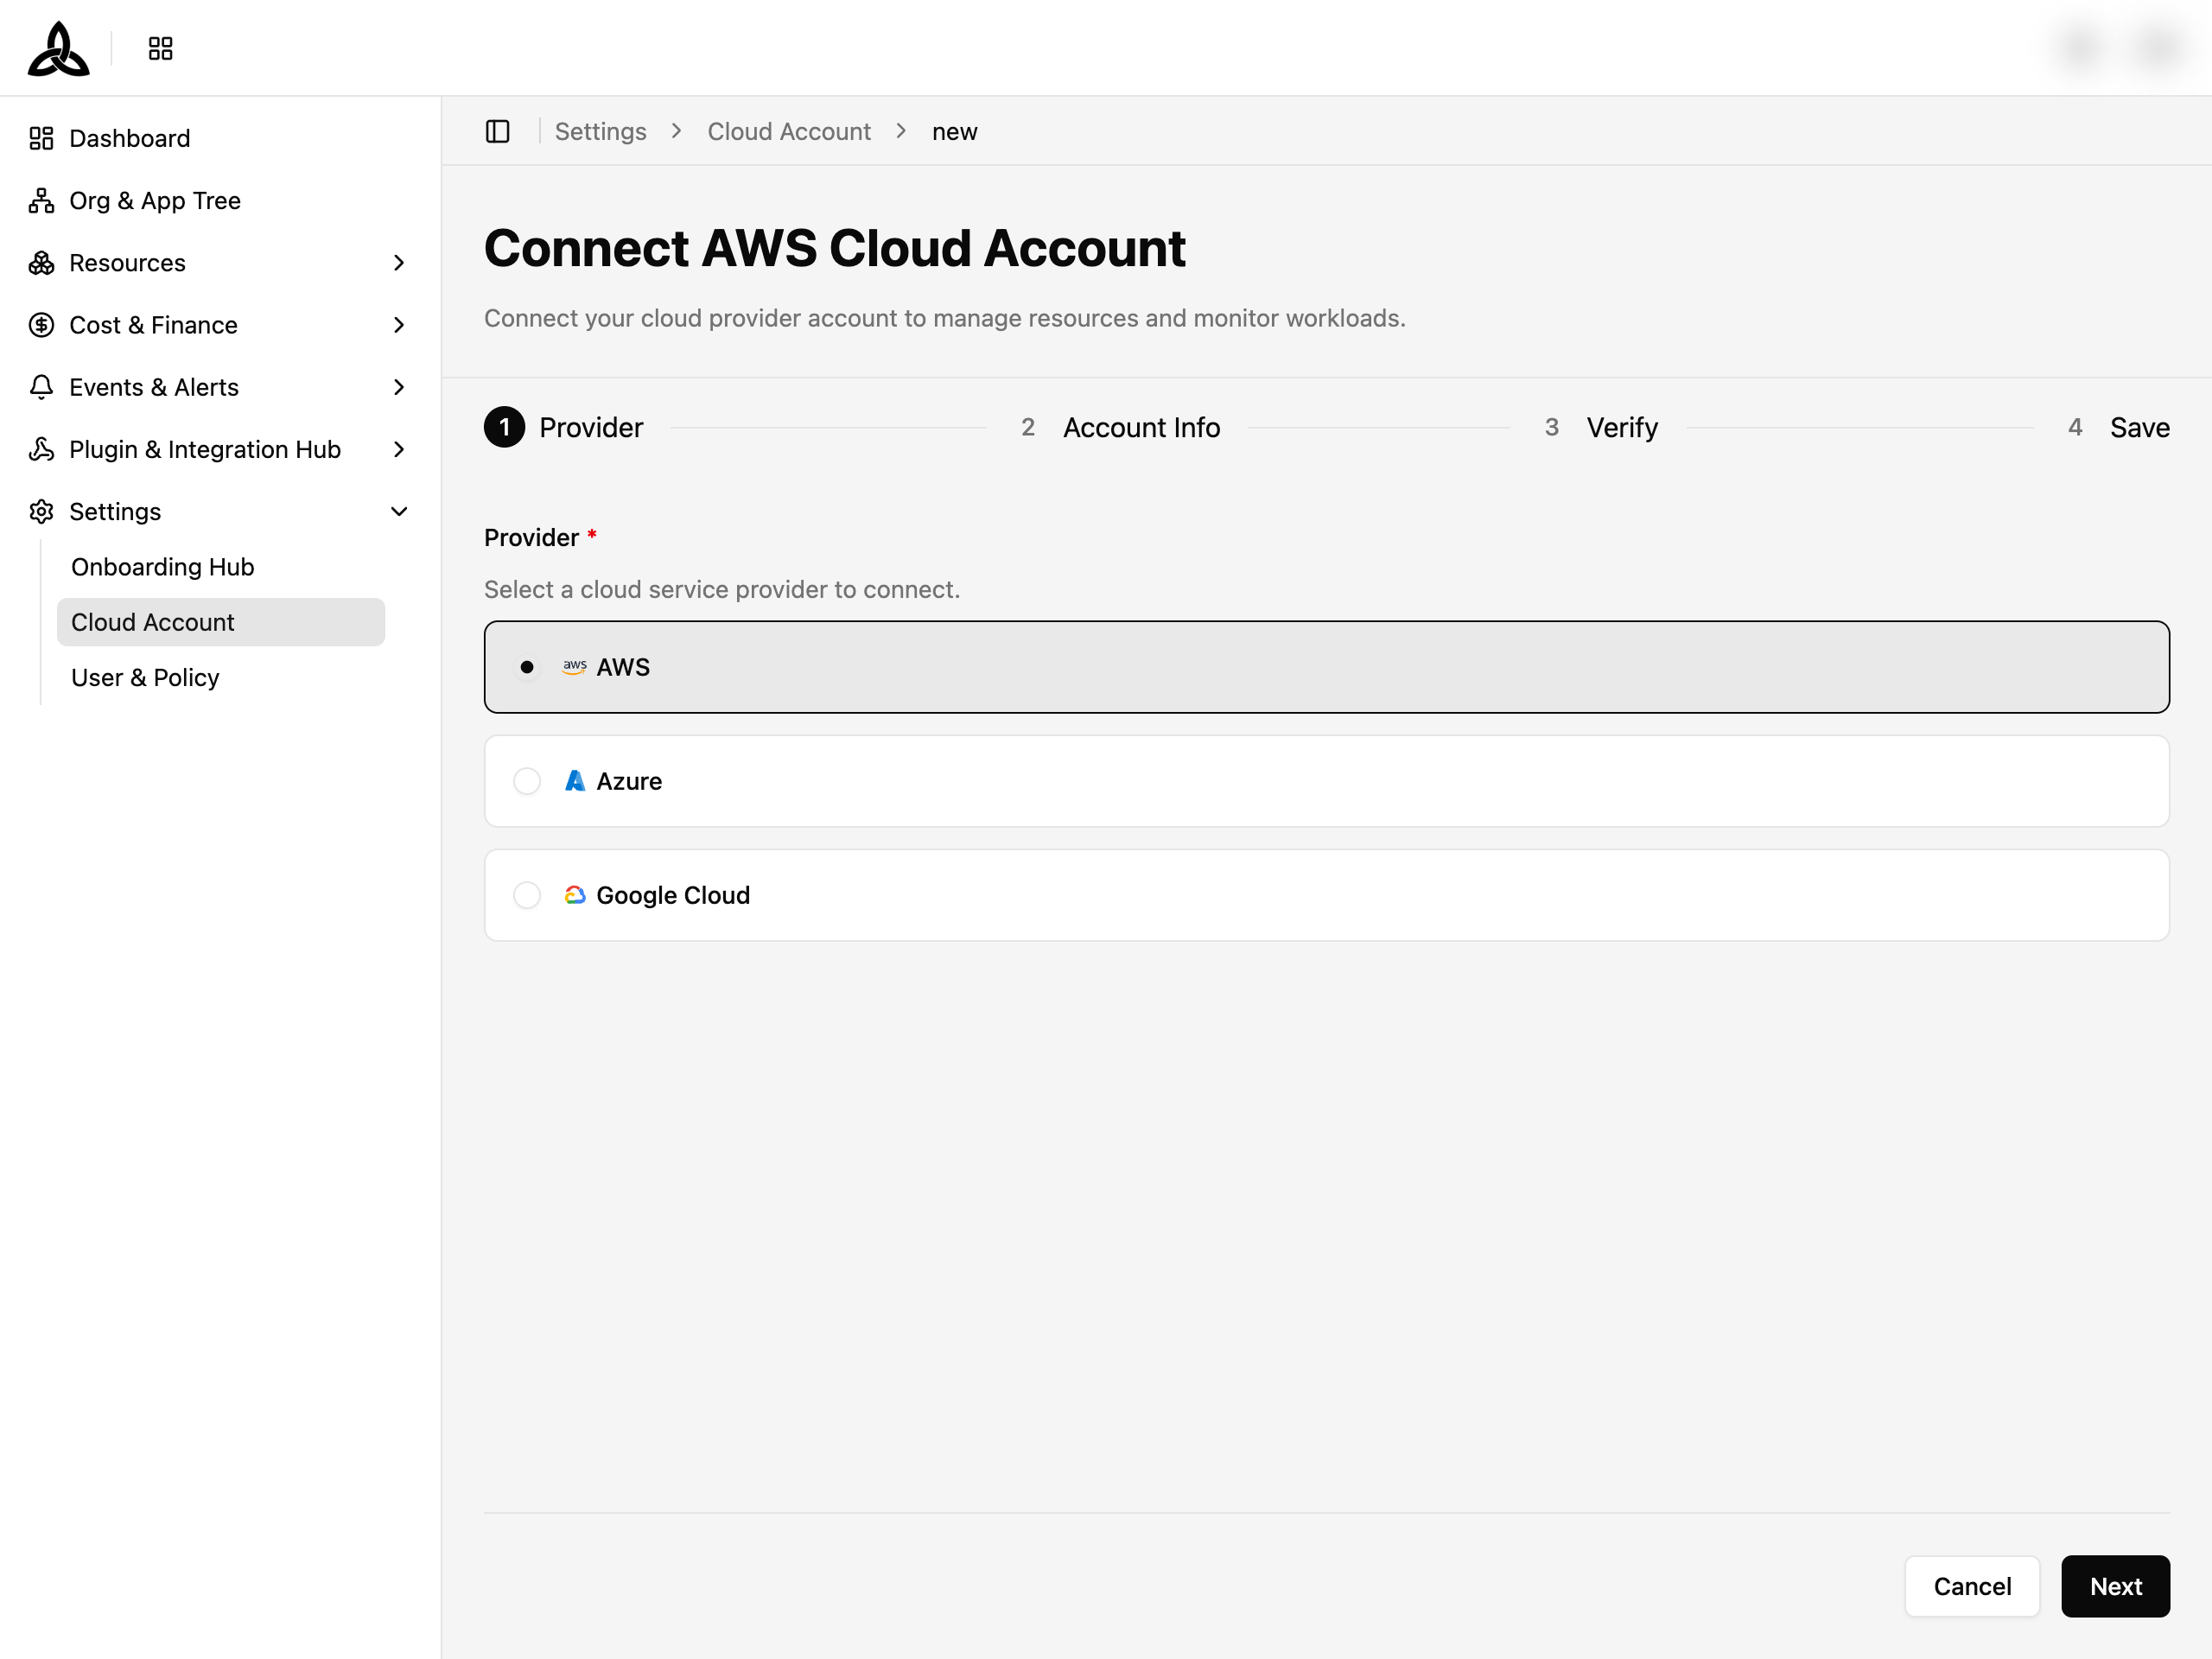
Select a Provider
Choose the cloud service provider. The stepper shows 4 steps: Provider → Account Info → Verify → Save.
Which providers appear here depends on the account type you picked in the previous step — see Supported account structures below.
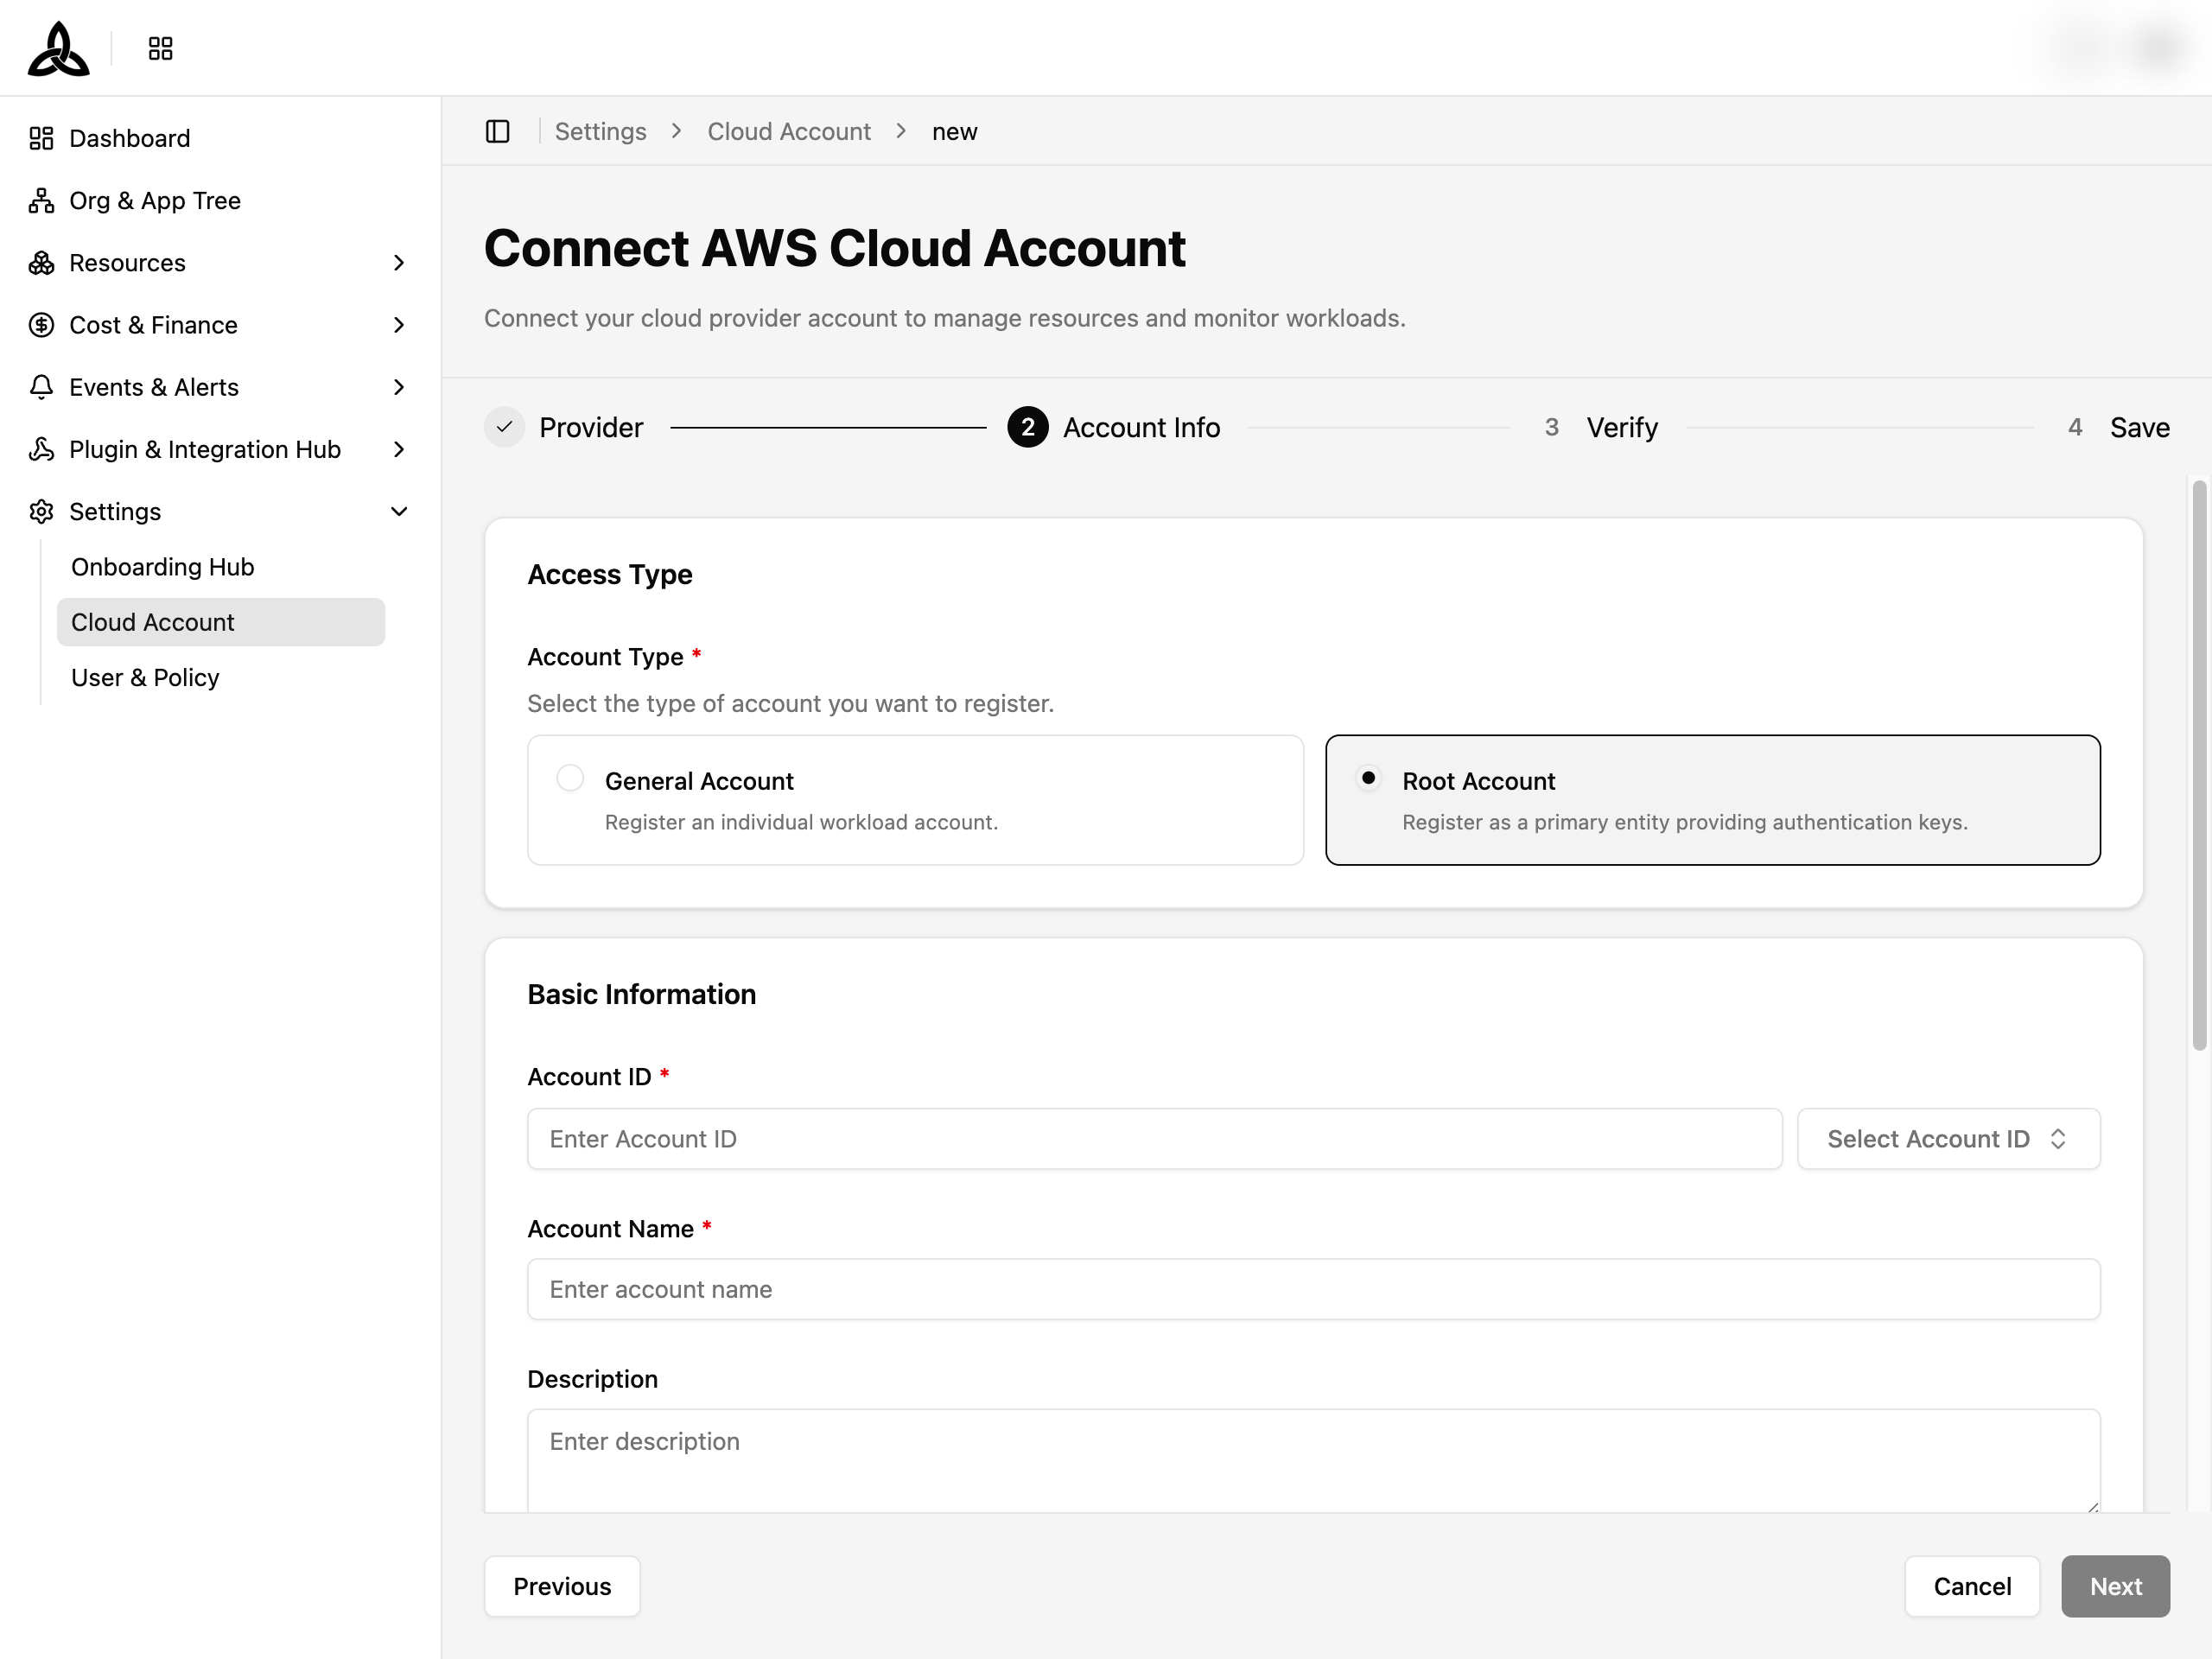
Configure Account Info
Enter the Account ID, Account Name, and Description. For Root Accounts, configure credentials directly. For General Accounts, select a connection method (Delegated or Direct).
Verify and Save
Review the configuration, verify the connection, and save the account. It will appear in the account list once registration completes.
Supported account structures
Not every provider supports every account structure, and the wizard only offers the combinations that actually exist.
| Provider | Root Account | General · Direct | General · Delegated |
|---|---|---|---|
| AWS | ✓ | ✓ | ✓ |
| Azure | ✓ | ✓ | ✓ |
| Google Cloud | ✓ | ✓ | ✓ |
| NCP | — | ✓ | — |
Delegated
connection method is hidden — NCP has no cross-account delegation equivalent.Bulk Register
Bulk Register is a menu item inside the [+ Connect Account ▾] dropdown (under the General Account section) that opens /settings/cloud-account/bulk. Use it to register multiple Delegated General Accounts at once based on a selected Root Account. The wizard guides you through 5 steps.
Select Root Account
Choose the Root Account that serves as the delegation basis. The selected Root Account’s provider automatically determines the candidate list and credential fields.
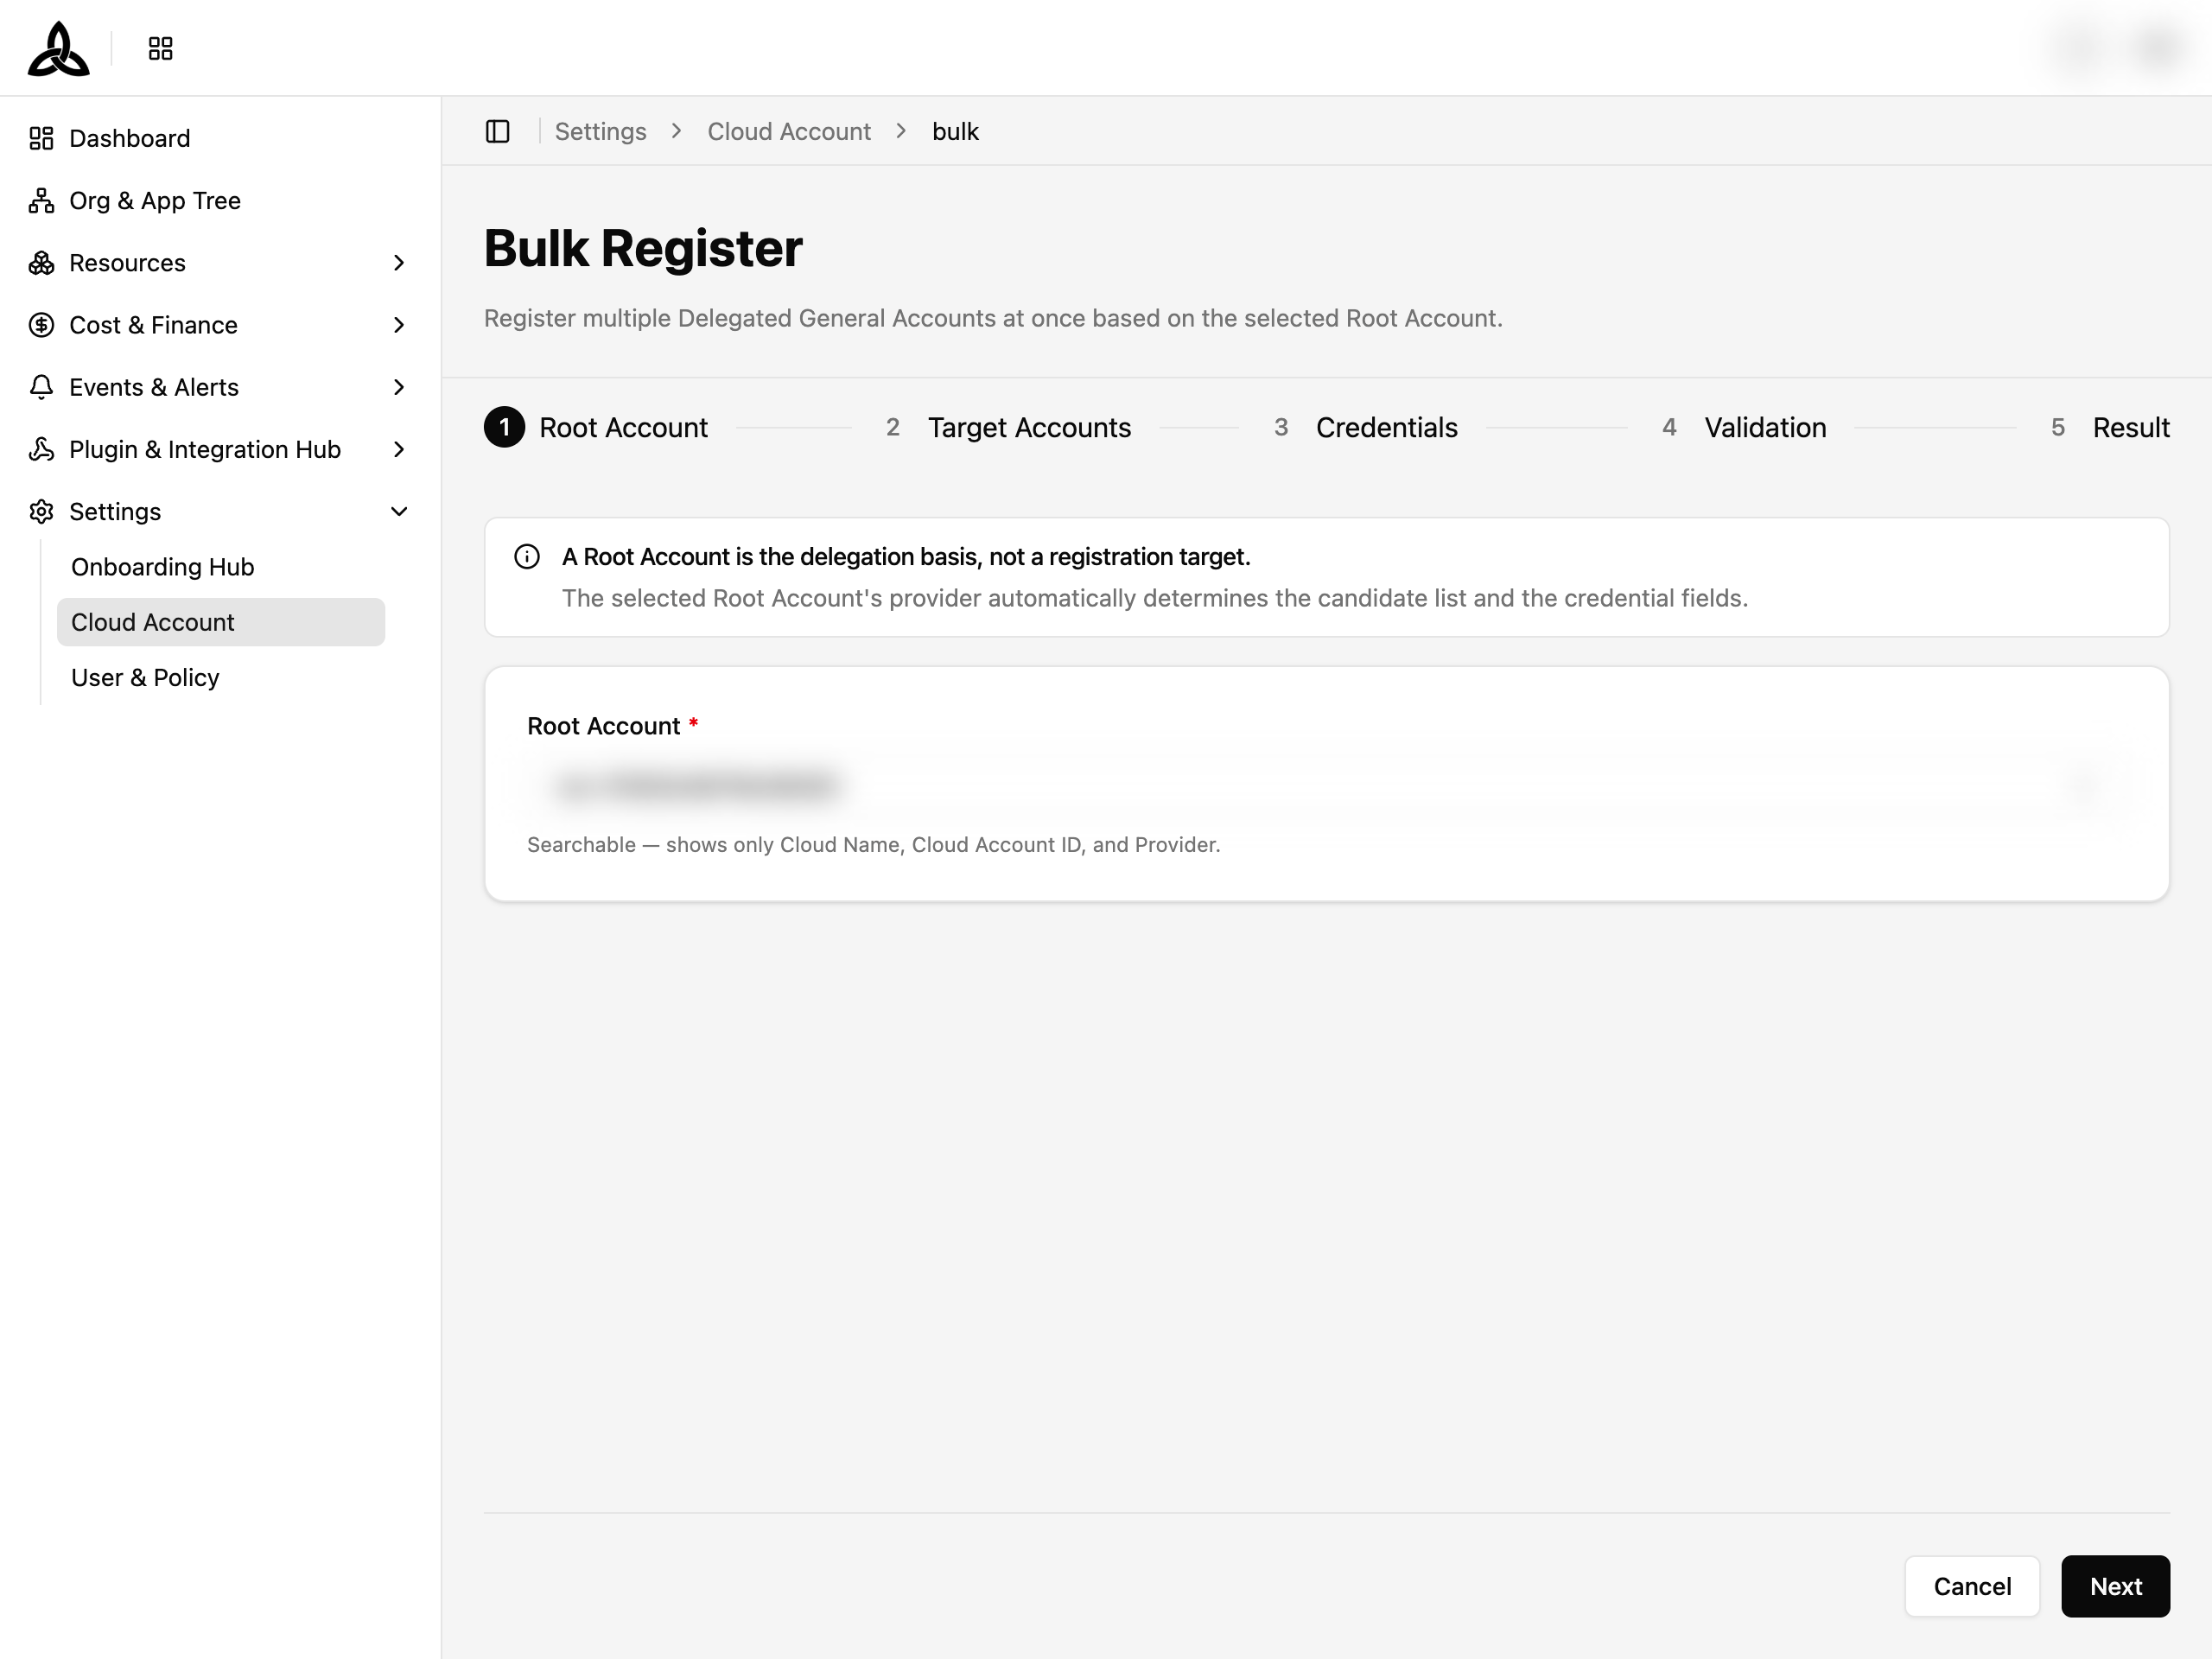
The five steps sit on one page as a stack of sections rather than separate screens, and the Progress panel on the right tracks which of them are Done, In progress, or Not started. Get ready before you start beside it lists what to have on hand — a registered Root Account, a pre-created IAM Role name and External ID, and the list of contracted accounts — with a link to the setup guide.
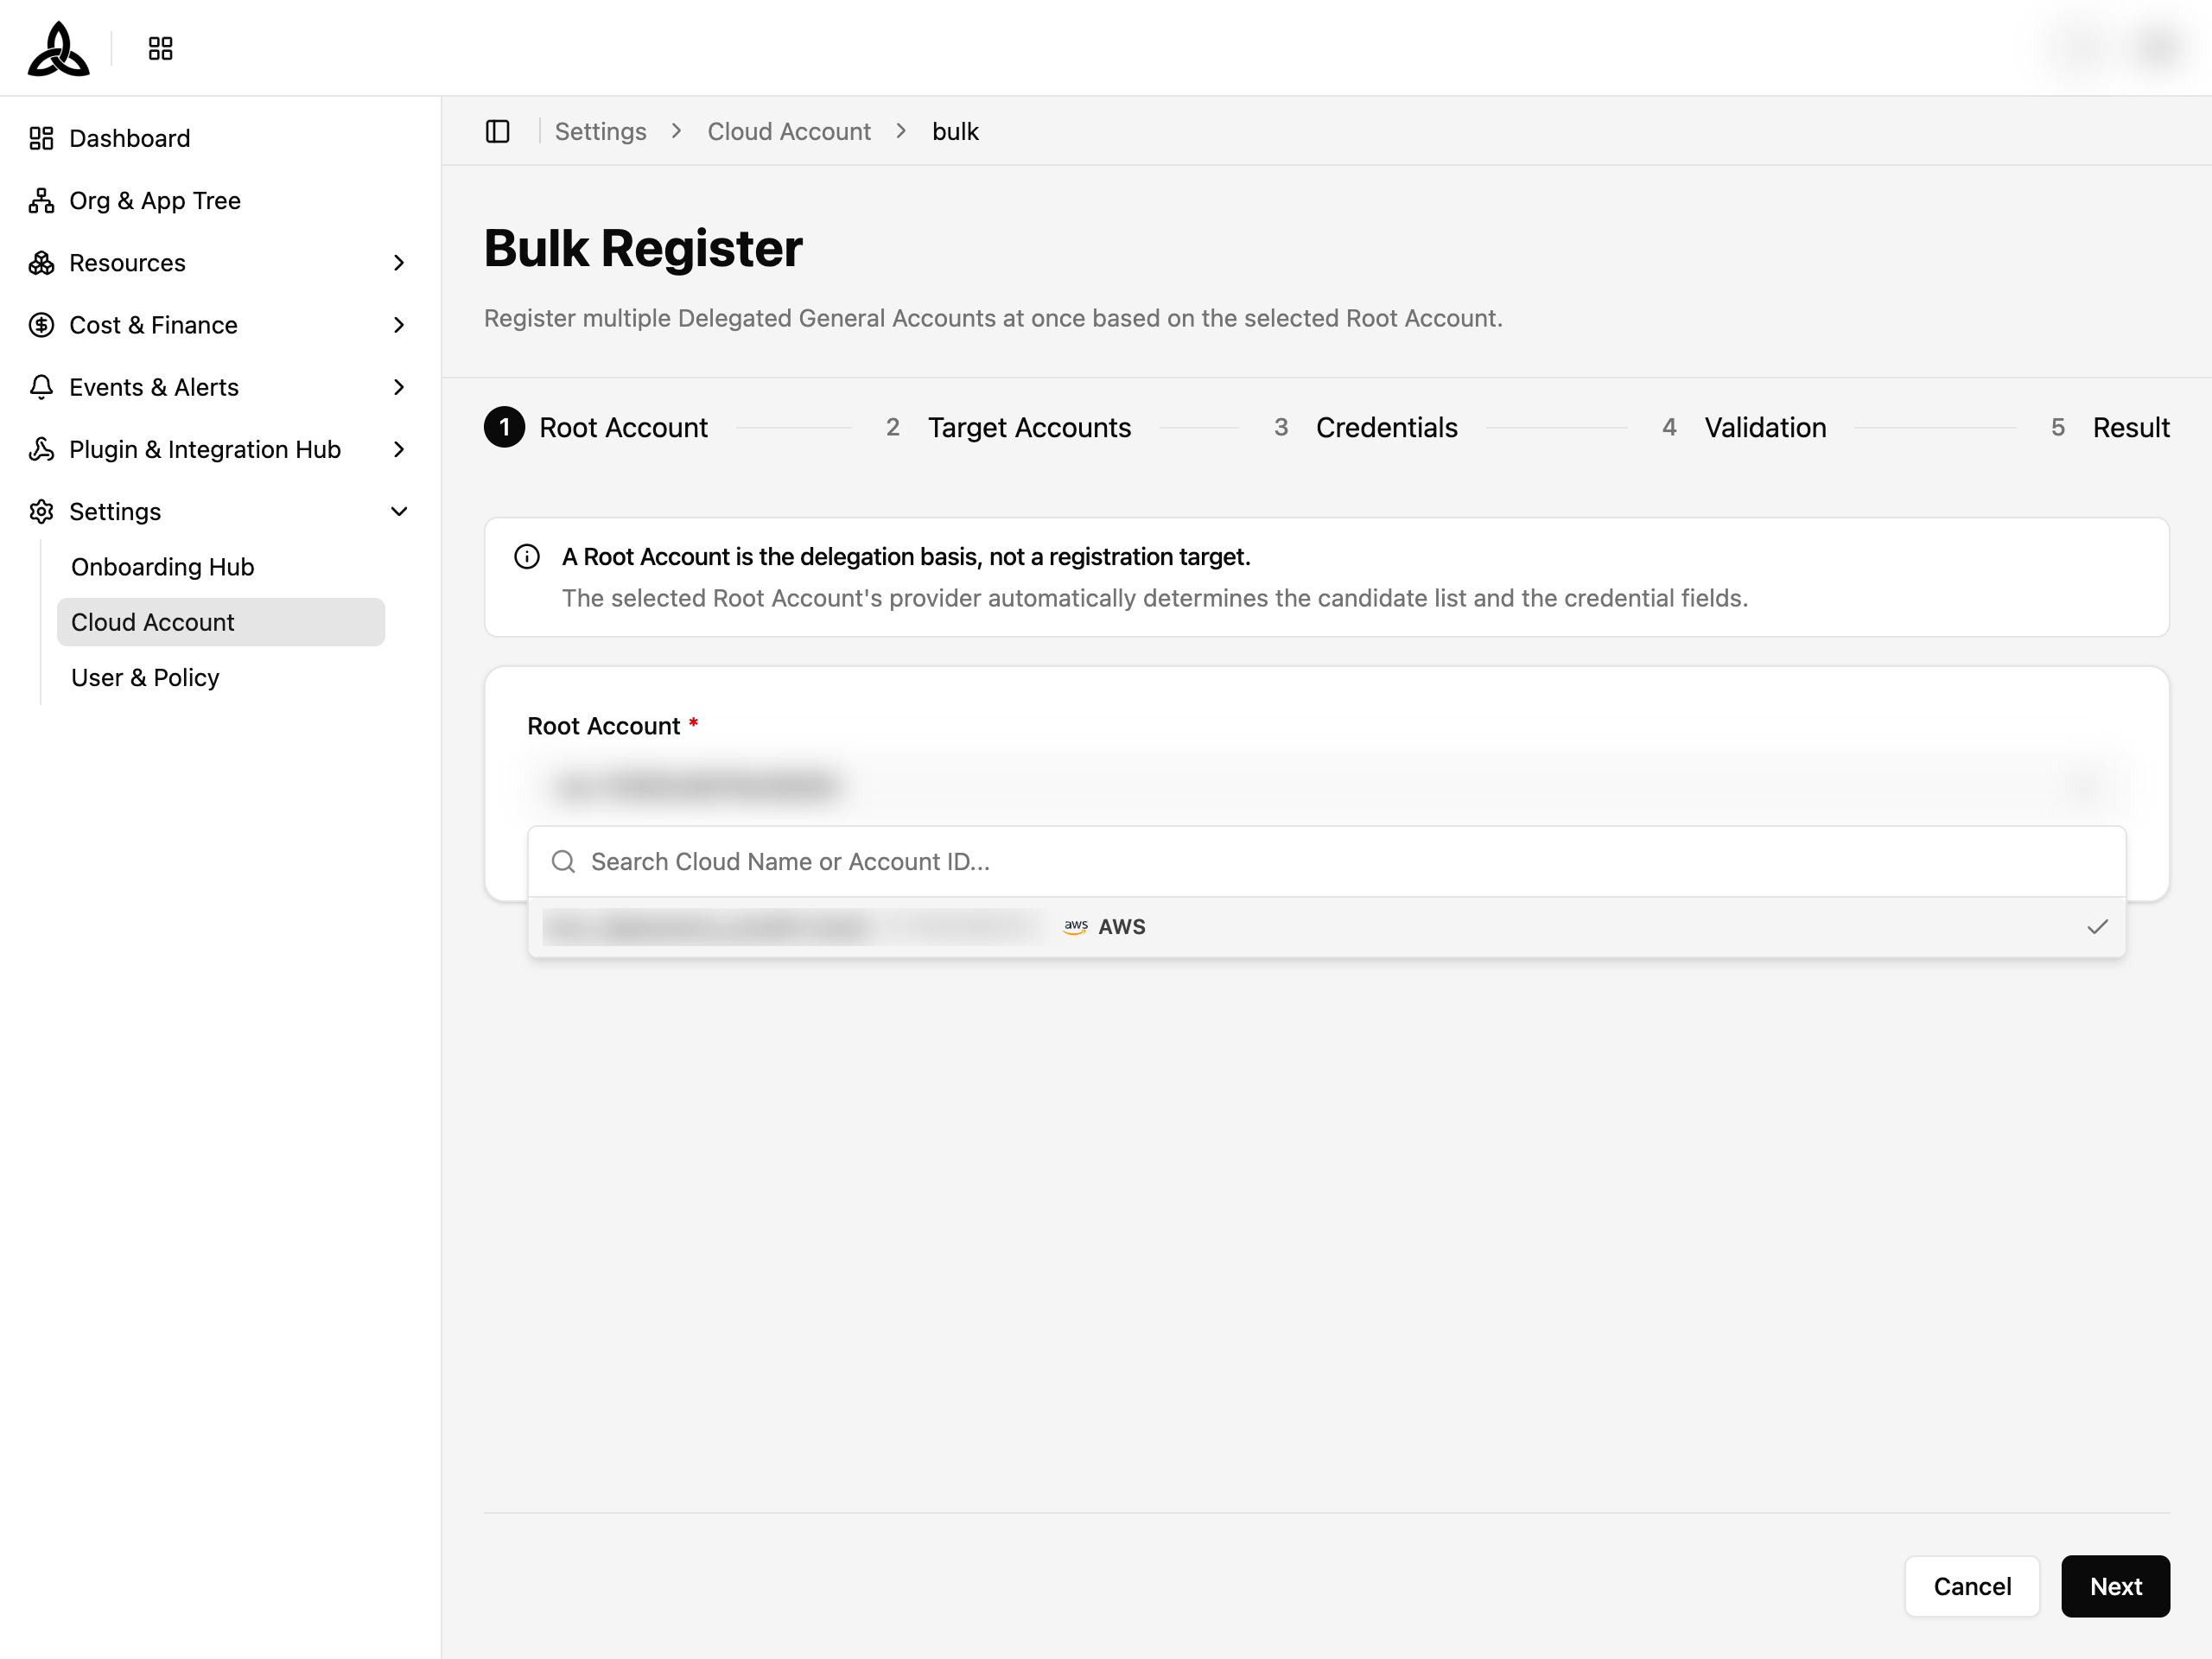
Pick a CSP first to narrow the Root Account list to one provider; the default All shows every Root Account, as before. The filter only appears when your Root Accounts span more than one provider.
Click the dropdown to search and select a Root Account from the list.
Select Target Accounts
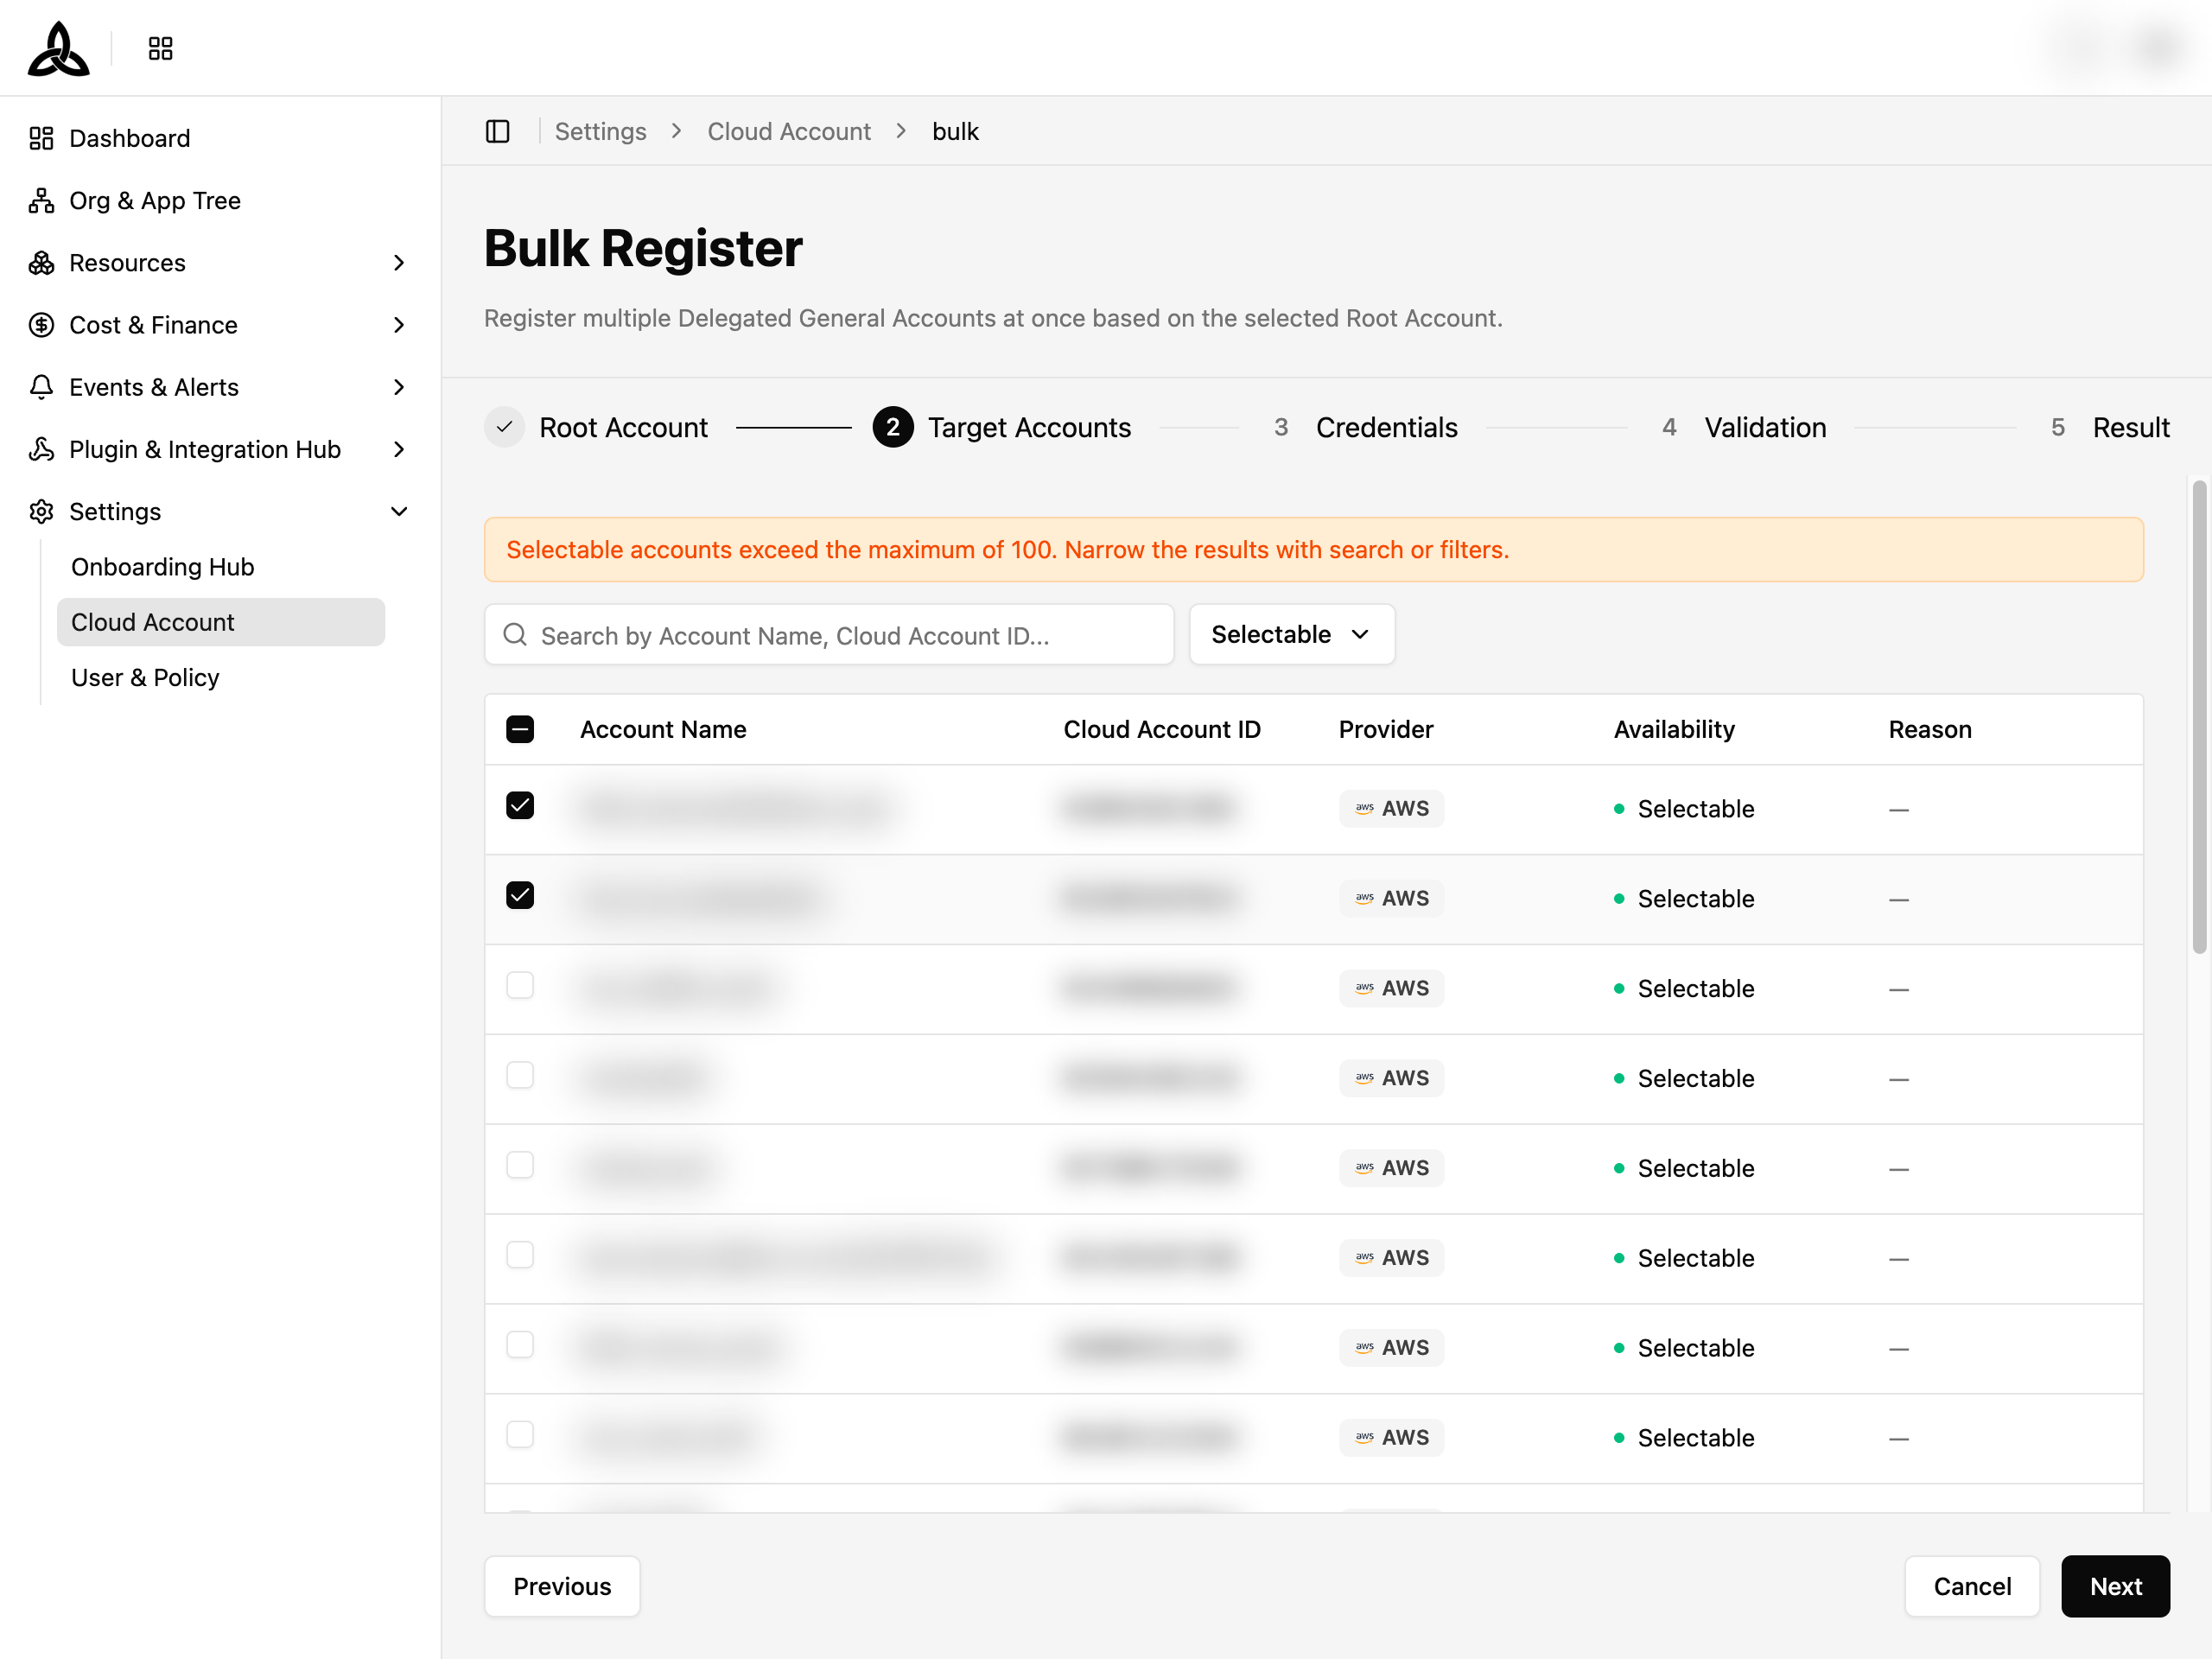
Browse and select the Delegated General Accounts to register. Accounts are listed with their availability status — only Selectable accounts can be checked.
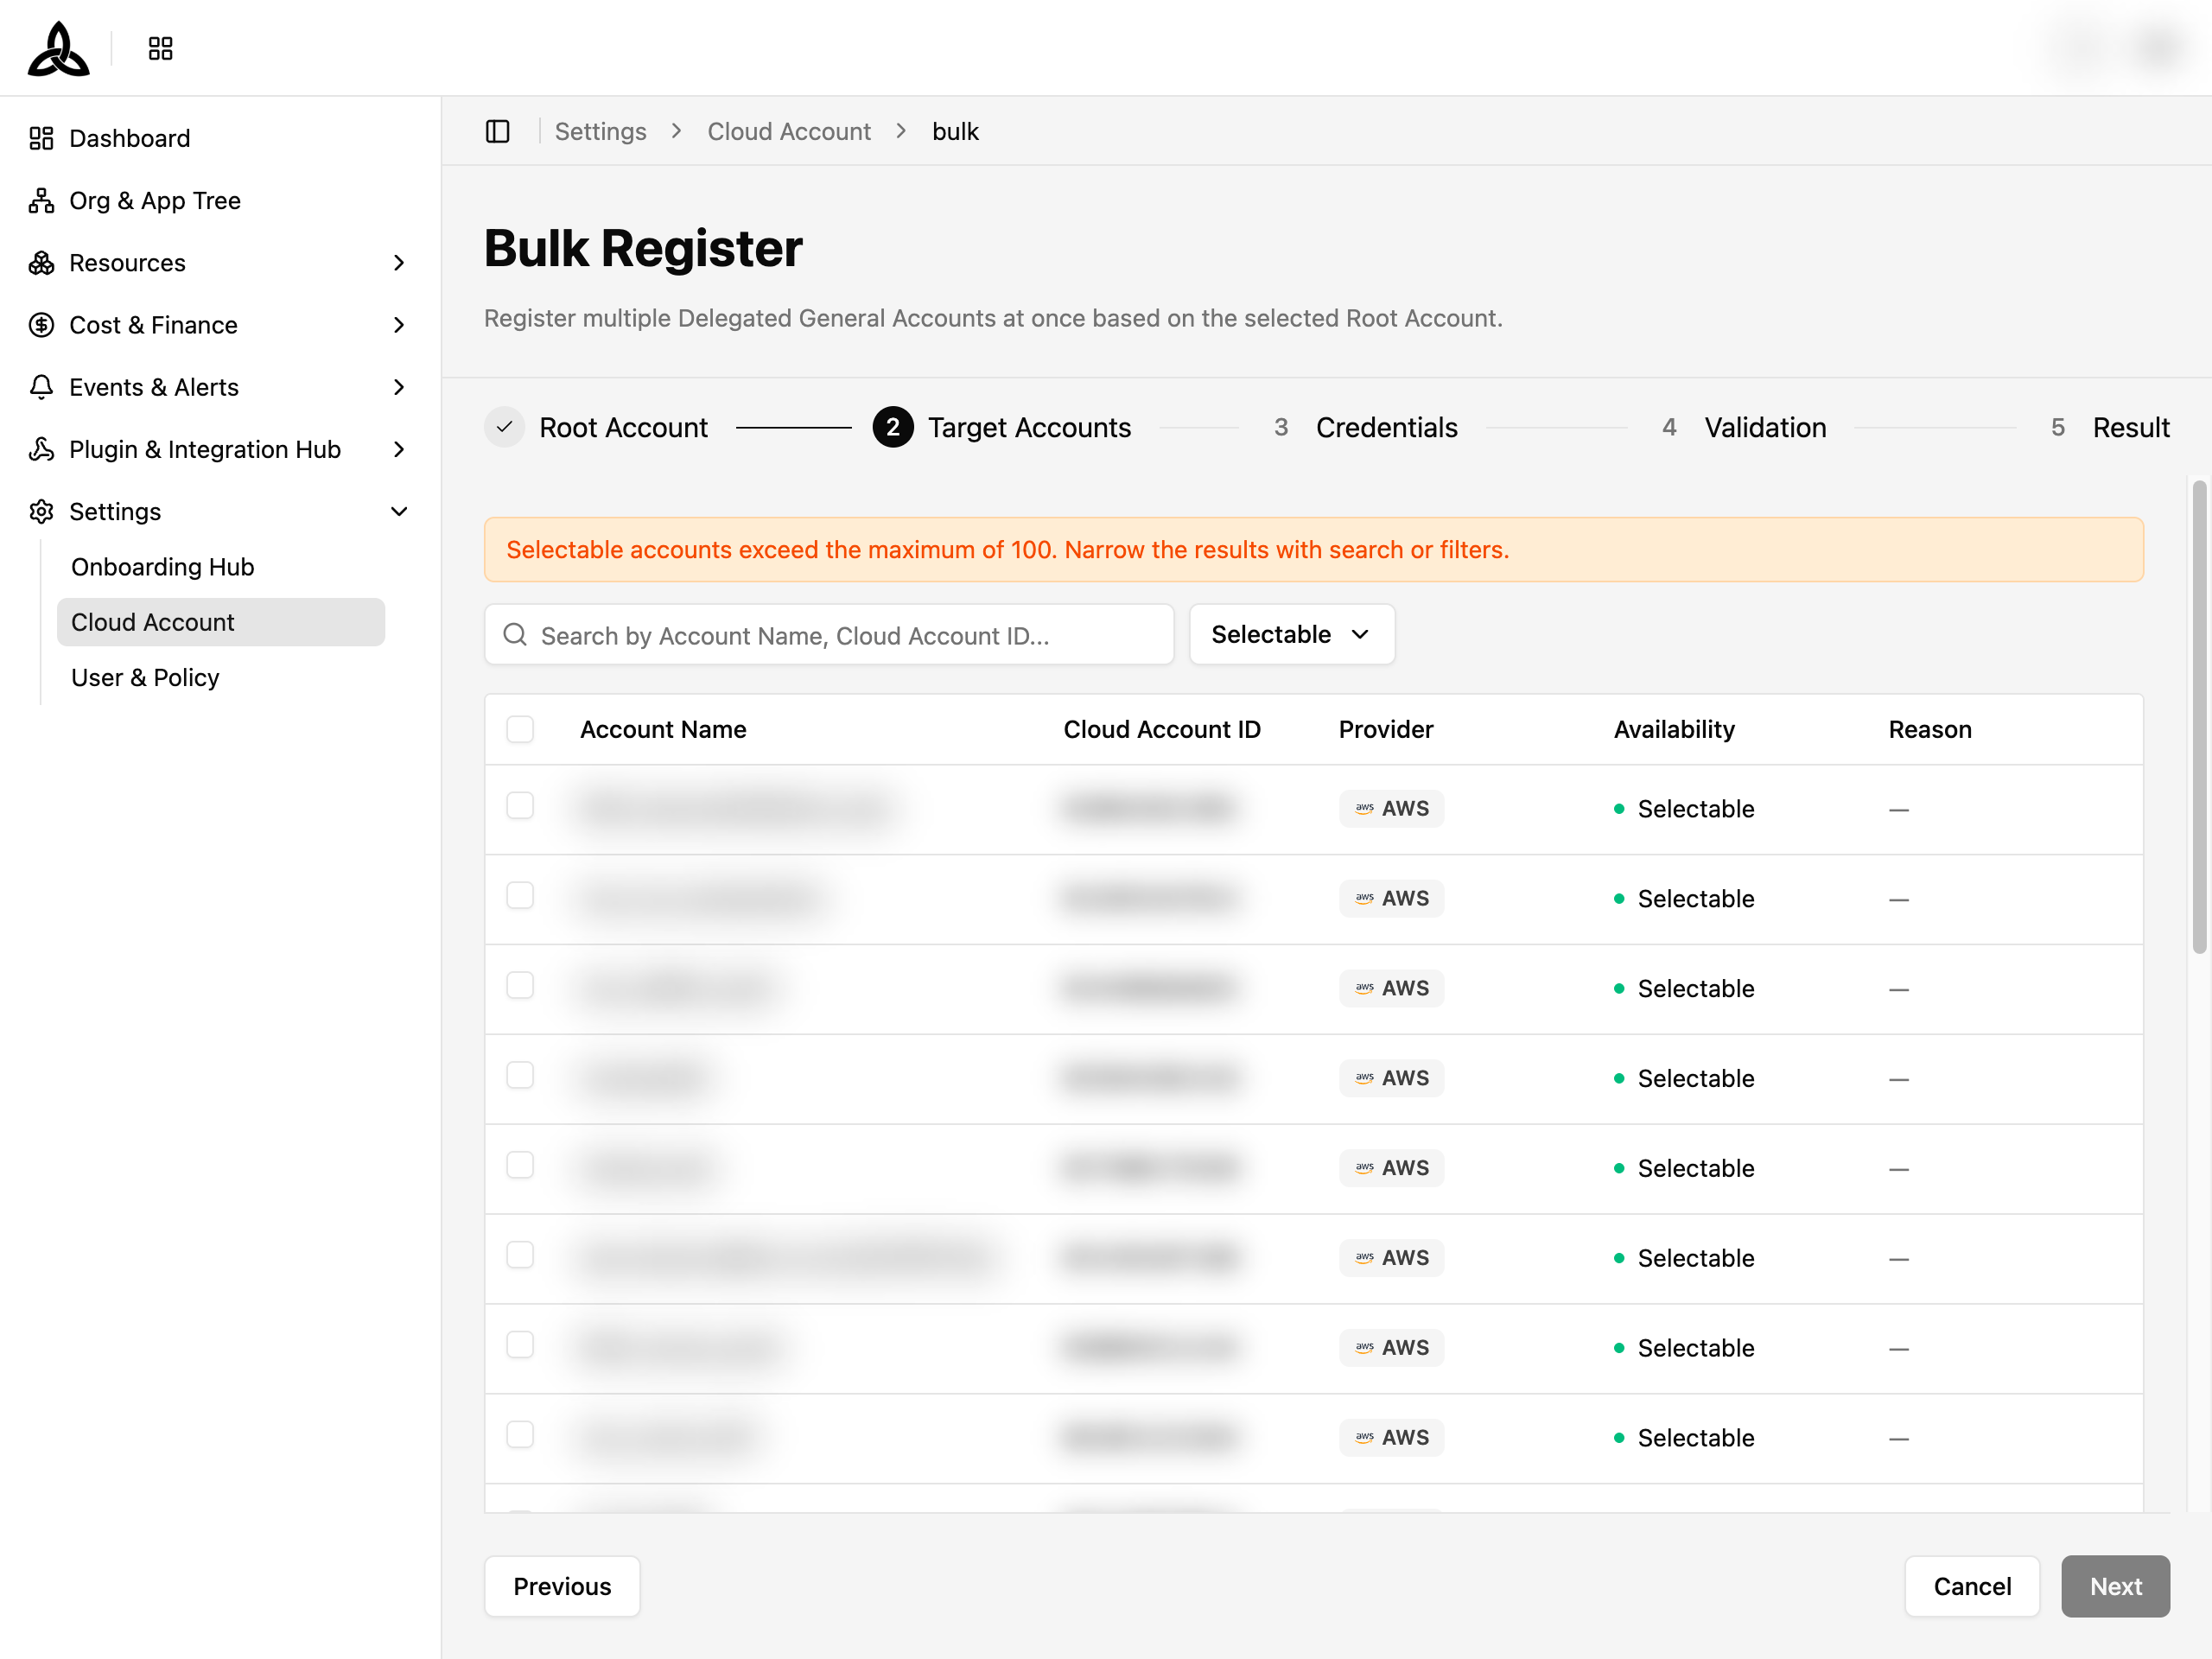
Use the checkboxes to select individual accounts or use the header checkbox to select all on the current page. The status filter dropdown lets you narrow the list:
| Filter | Description |
|---|---|
| All Statuses | Show all candidate accounts |
| Selectable | Accounts available for registration (default) |
| Duplicate | Accounts already registered |
Configure Credentials
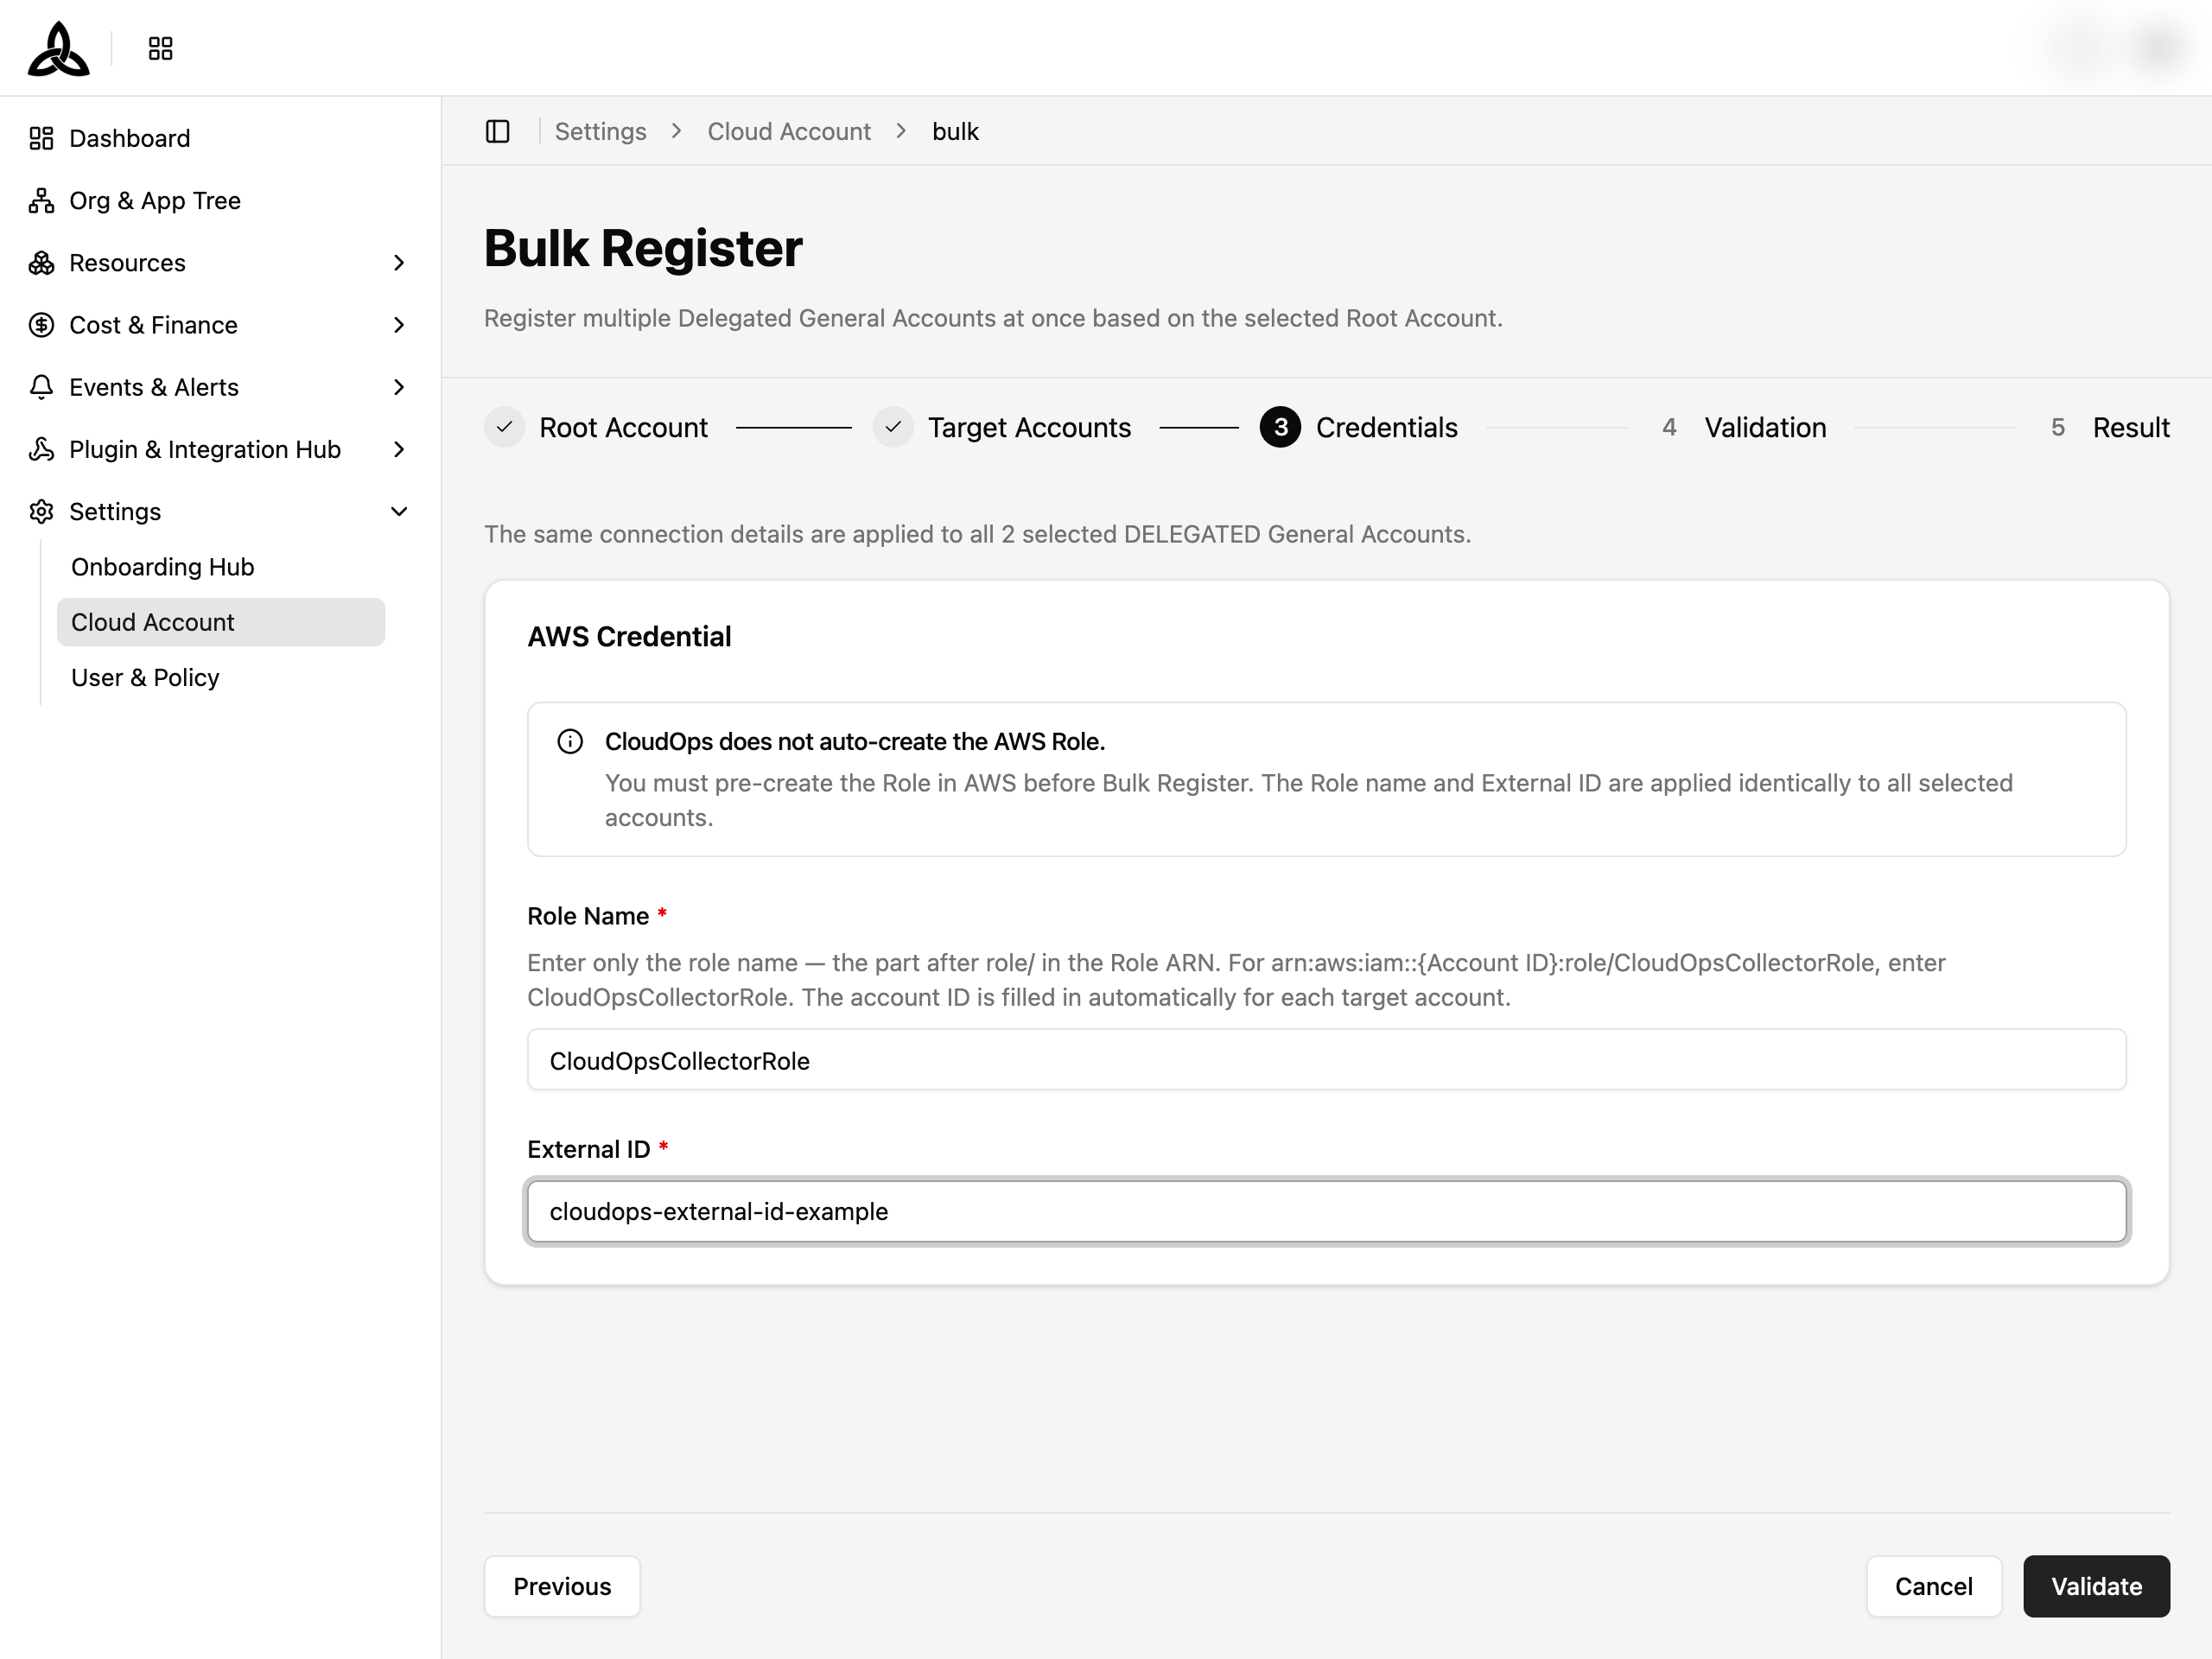
Enter the credential details that will be applied identically to all selected accounts. For AWS, provide the Role Name and External ID.
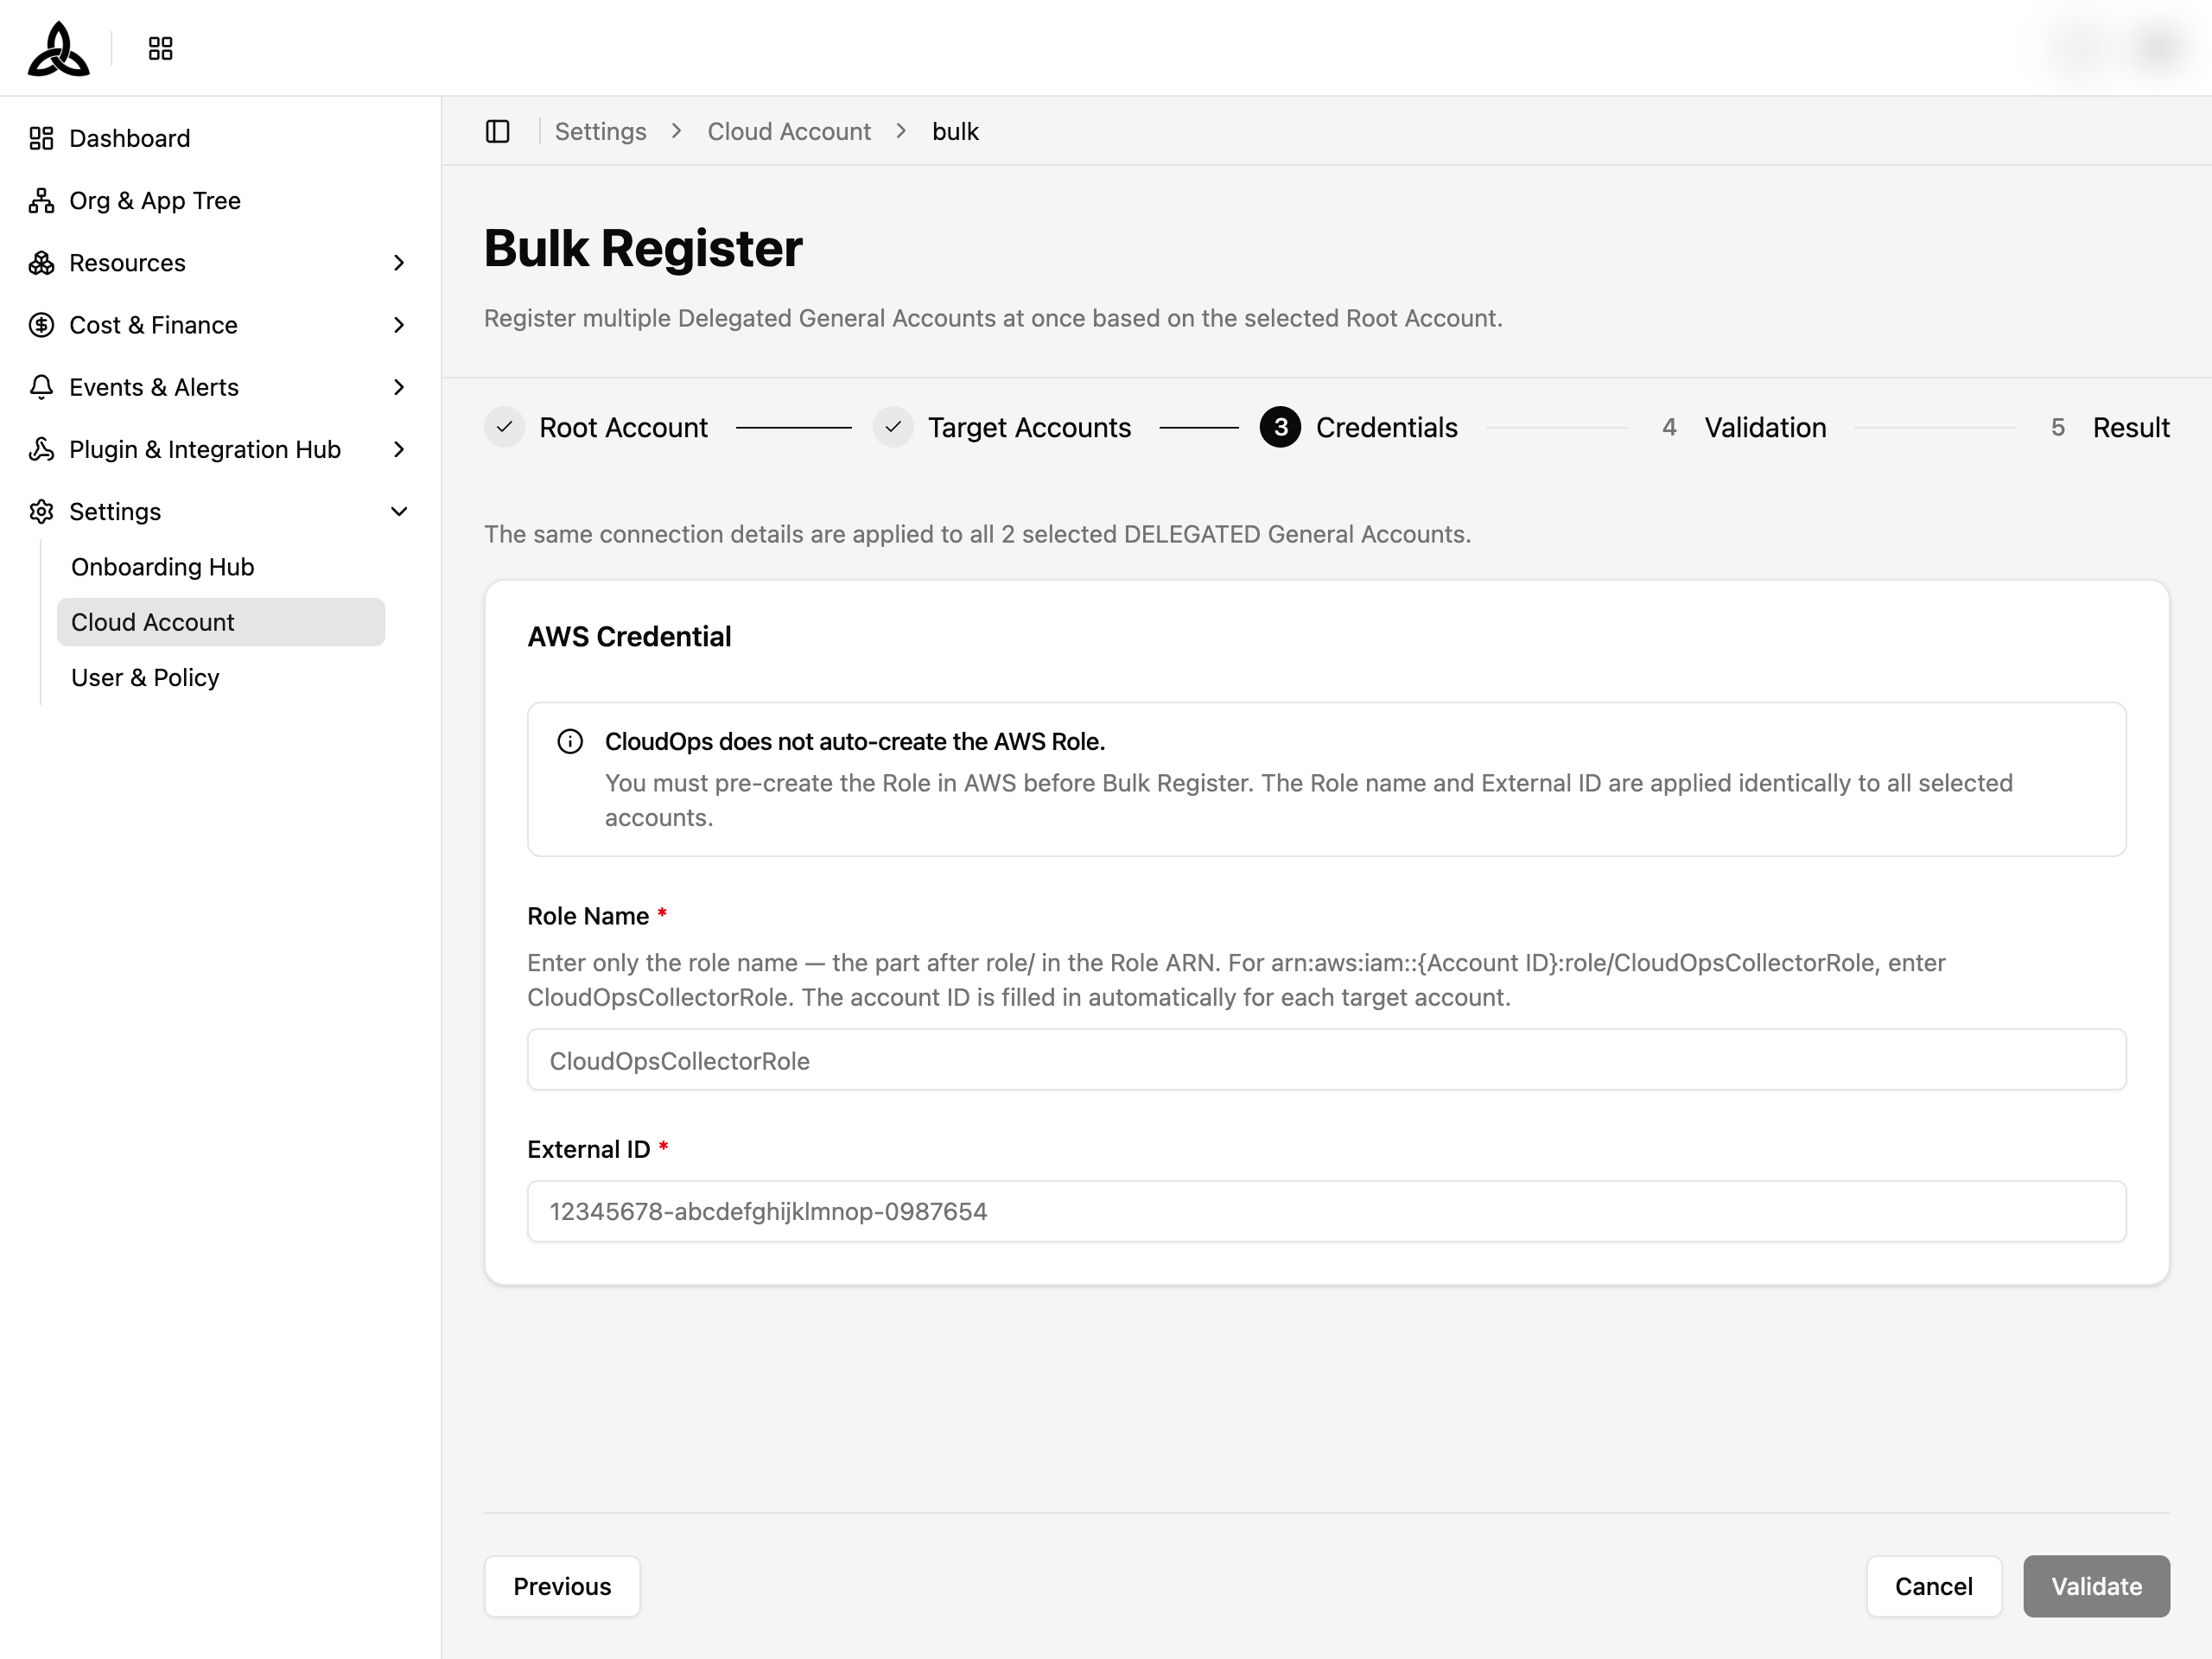
| Field | Description |
|---|---|
| Role Name | The IAM Role name (the part after role/ in the Role ARN). CloudOps does not auto-create the role — you must pre-create it in AWS |
| External ID | The External ID configured in the IAM Role’s trust policy for assume-role |
Validation
CloudOps runs a connection test (STS AssumeRole) for each selected account. The result shows Passed or Failed with a reason for each account.
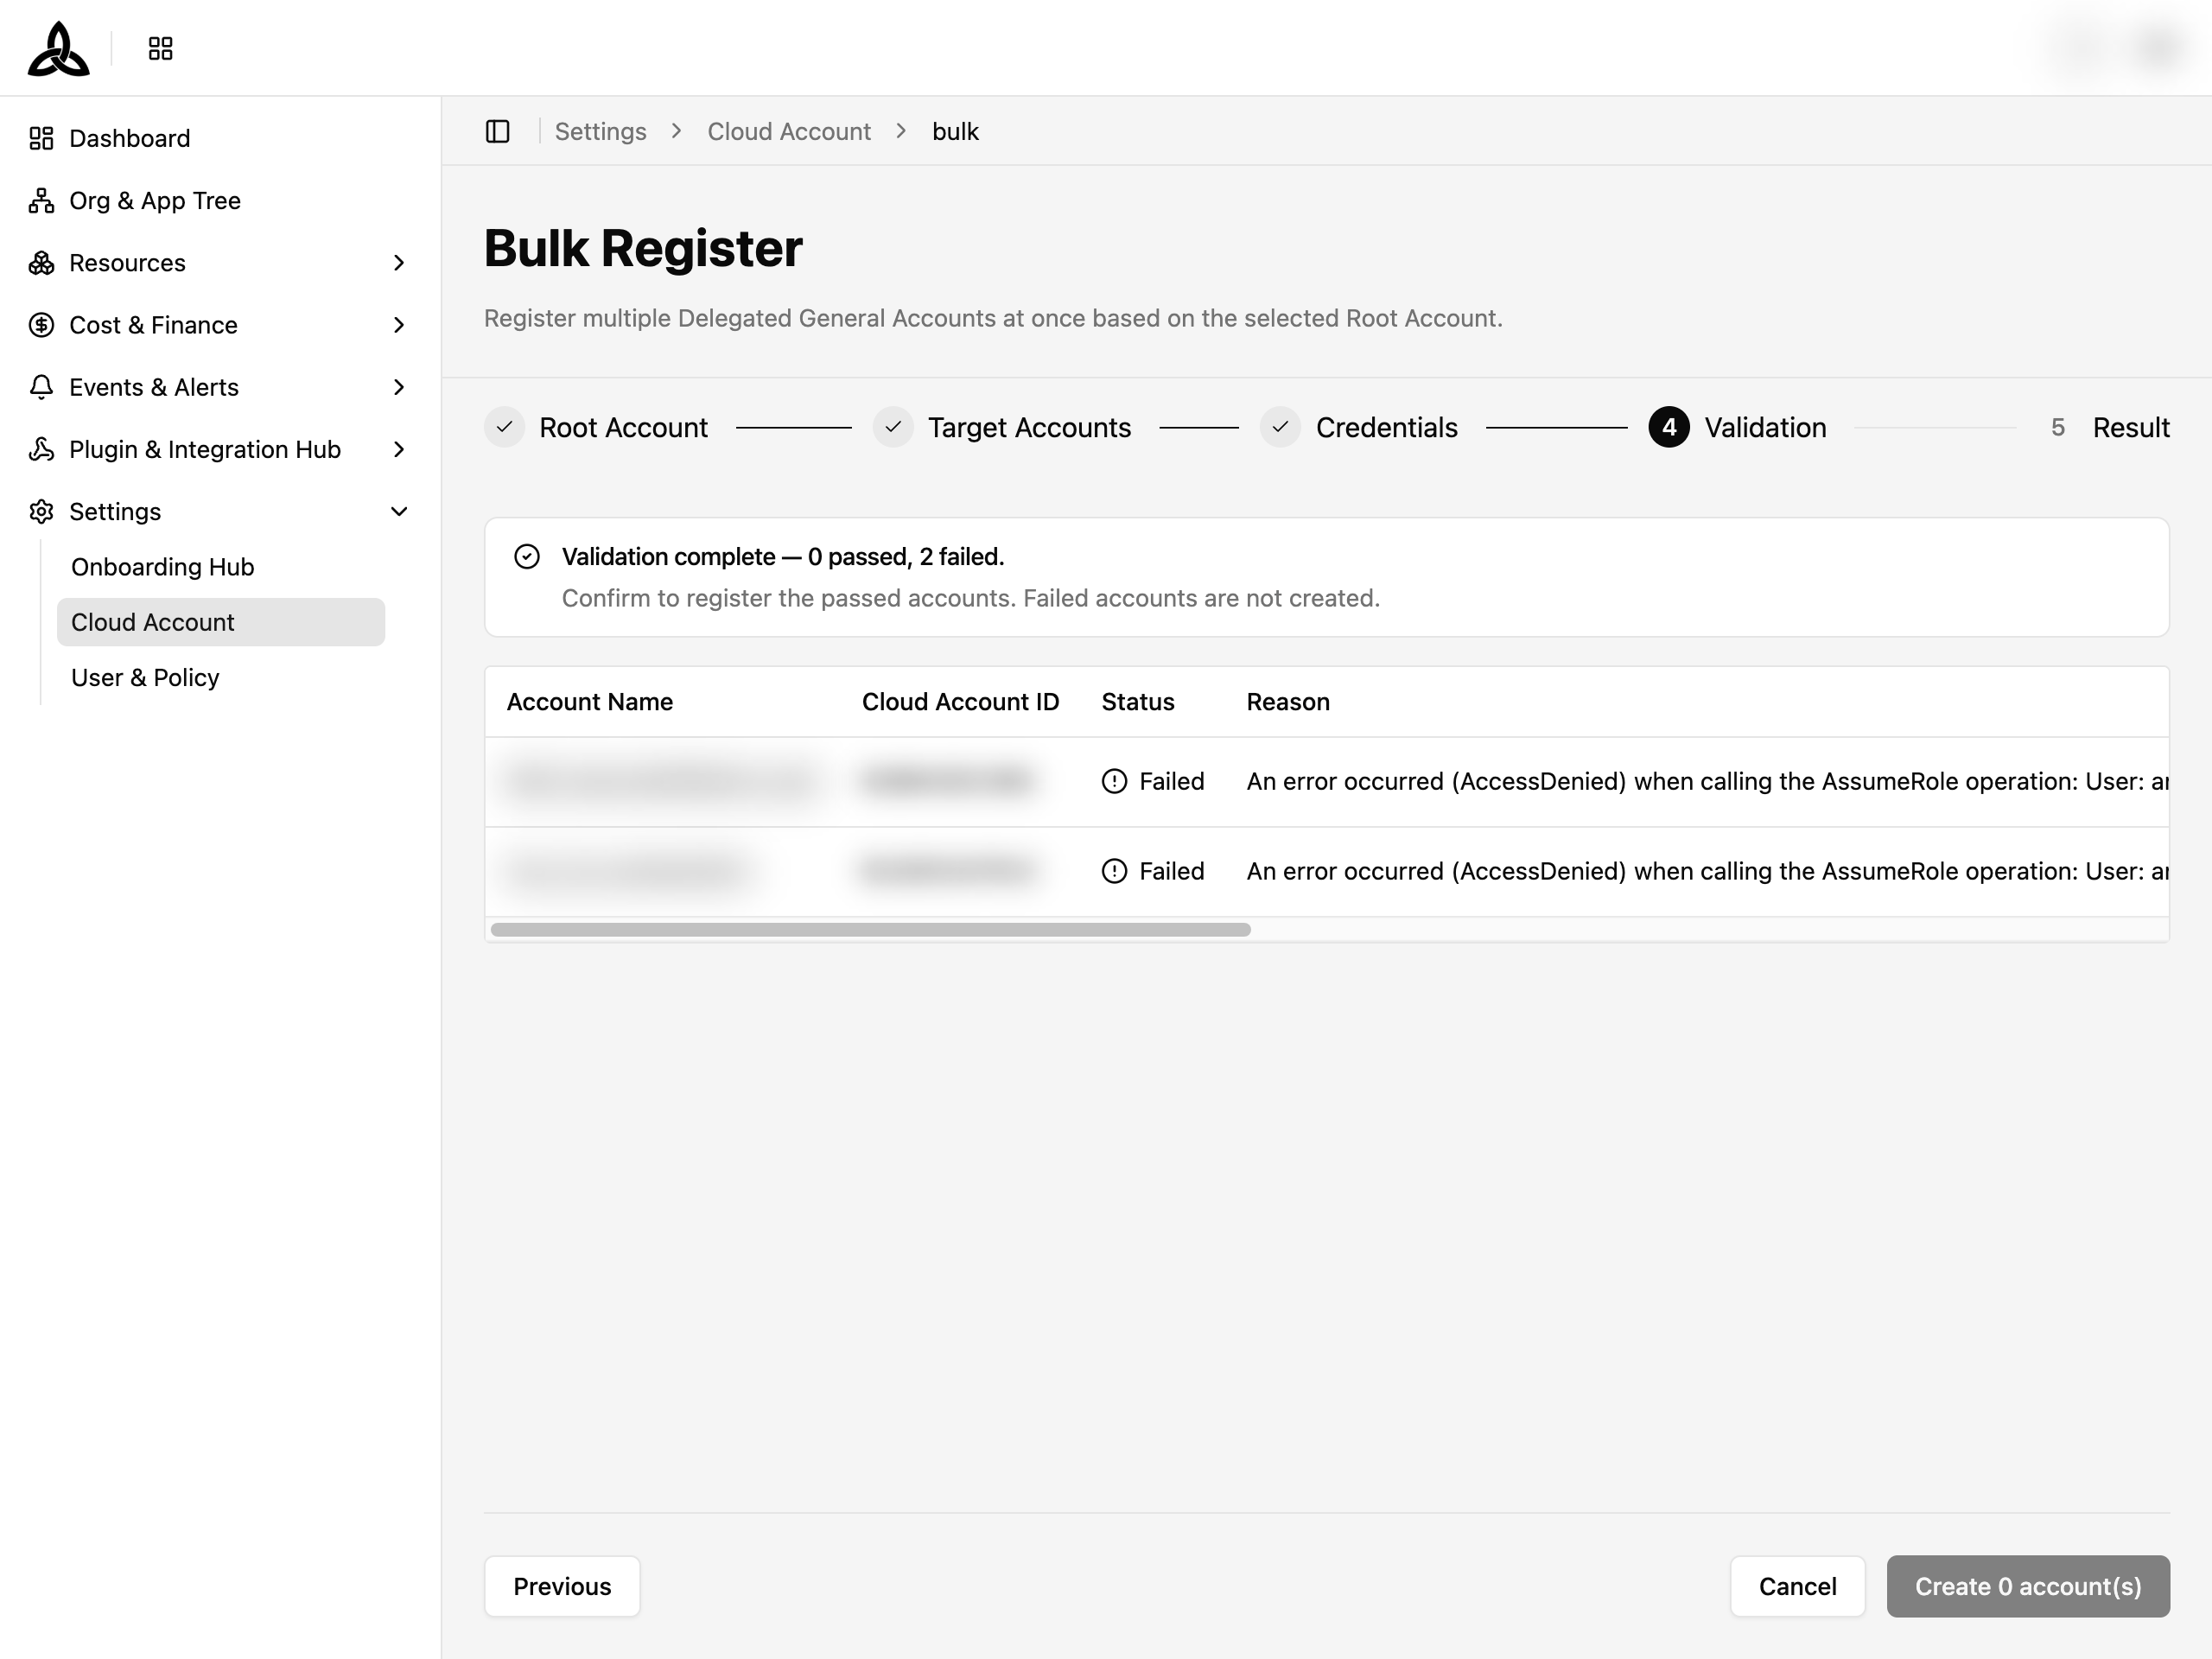
| Status | Description |
|---|---|
| Passed | Connection test succeeded — the account will be registered |
| Failed | Connection test failed — the account will not be registered. Check the Reason column for details |
Result
Review the registration results. A summary shows total selected, success, and failed counts. Use the Success and Failed tabs to inspect individual accounts.
Disconnecting an Account
Open the disconnect dialog
On the account detail page, click the [Disconnect] button in the top-right corner.
Confirm disconnection
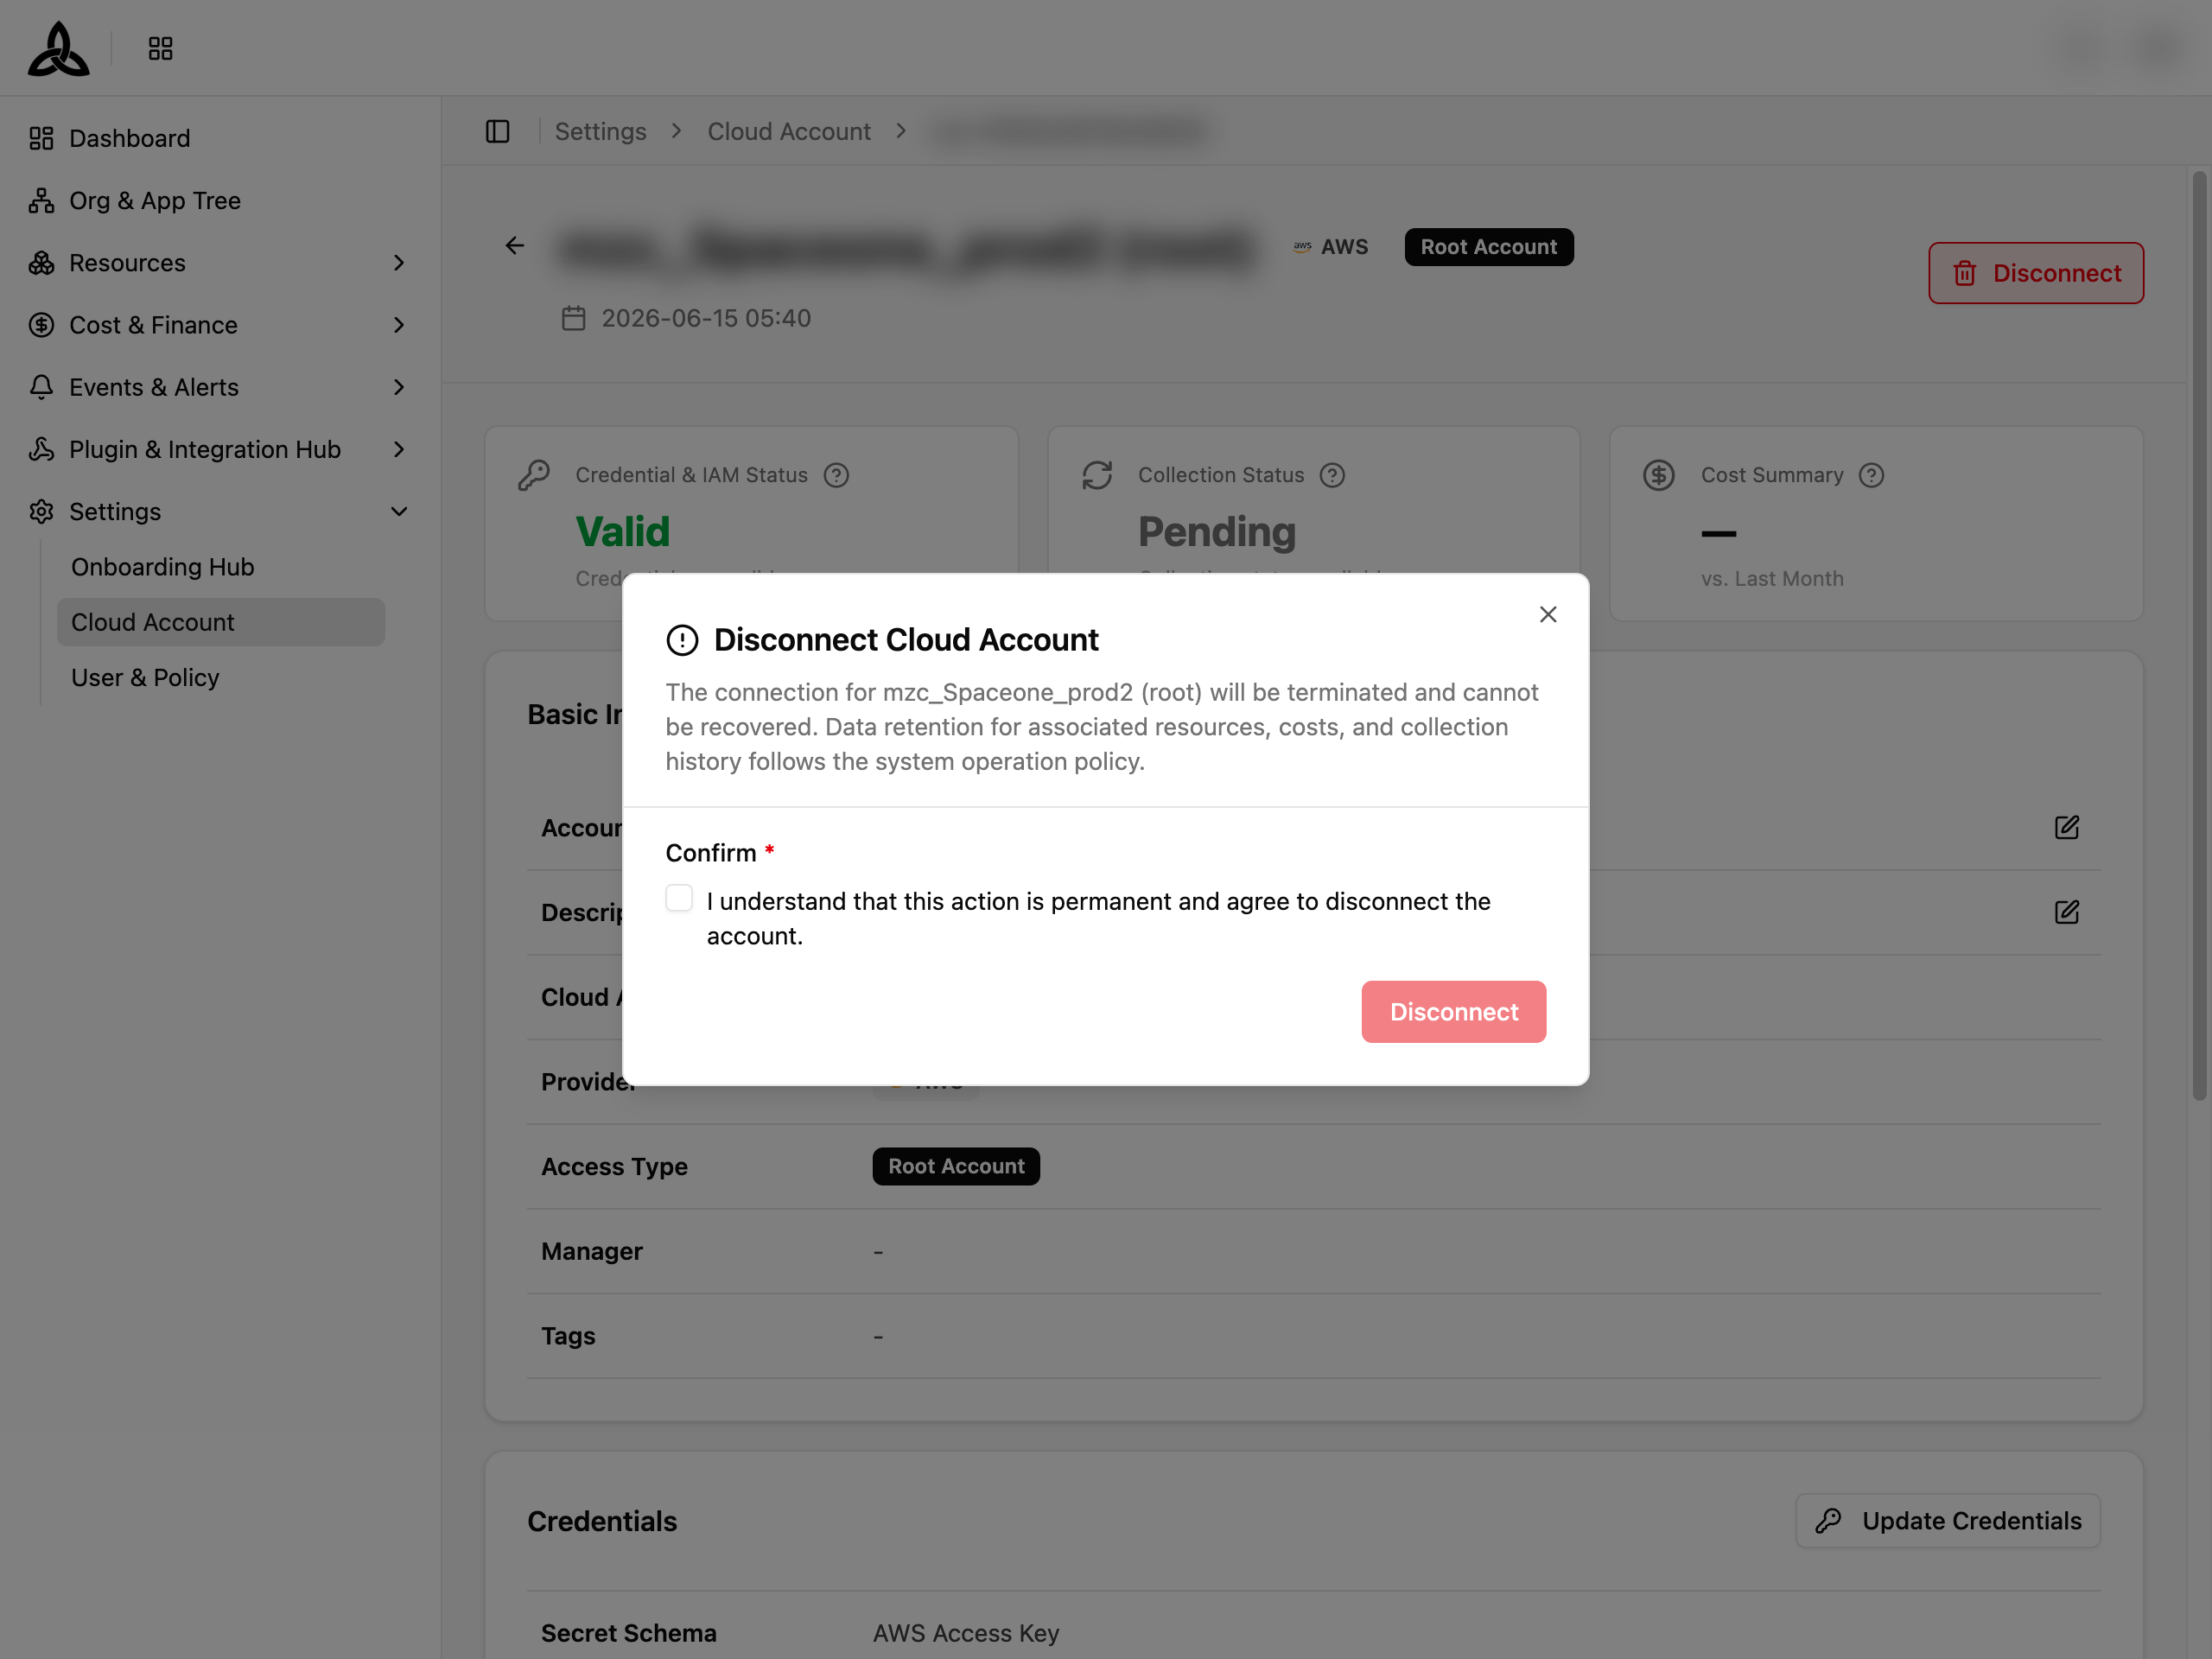
Review the warning message, then check the confirmation checkbox: “I understand that this action is permanent and agree to disconnect the account.” Click [Disconnect] to proceed.