Resource Inventory
On the [Resources > Resource Inventory] page, you work with the unified asset list collected across AWS, GCP, Azure, and other major cloud providers. The page opens on a search hub rather than a full table — you decide what you are looking for first, then the results appear.
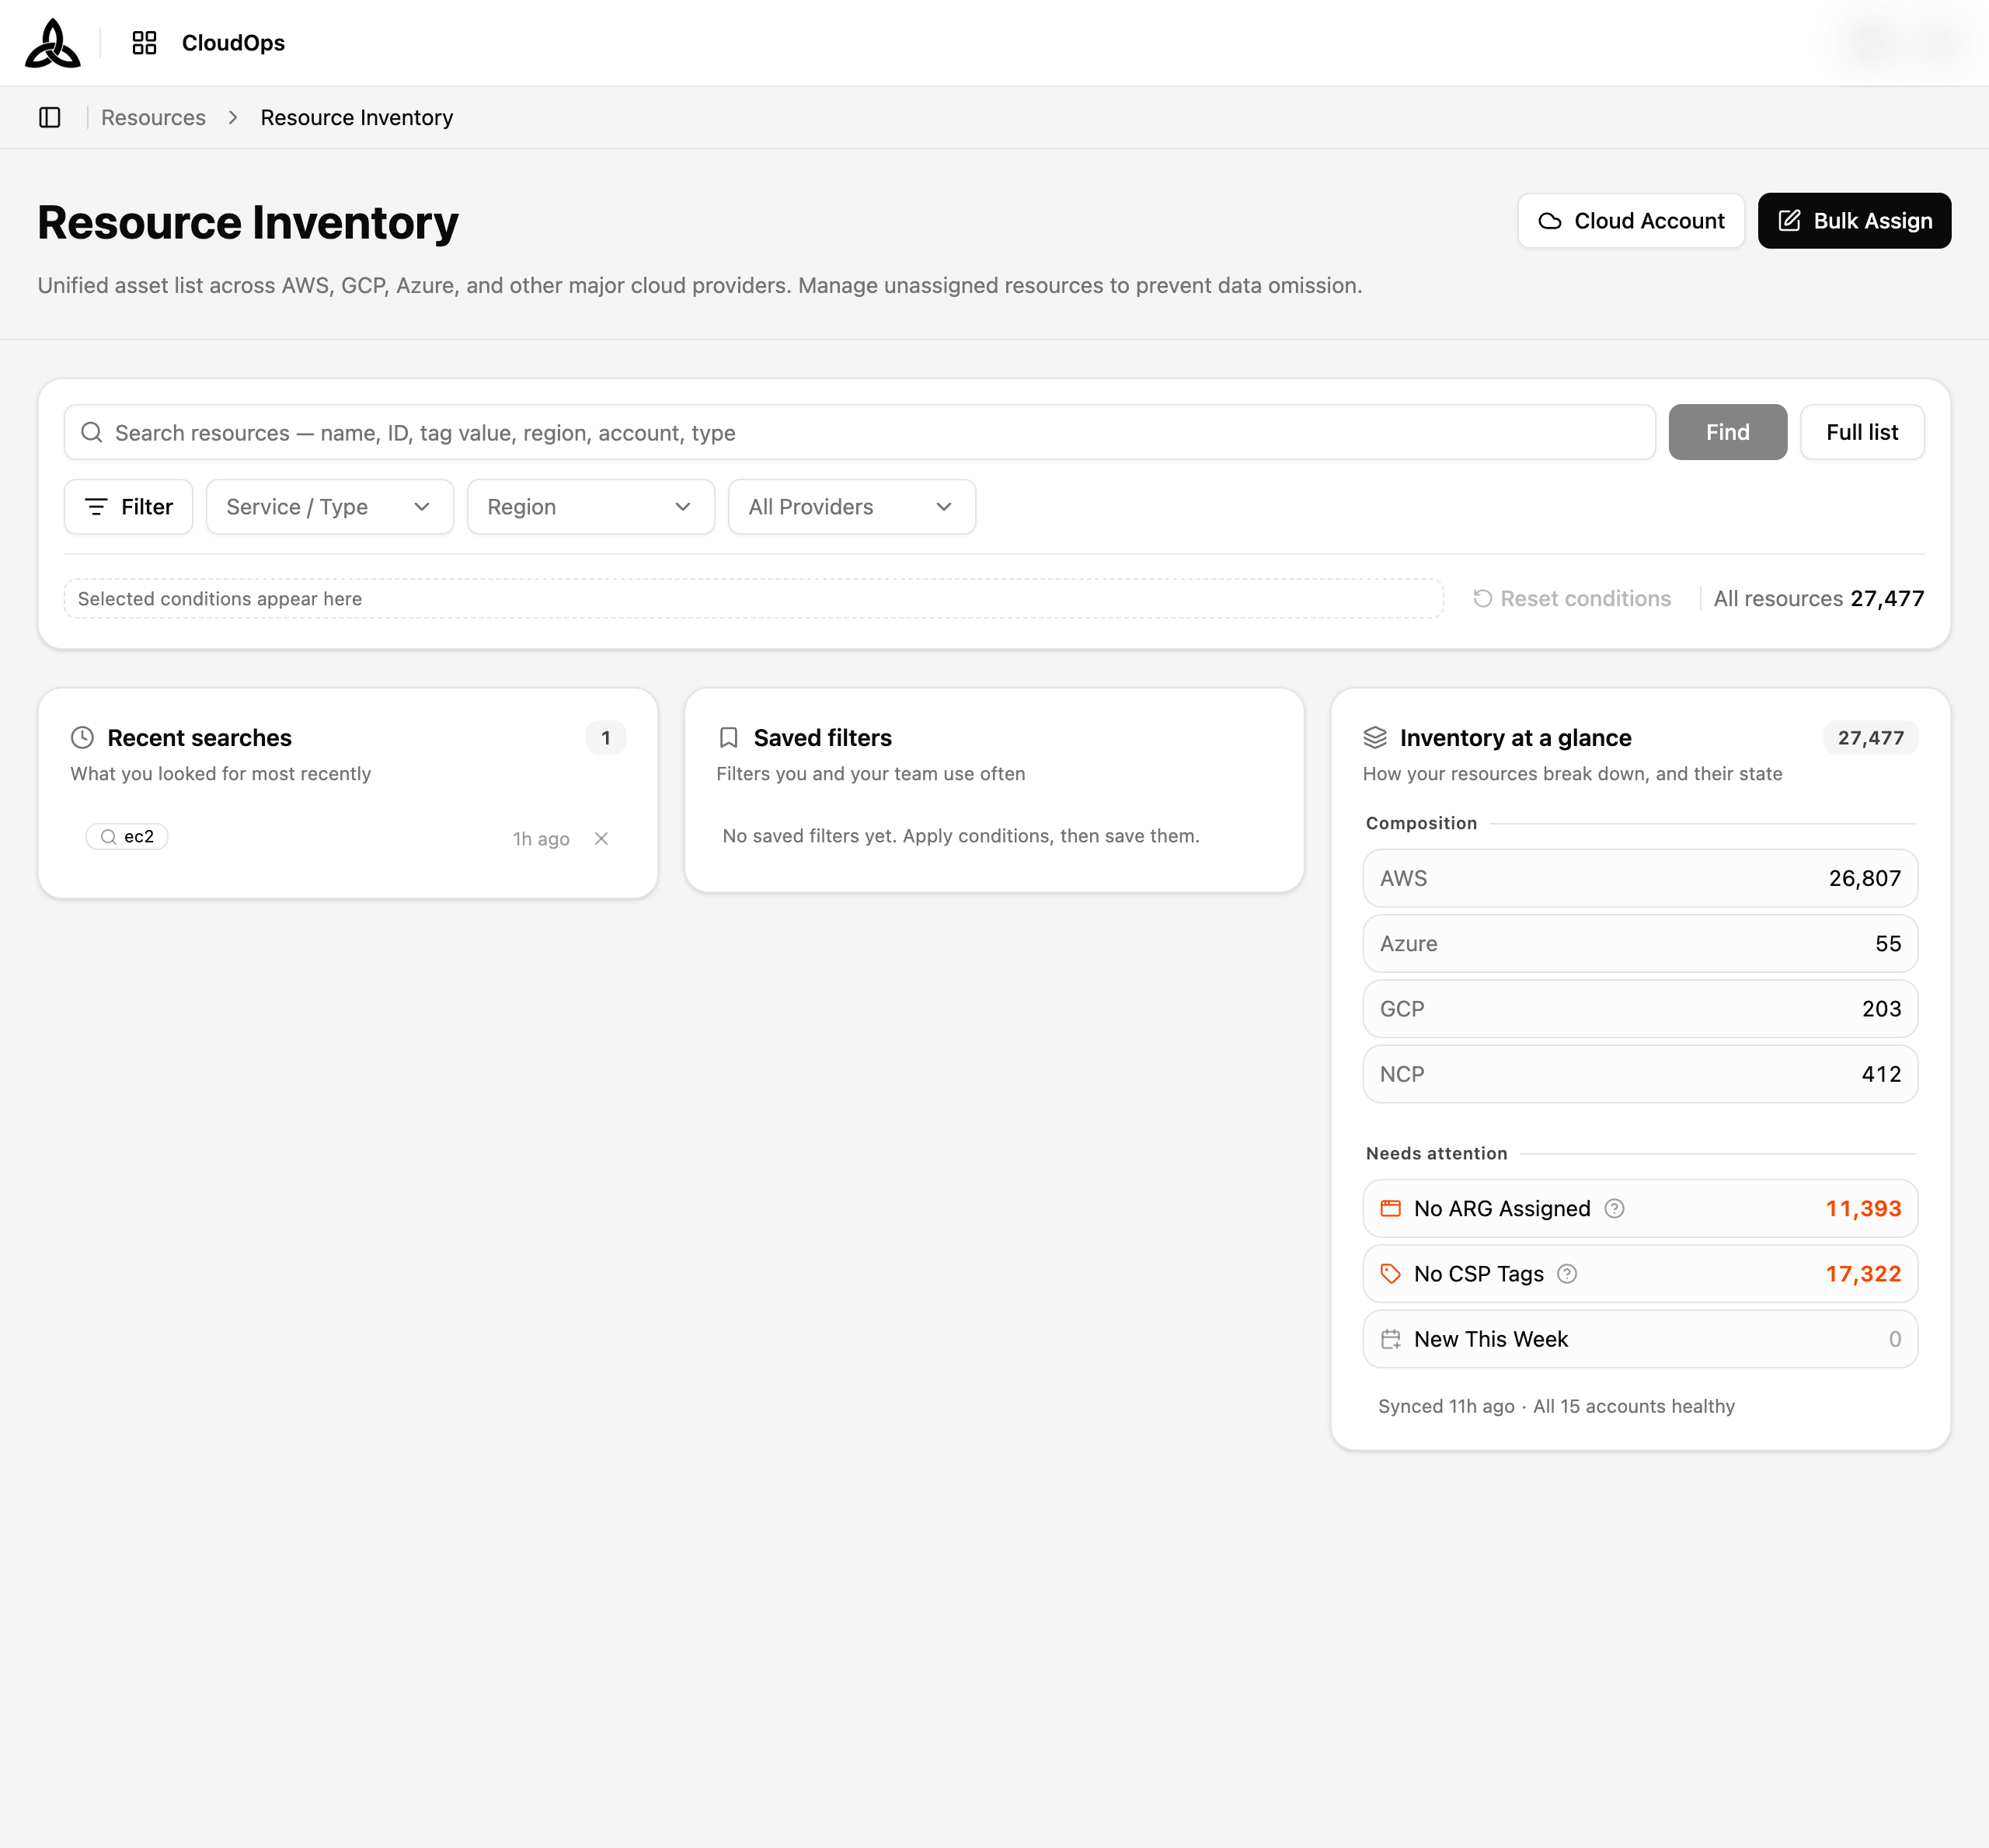
The Search Hub
The hub is the entry screen. It gives you three ways to start and a read of the inventory as a whole.
| Area | Description |
|---|---|
| Search box | Search across name, ID, tag value, region, account, and type. [Find] runs the search; [Full list] opens every resource with no conditions |
| Recent searches | What you looked for most recently. Select one to run it again, or remove it from the list |
| Saved filters | Condition sets you and your team keep for reuse |
| Inventory at a glance | Composition by provider, and a Needs attention group — resources with no application assigned, resources with no CSP tags, and what arrived this week |
Each Needs attention figure is a shortcut: selecting one applies that condition and takes you to the results.
The line under the panel shows when the inventory was last synced and whether the connected accounts are healthy.
Finding Resources
Type at least two characters and the search box offers what it can match.
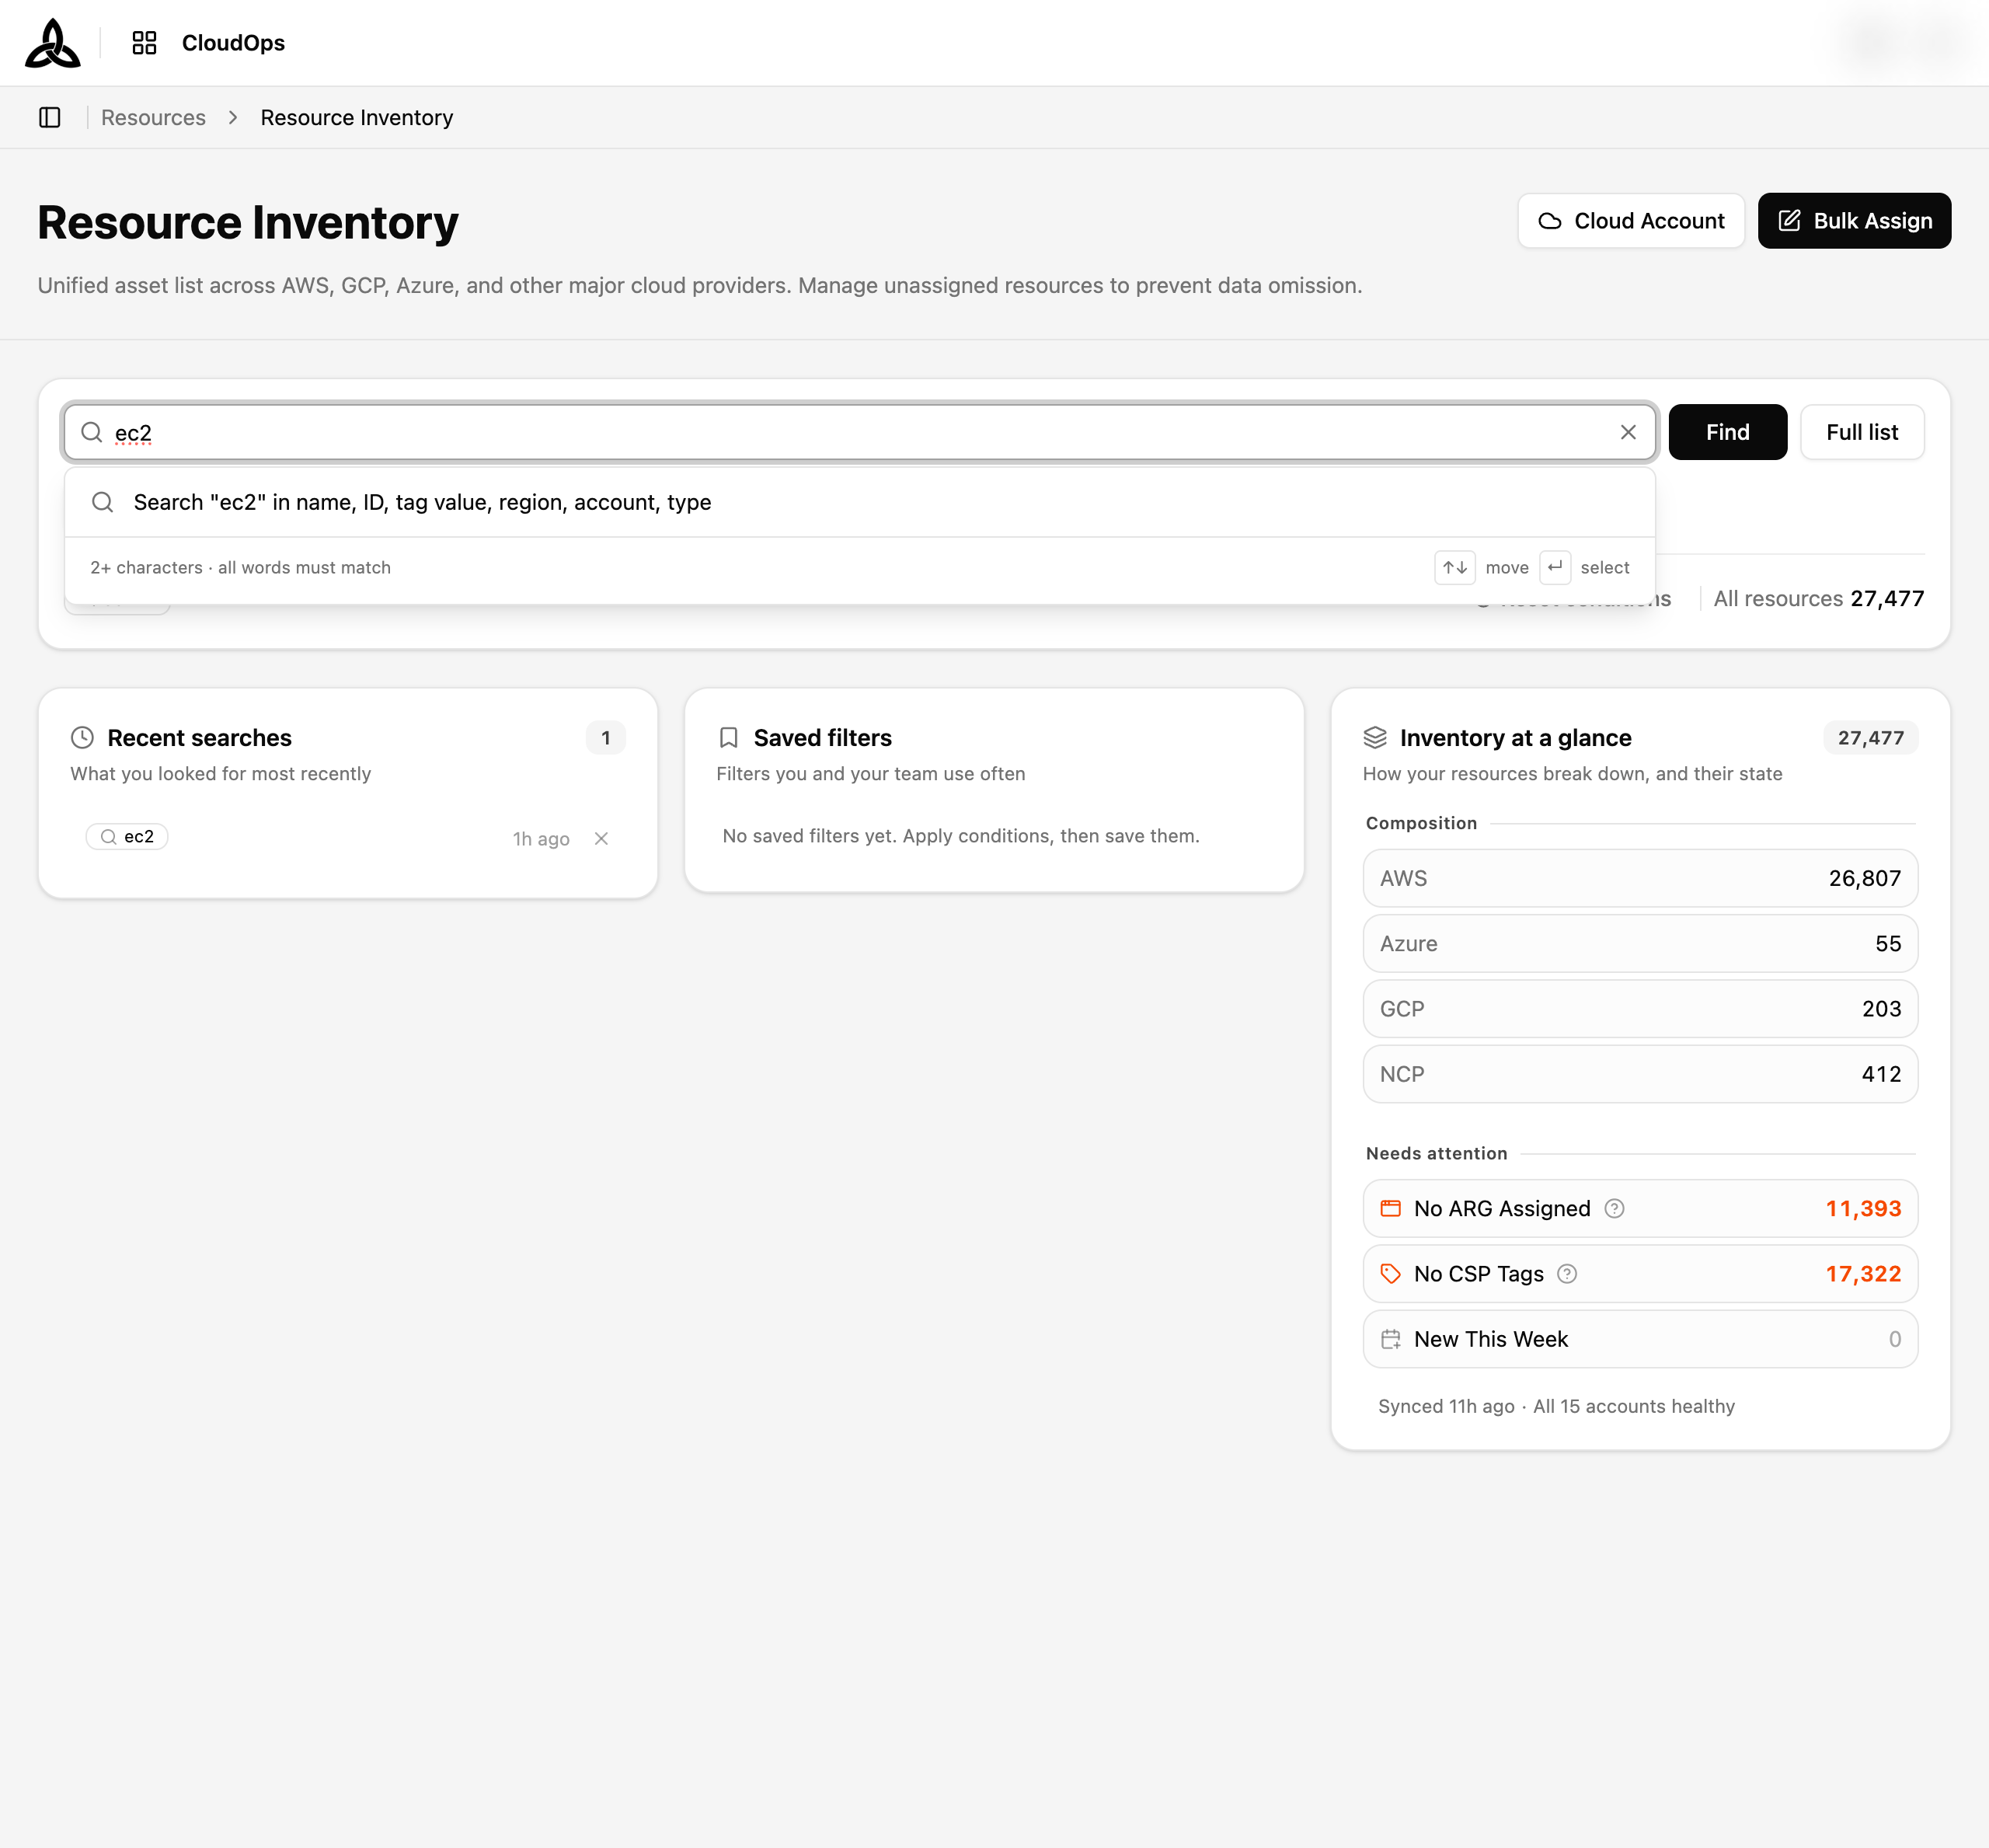
The first entry always searches your text across every field. Below it, the box may suggest narrowing by a specific field — applying an account or a type as a filter instead of a free-text match. All words must match.
Select [Find] to run the search. The results screen replaces the hub, and [Back to search] returns to it with your conditions intact so you can adjust them.
Results
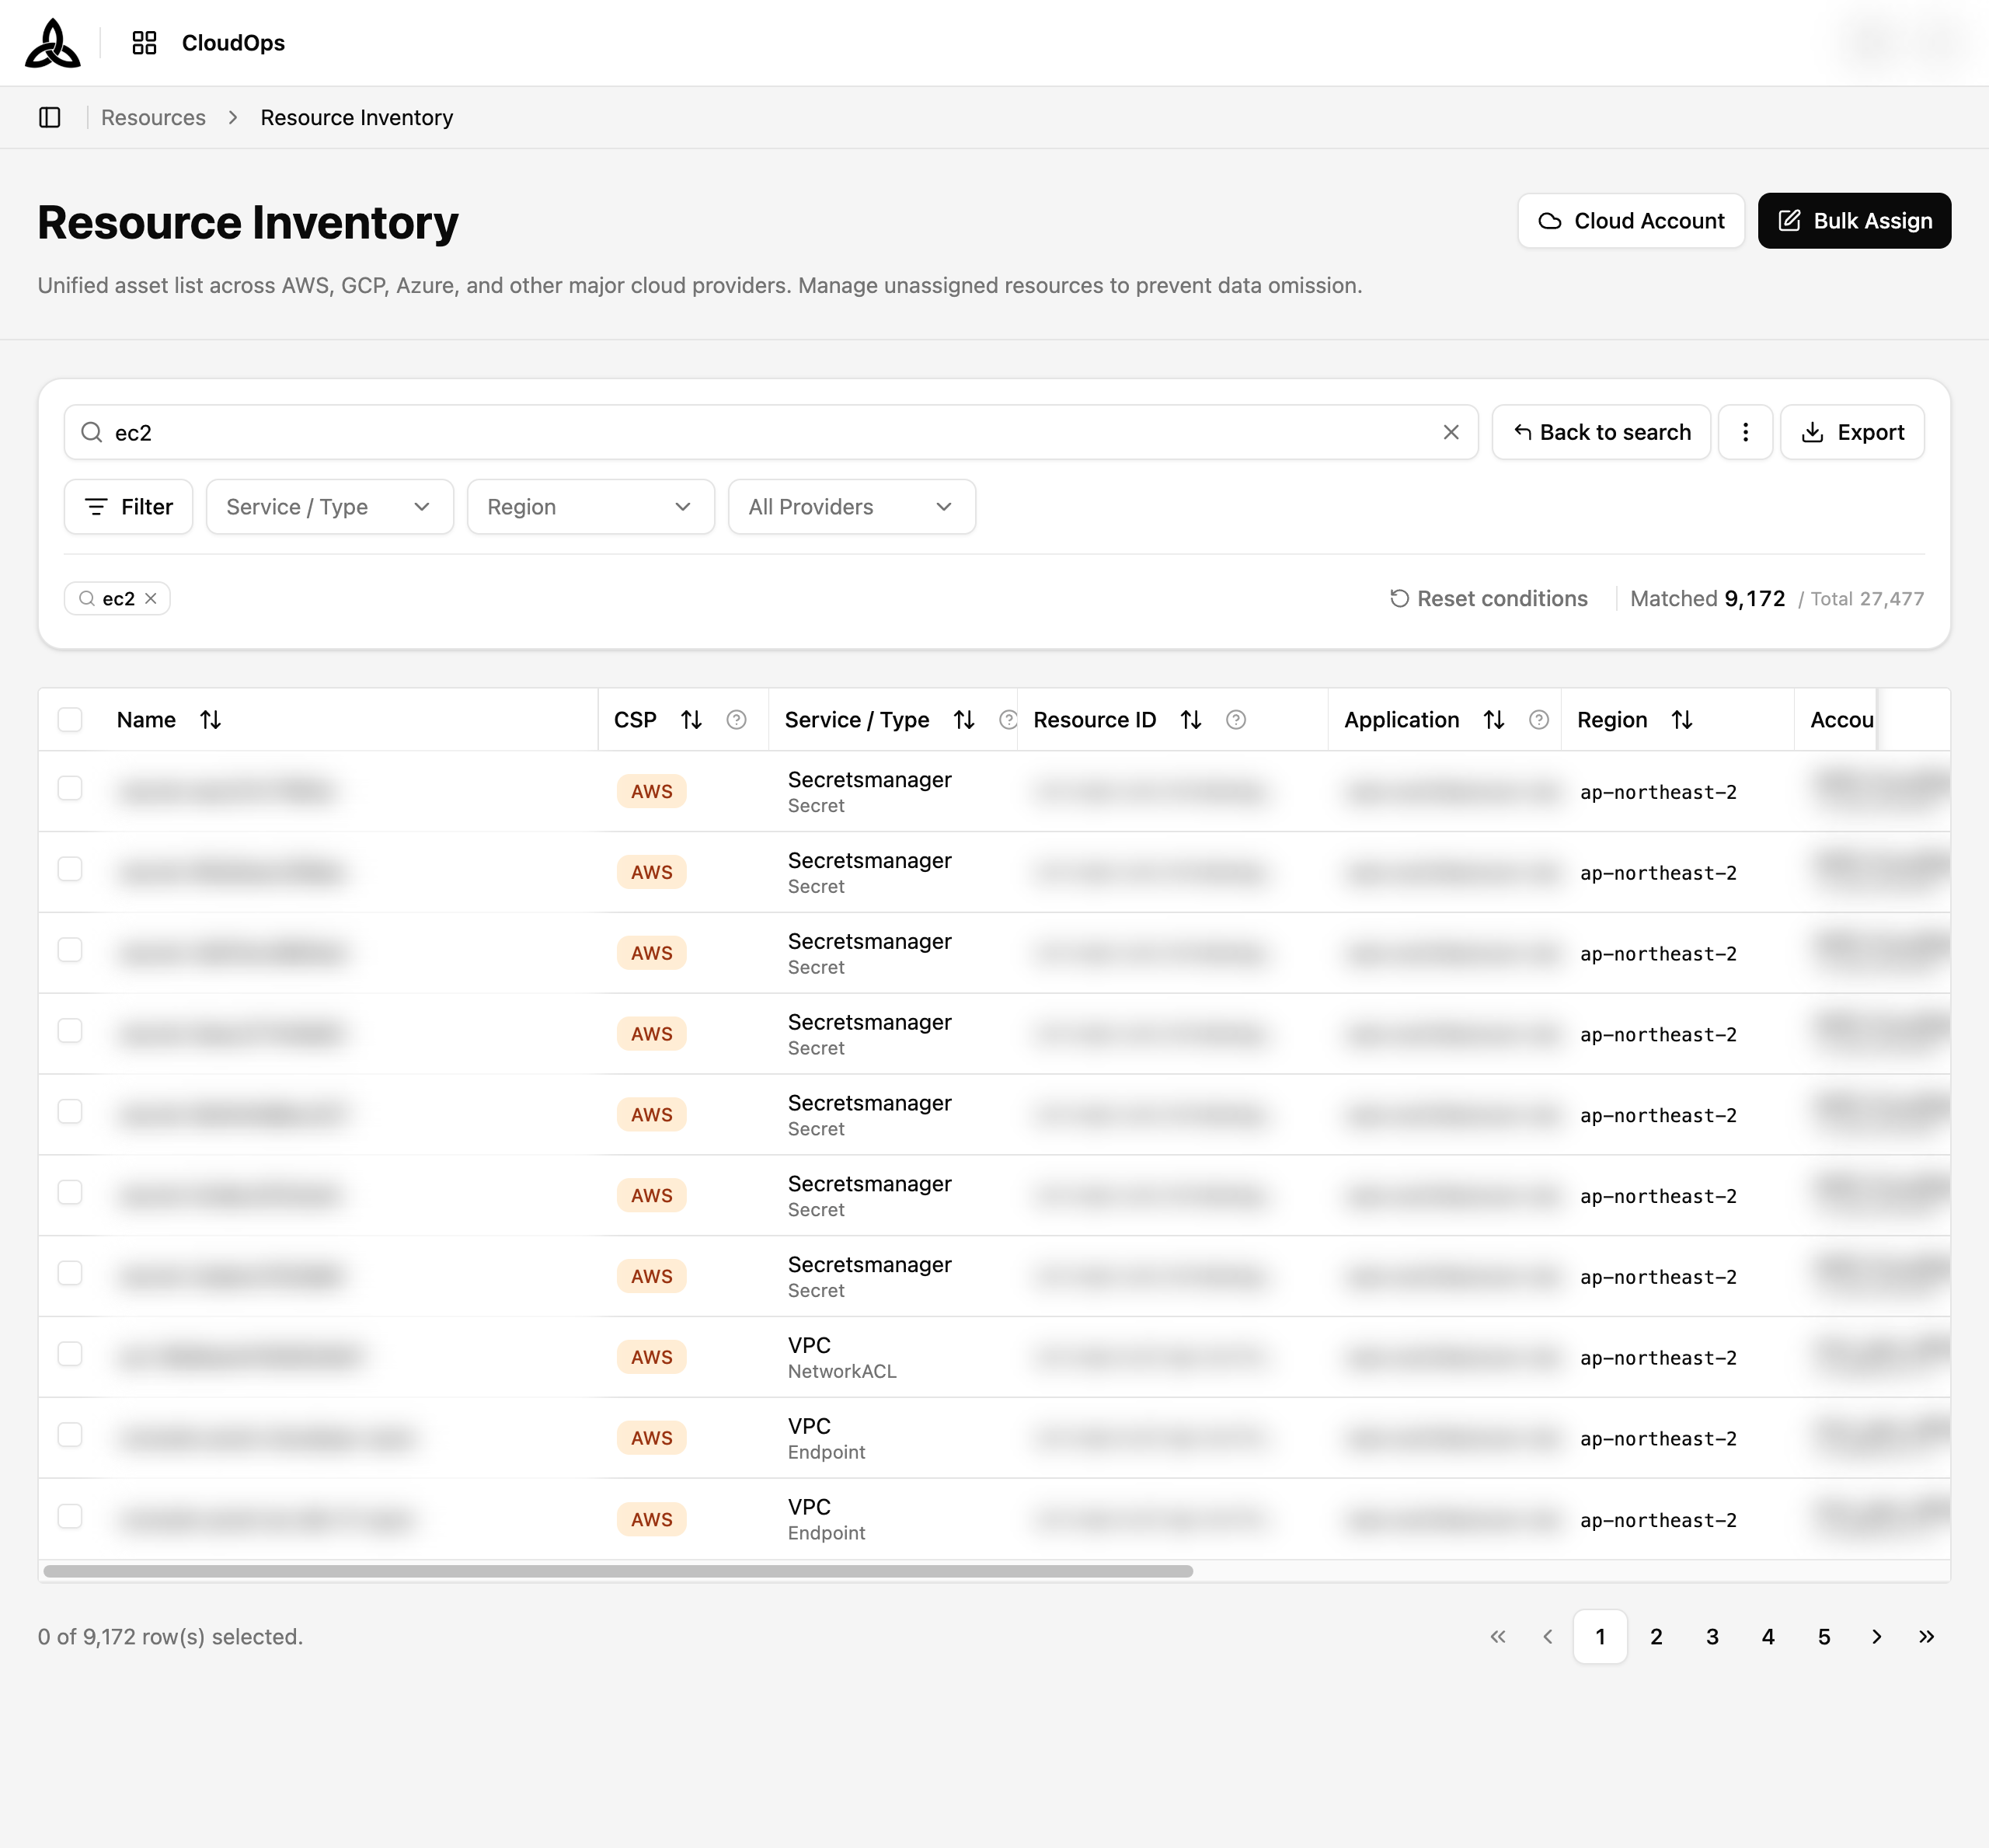
Applied conditions
Every condition currently in force is shown as a chip in one row, so you never have to open a panel to see what you are looking at.

| Element | Description |
|---|---|
| Saved-filter name | If the conditions came from a saved filter, its name leads the row. A Modified marker appears once you change them |
| Condition chip | One per condition — a magnifier icon for the search term, a filter icon for a filter. Select × to remove just that one |
| Reset conditions | Clears every condition at once |
| Matched / Total | How many resources match, against the whole inventory |
Table columns
| Column | Description |
|---|---|
| CSP | The cloud provider the resource belongs to |
| Service / Type | The provider’s service classification |
| Resource ID | The identifier the provider assigned |
| Application | The application the resource is assigned to. Resources map to leaf applications only |
| Region | The provider region |
| Name | The resource name. Select it to open the detail page |
| Account | The cloud account the resource belongs to |
| Status | Active, Disconnected, Deleted, External, or Virtual |
| Last Synced | When the resource was last collected |
| CSP Tags | Tags set on the resource in the provider’s own console |
| CloudOps Tags | Tags CloudOps manages separately for operations and classification |
The leading columns stay pinned to the left while you scroll the table sideways, so a resource’s identity never scrolls away from the values you are reading.
Exporting the List
[Export] on the toolbar turns what you are currently looking at into a file.
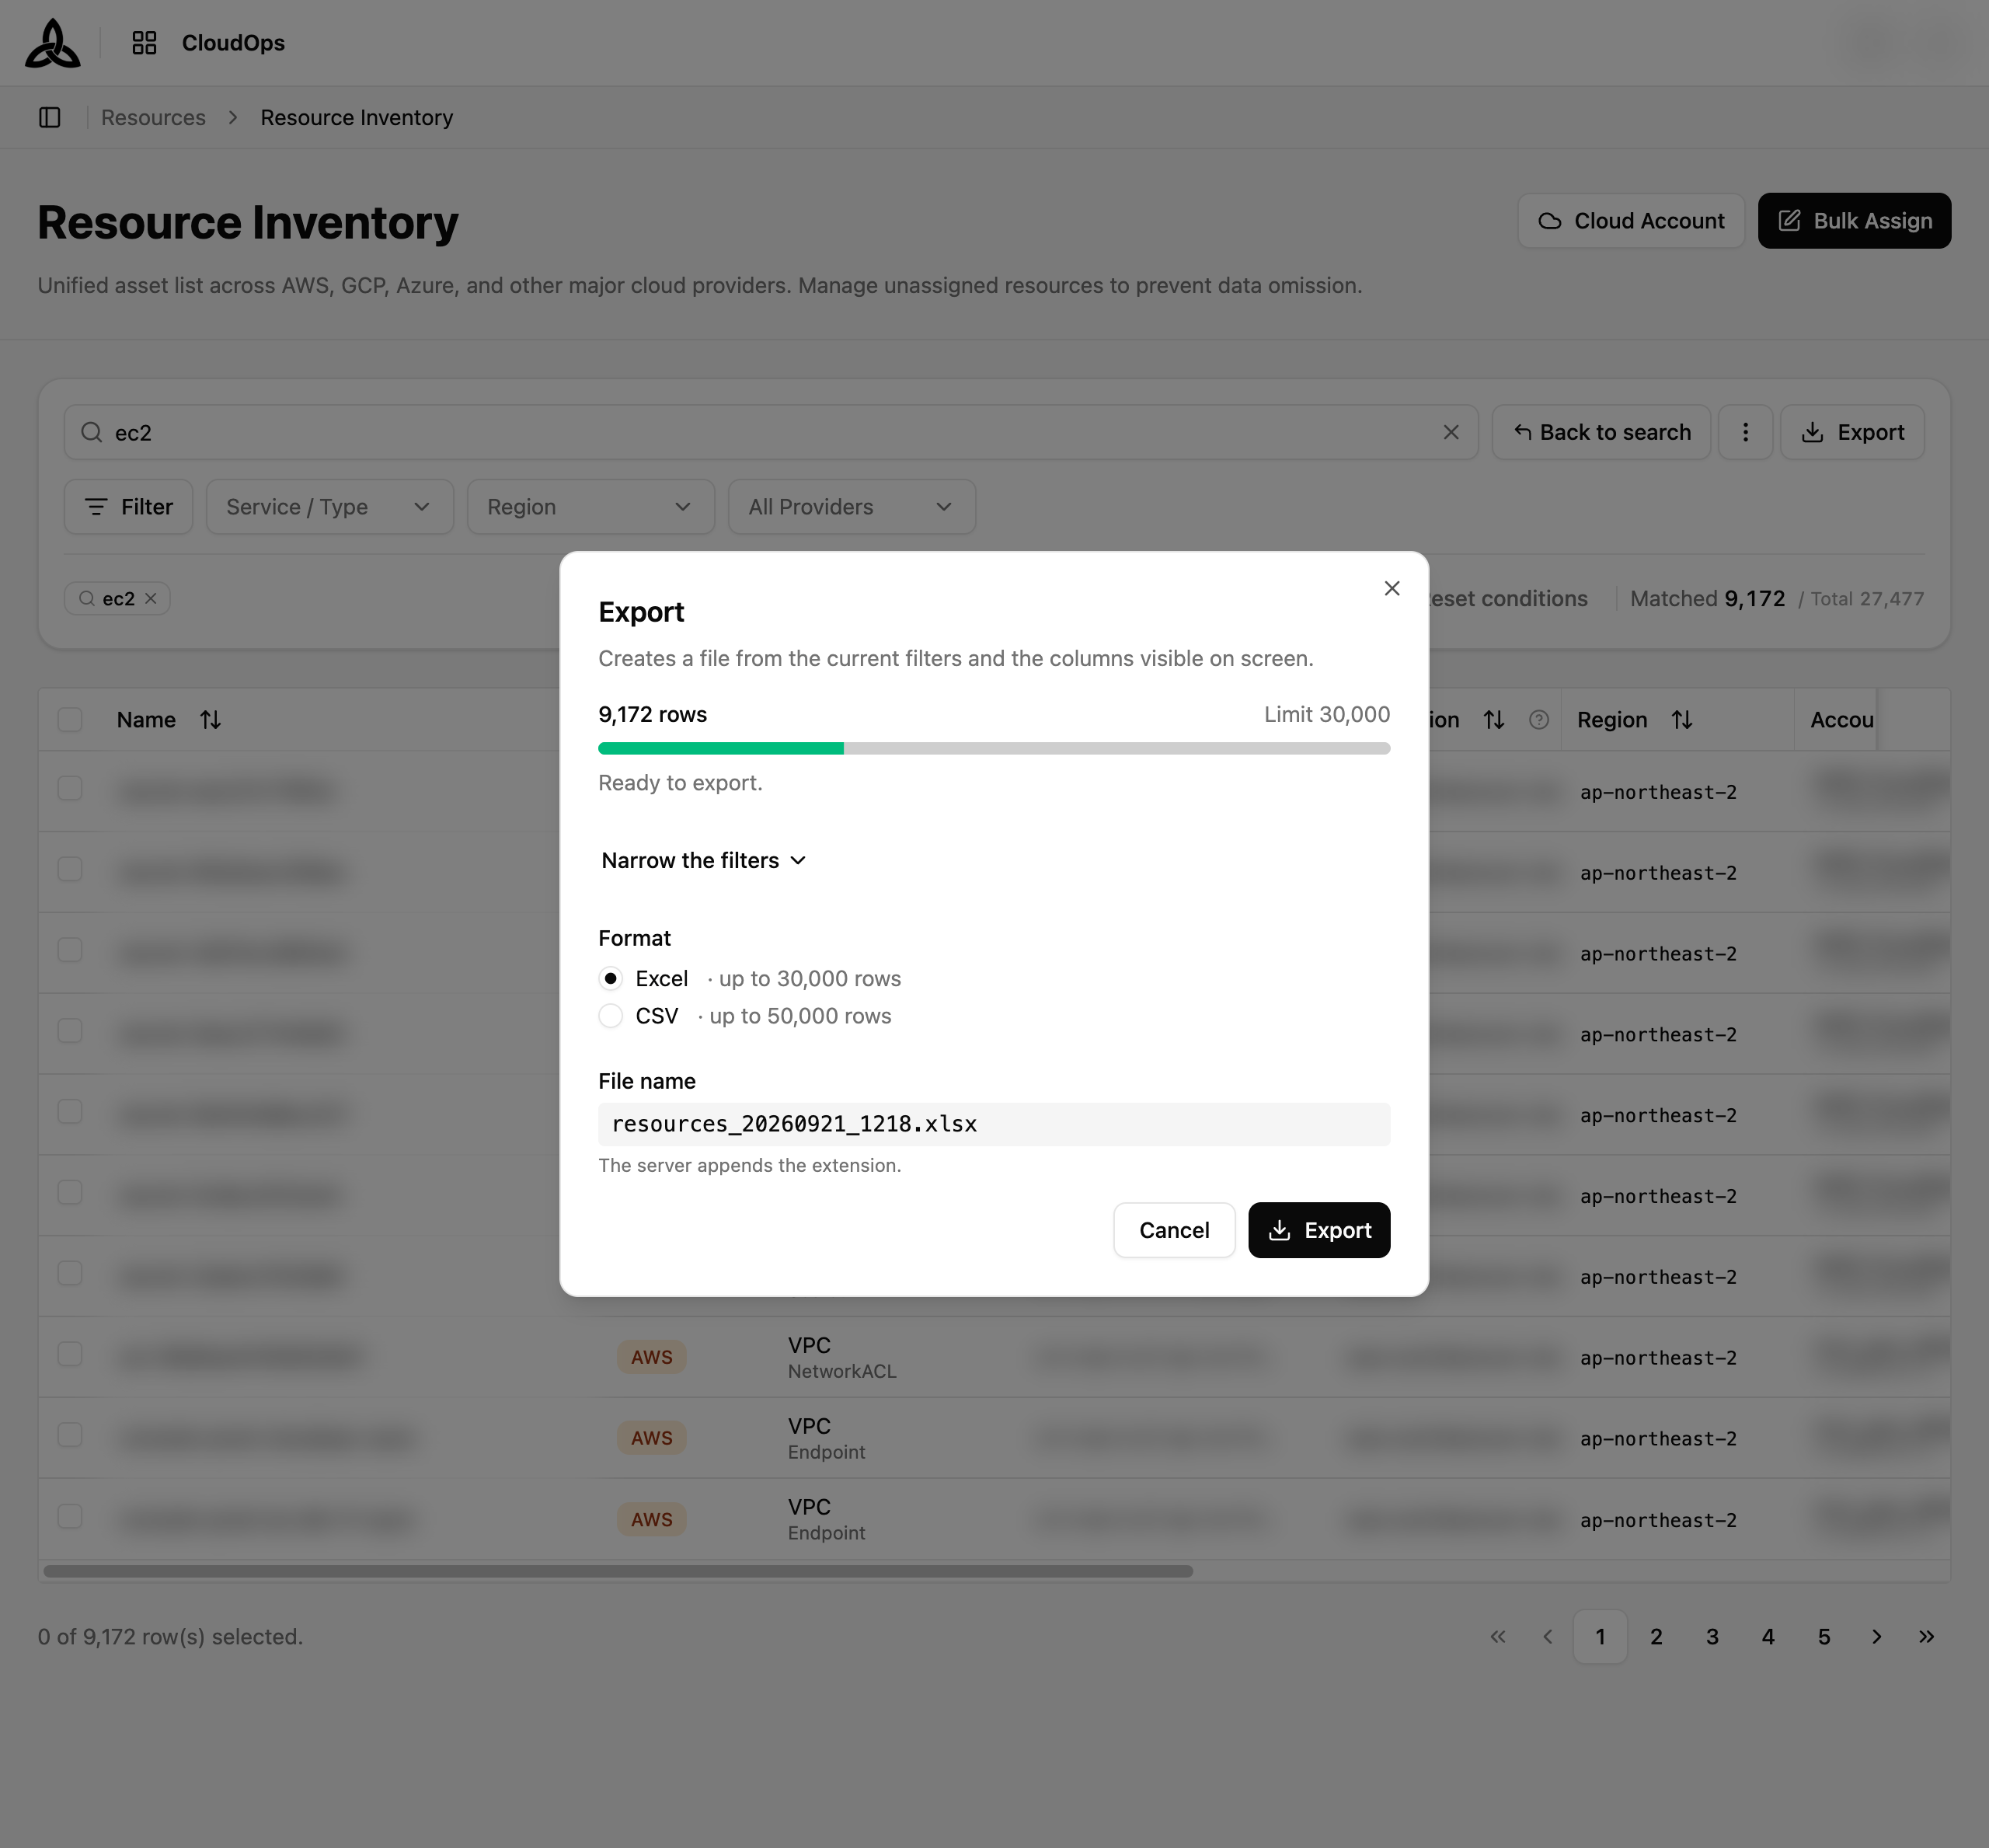
Selecting it offers the two formats; choosing one starts the export.
| Format | Row limit |
|---|---|
| Excel | 30,000 rows |
| CSV | 50,000 rows |
The file is built from the filters you have applied and the columns visible on screen — narrowing the list narrows the file, and a column turned off in display settings does not appear in it. At least one column has to be on.
When the list is too big
Going over the row limit stops the export rather than silently truncating it, and you are told by how much. Narrow the filters — or turn off columns — and run it again.
The file downloads on its own once it is ready.
Filters
Select [Filter] to open the filter panel. The left rail lists the axes you can narrow by; the right side lists that axis’s values.
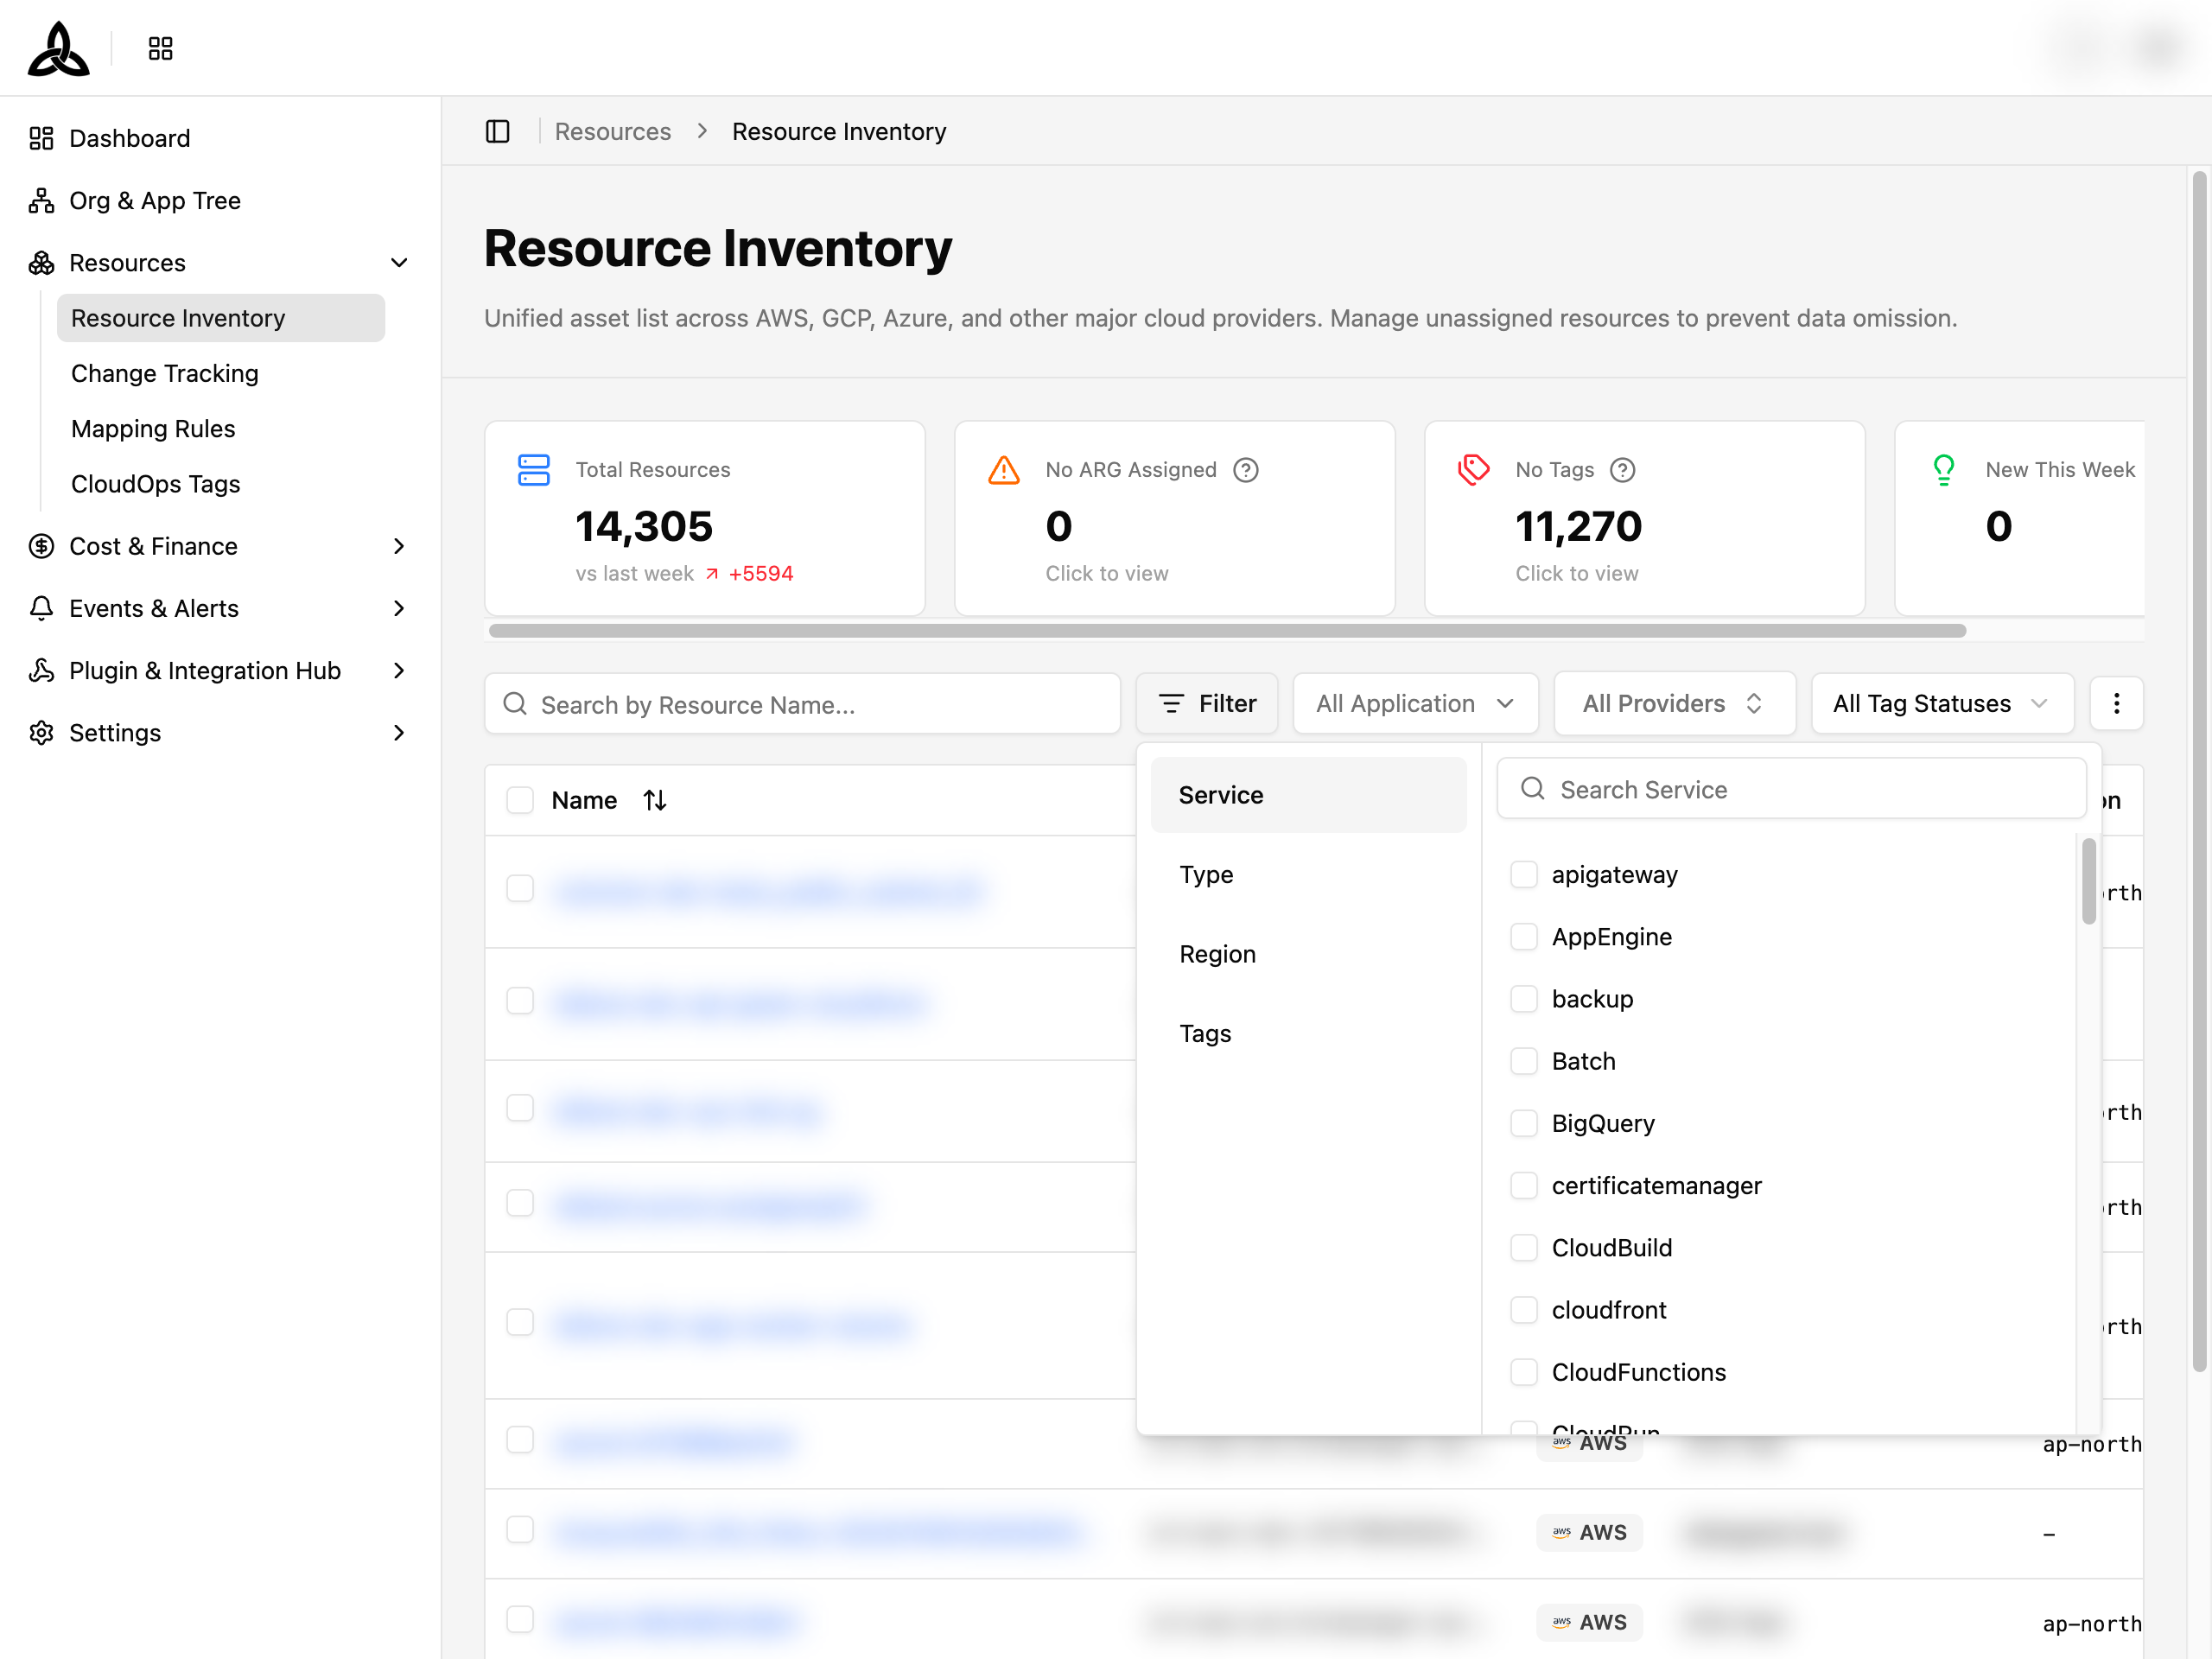
Use the star next to an axis to pin it as a quick filter, which puts it beside the [Filter] button for direct access.
Saved Filters
The filter panel header carries Saved filters and [Save]. Saving keeps the current search and filters together under a name so you can bring them back later.
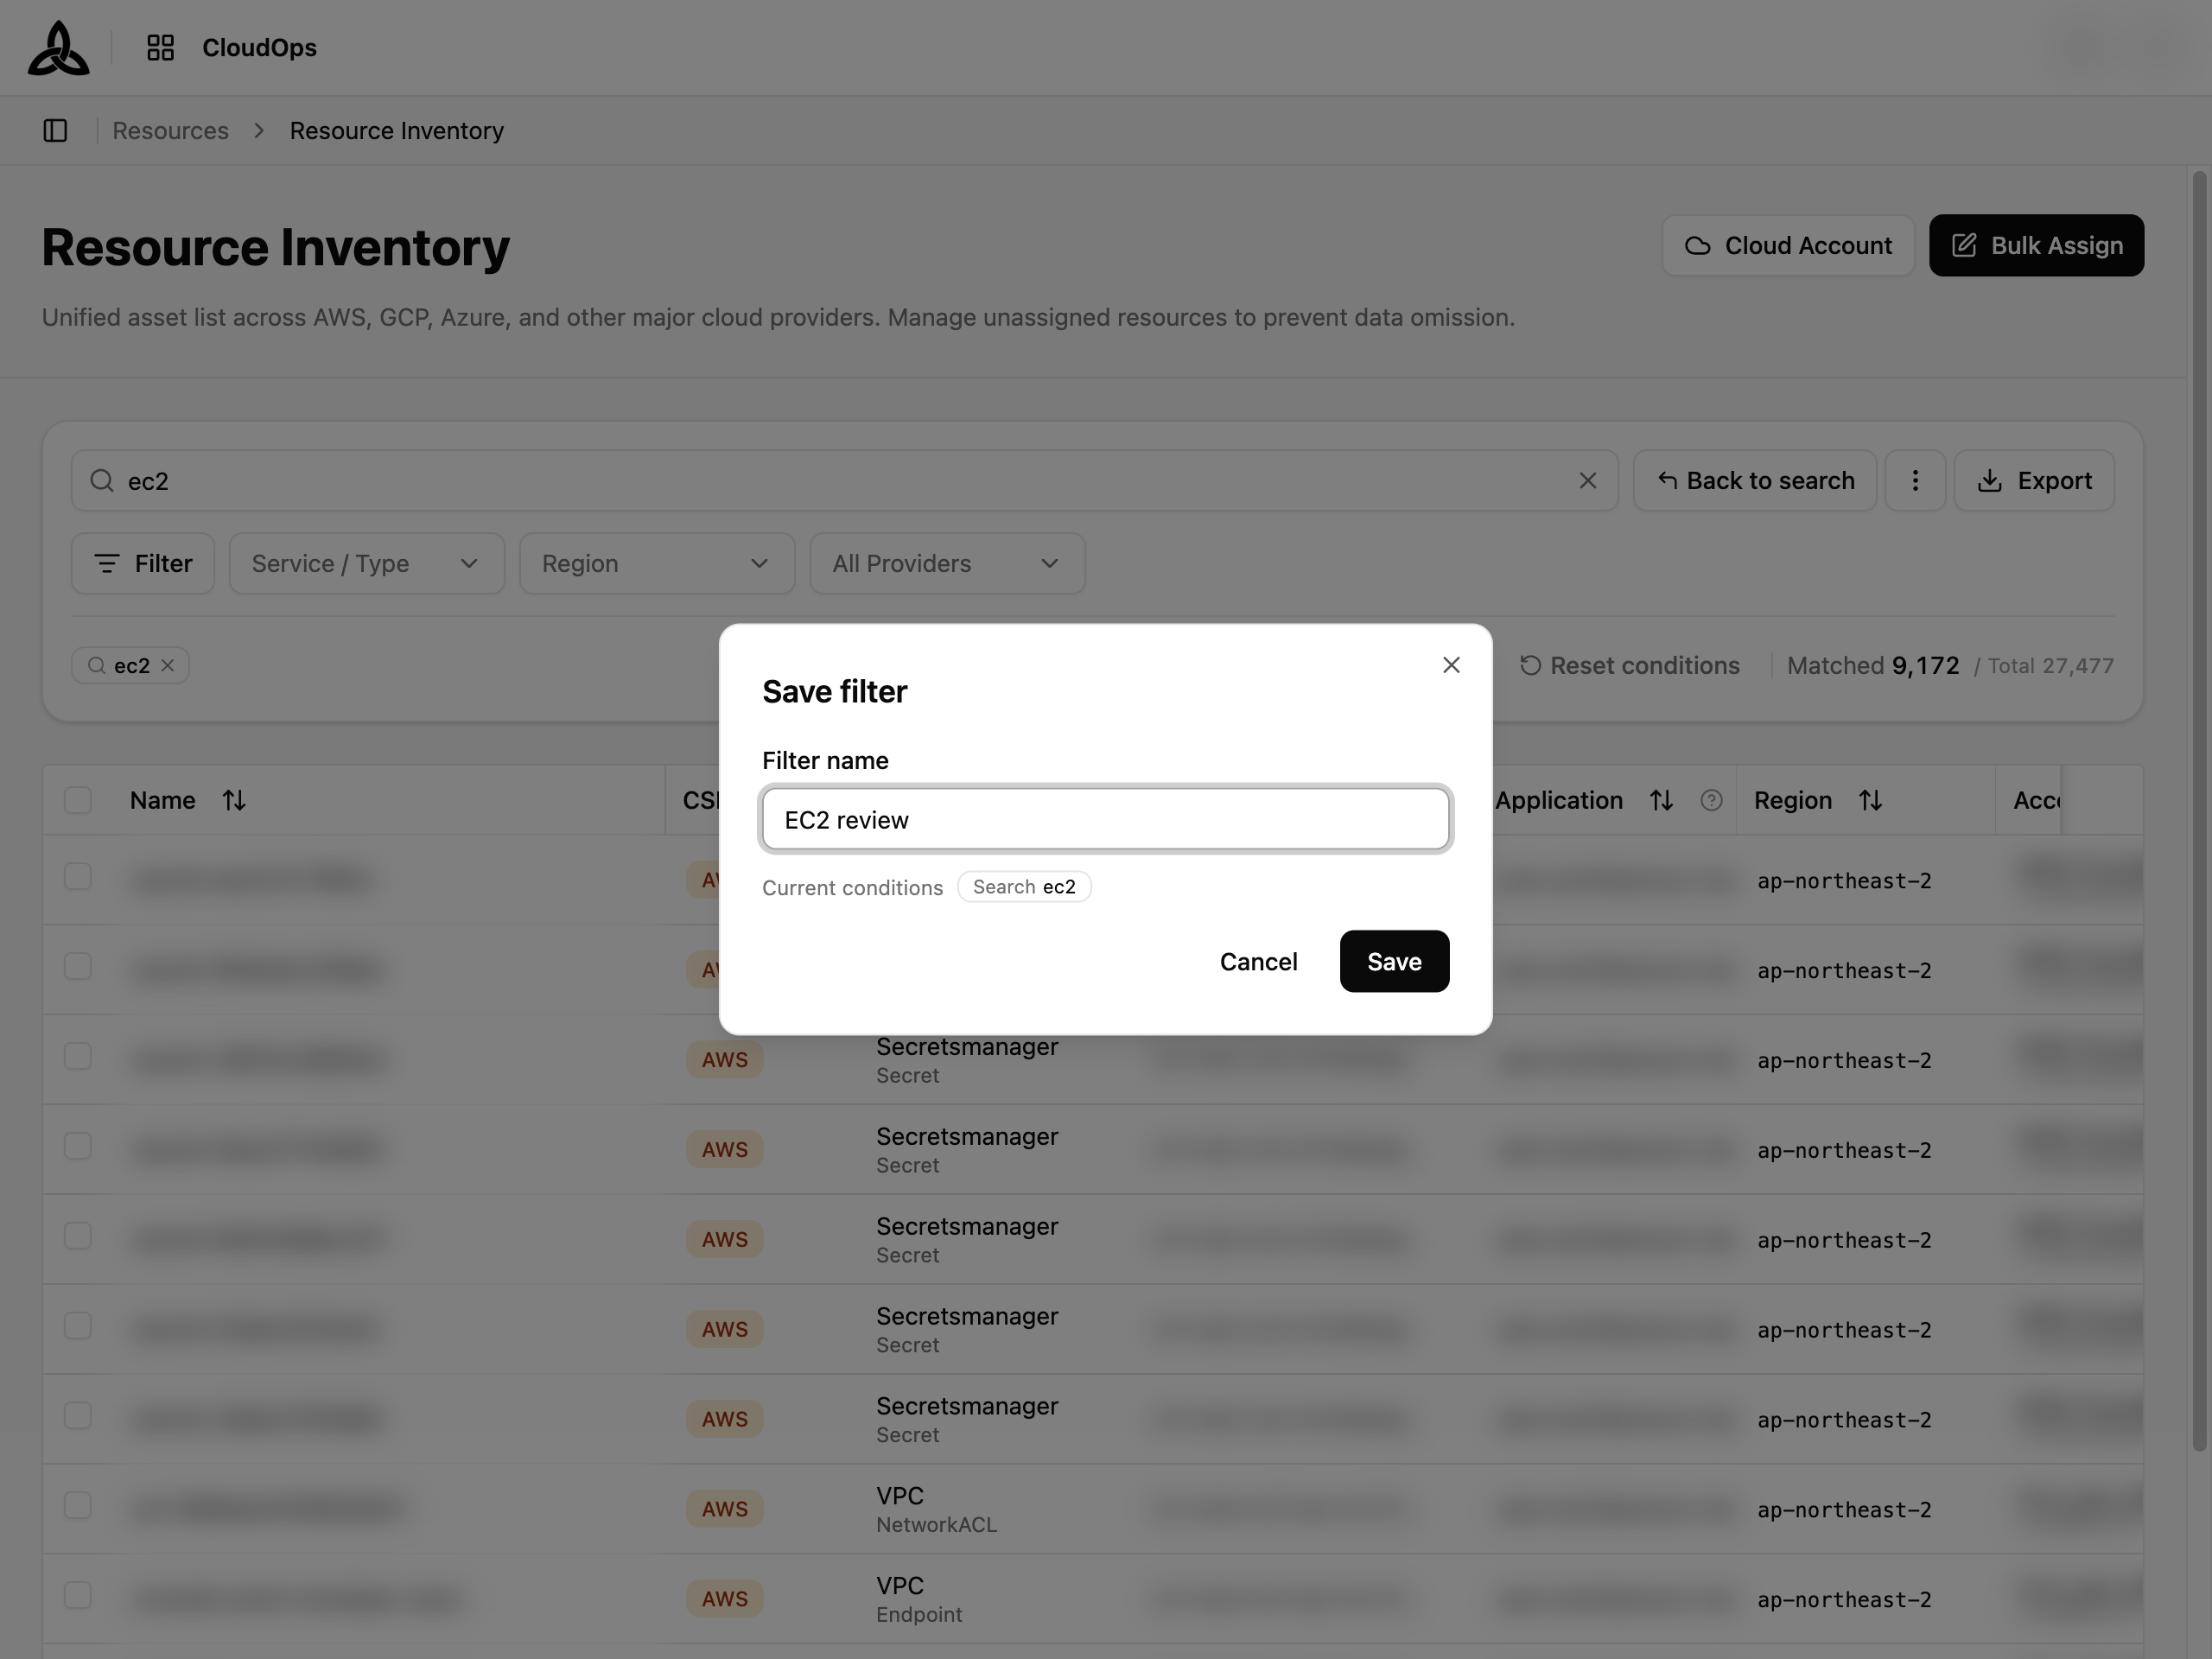
The dialog shows the conditions being saved before you commit. Reusing an existing name overwrites that filter’s conditions.
From the Saved filters dropdown you can apply, rename by overwriting, or delete a filter, and sort the list by most recently used or by name. Deleting a saved filter removes the stored conditions only — whatever is currently applied on screen stays as it is.
Selecting Resources
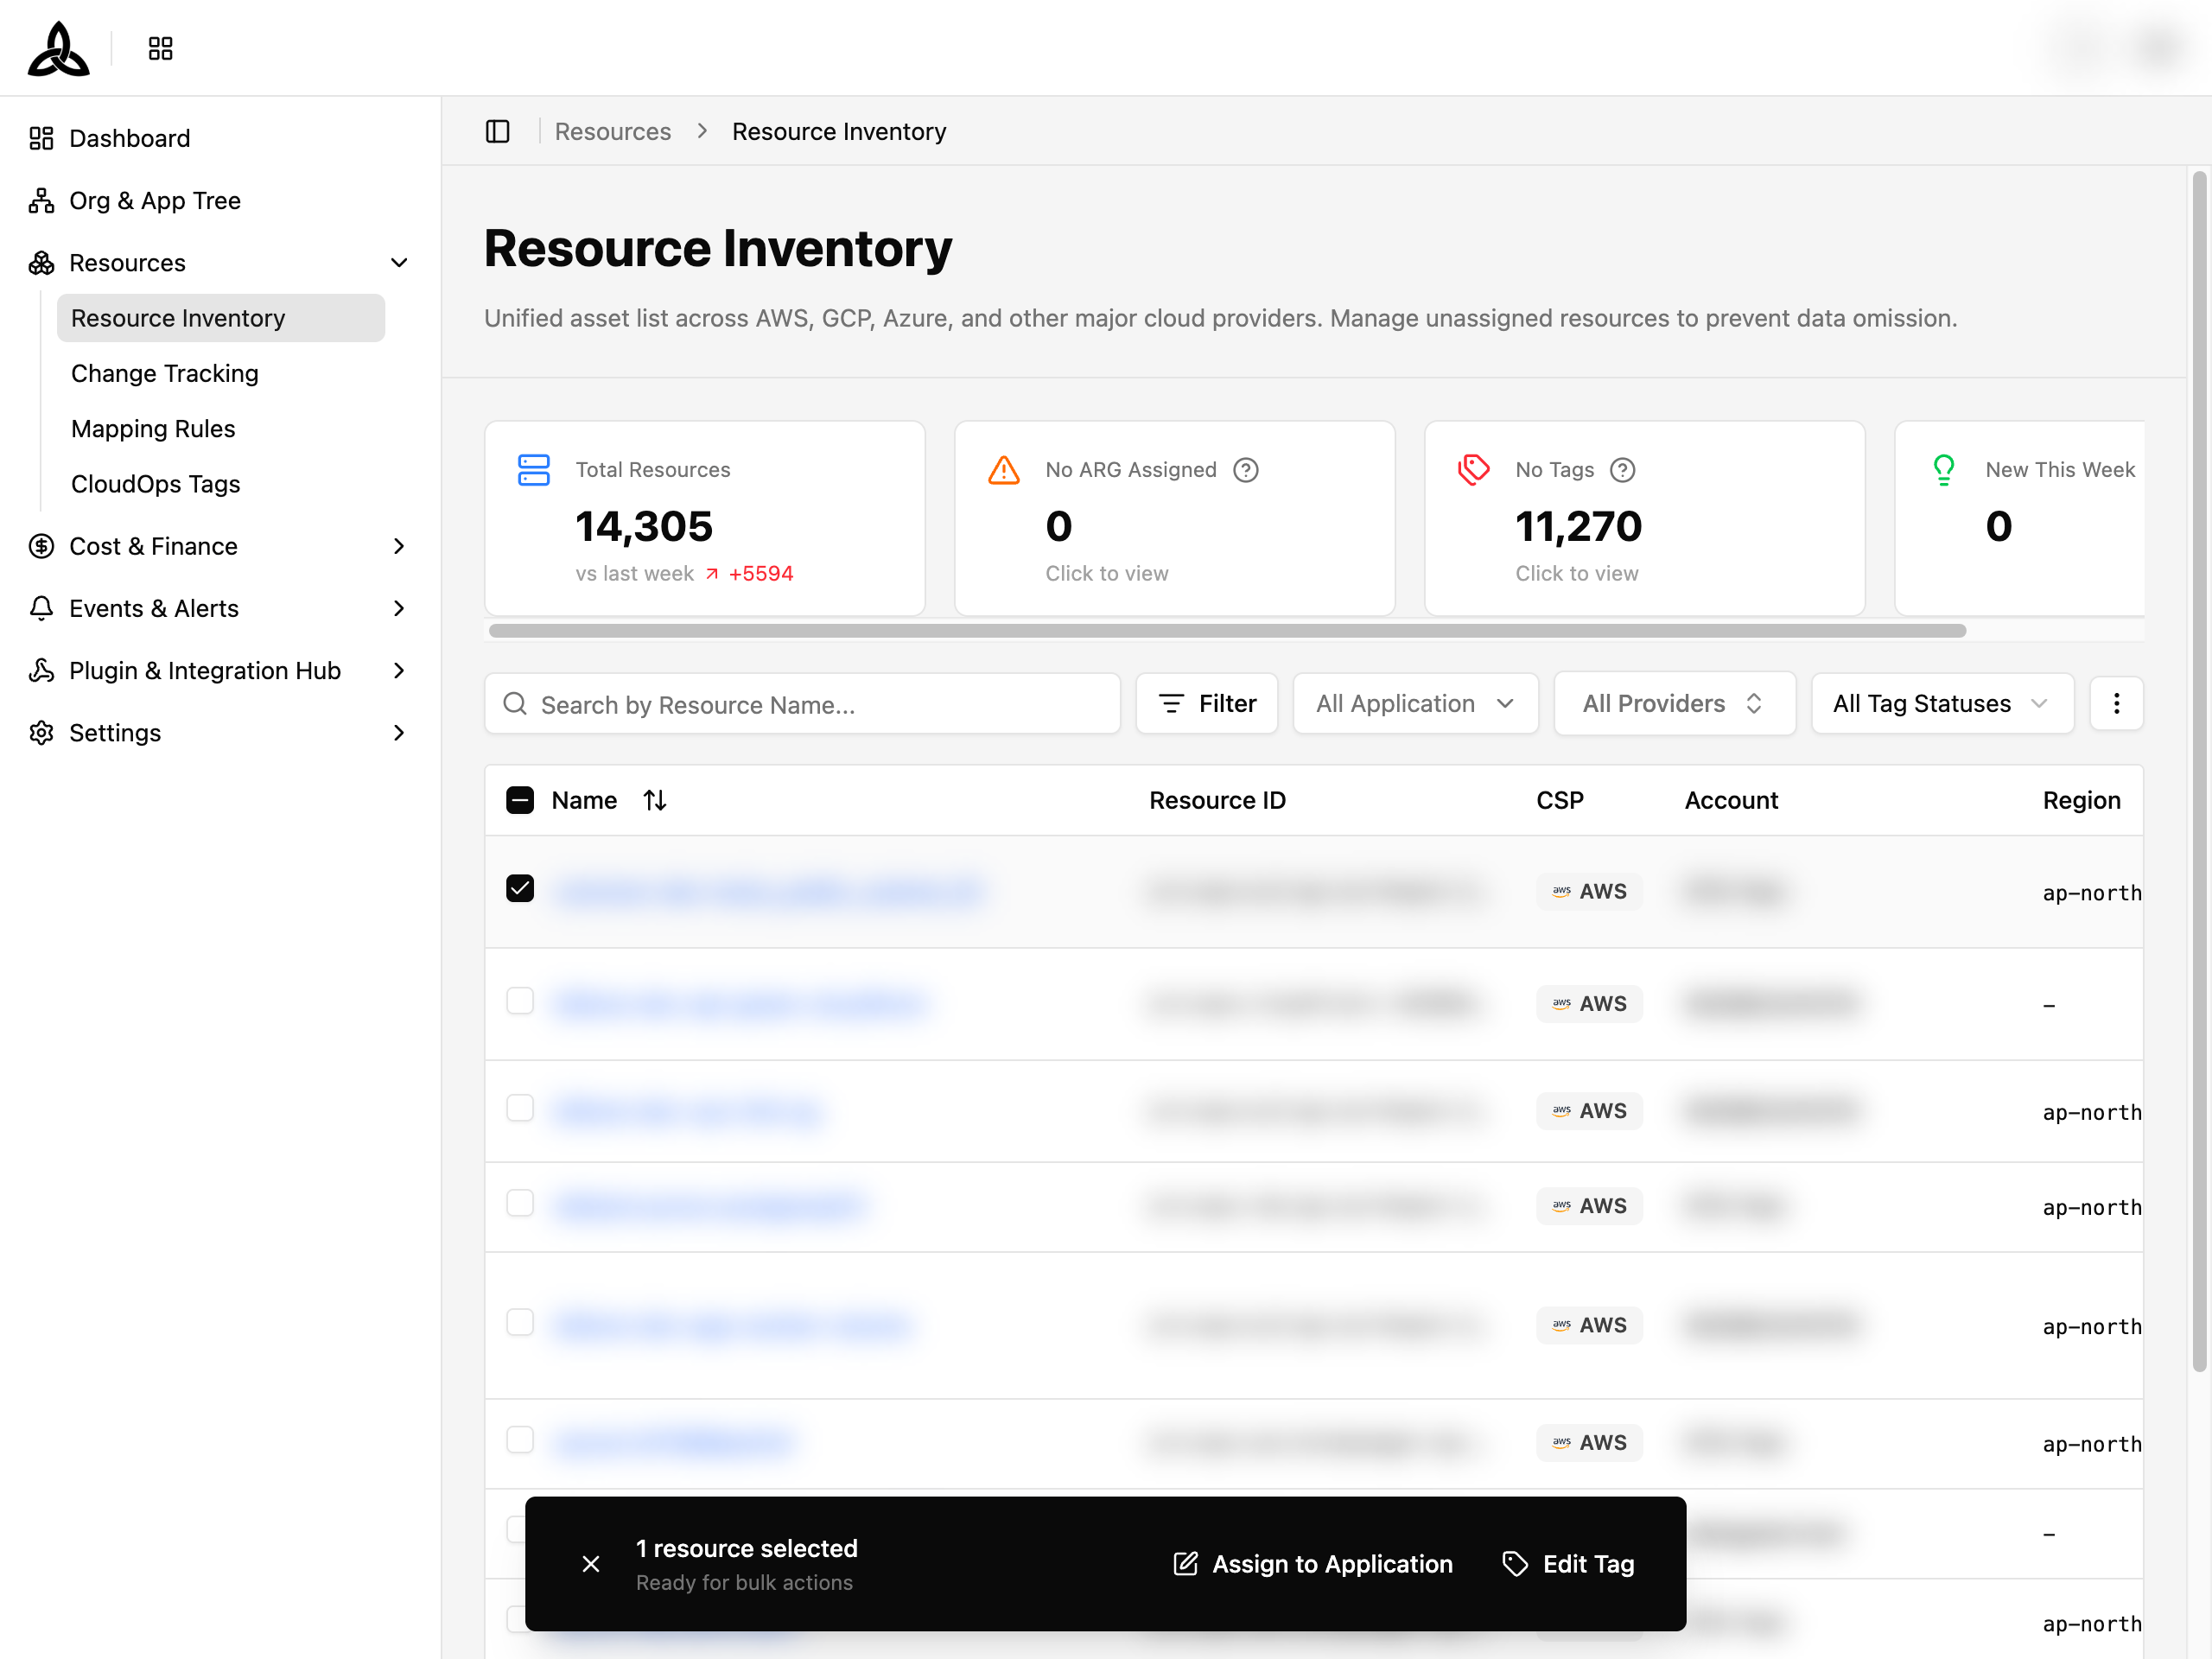
Selecting rows reveals an action bar along the bottom.
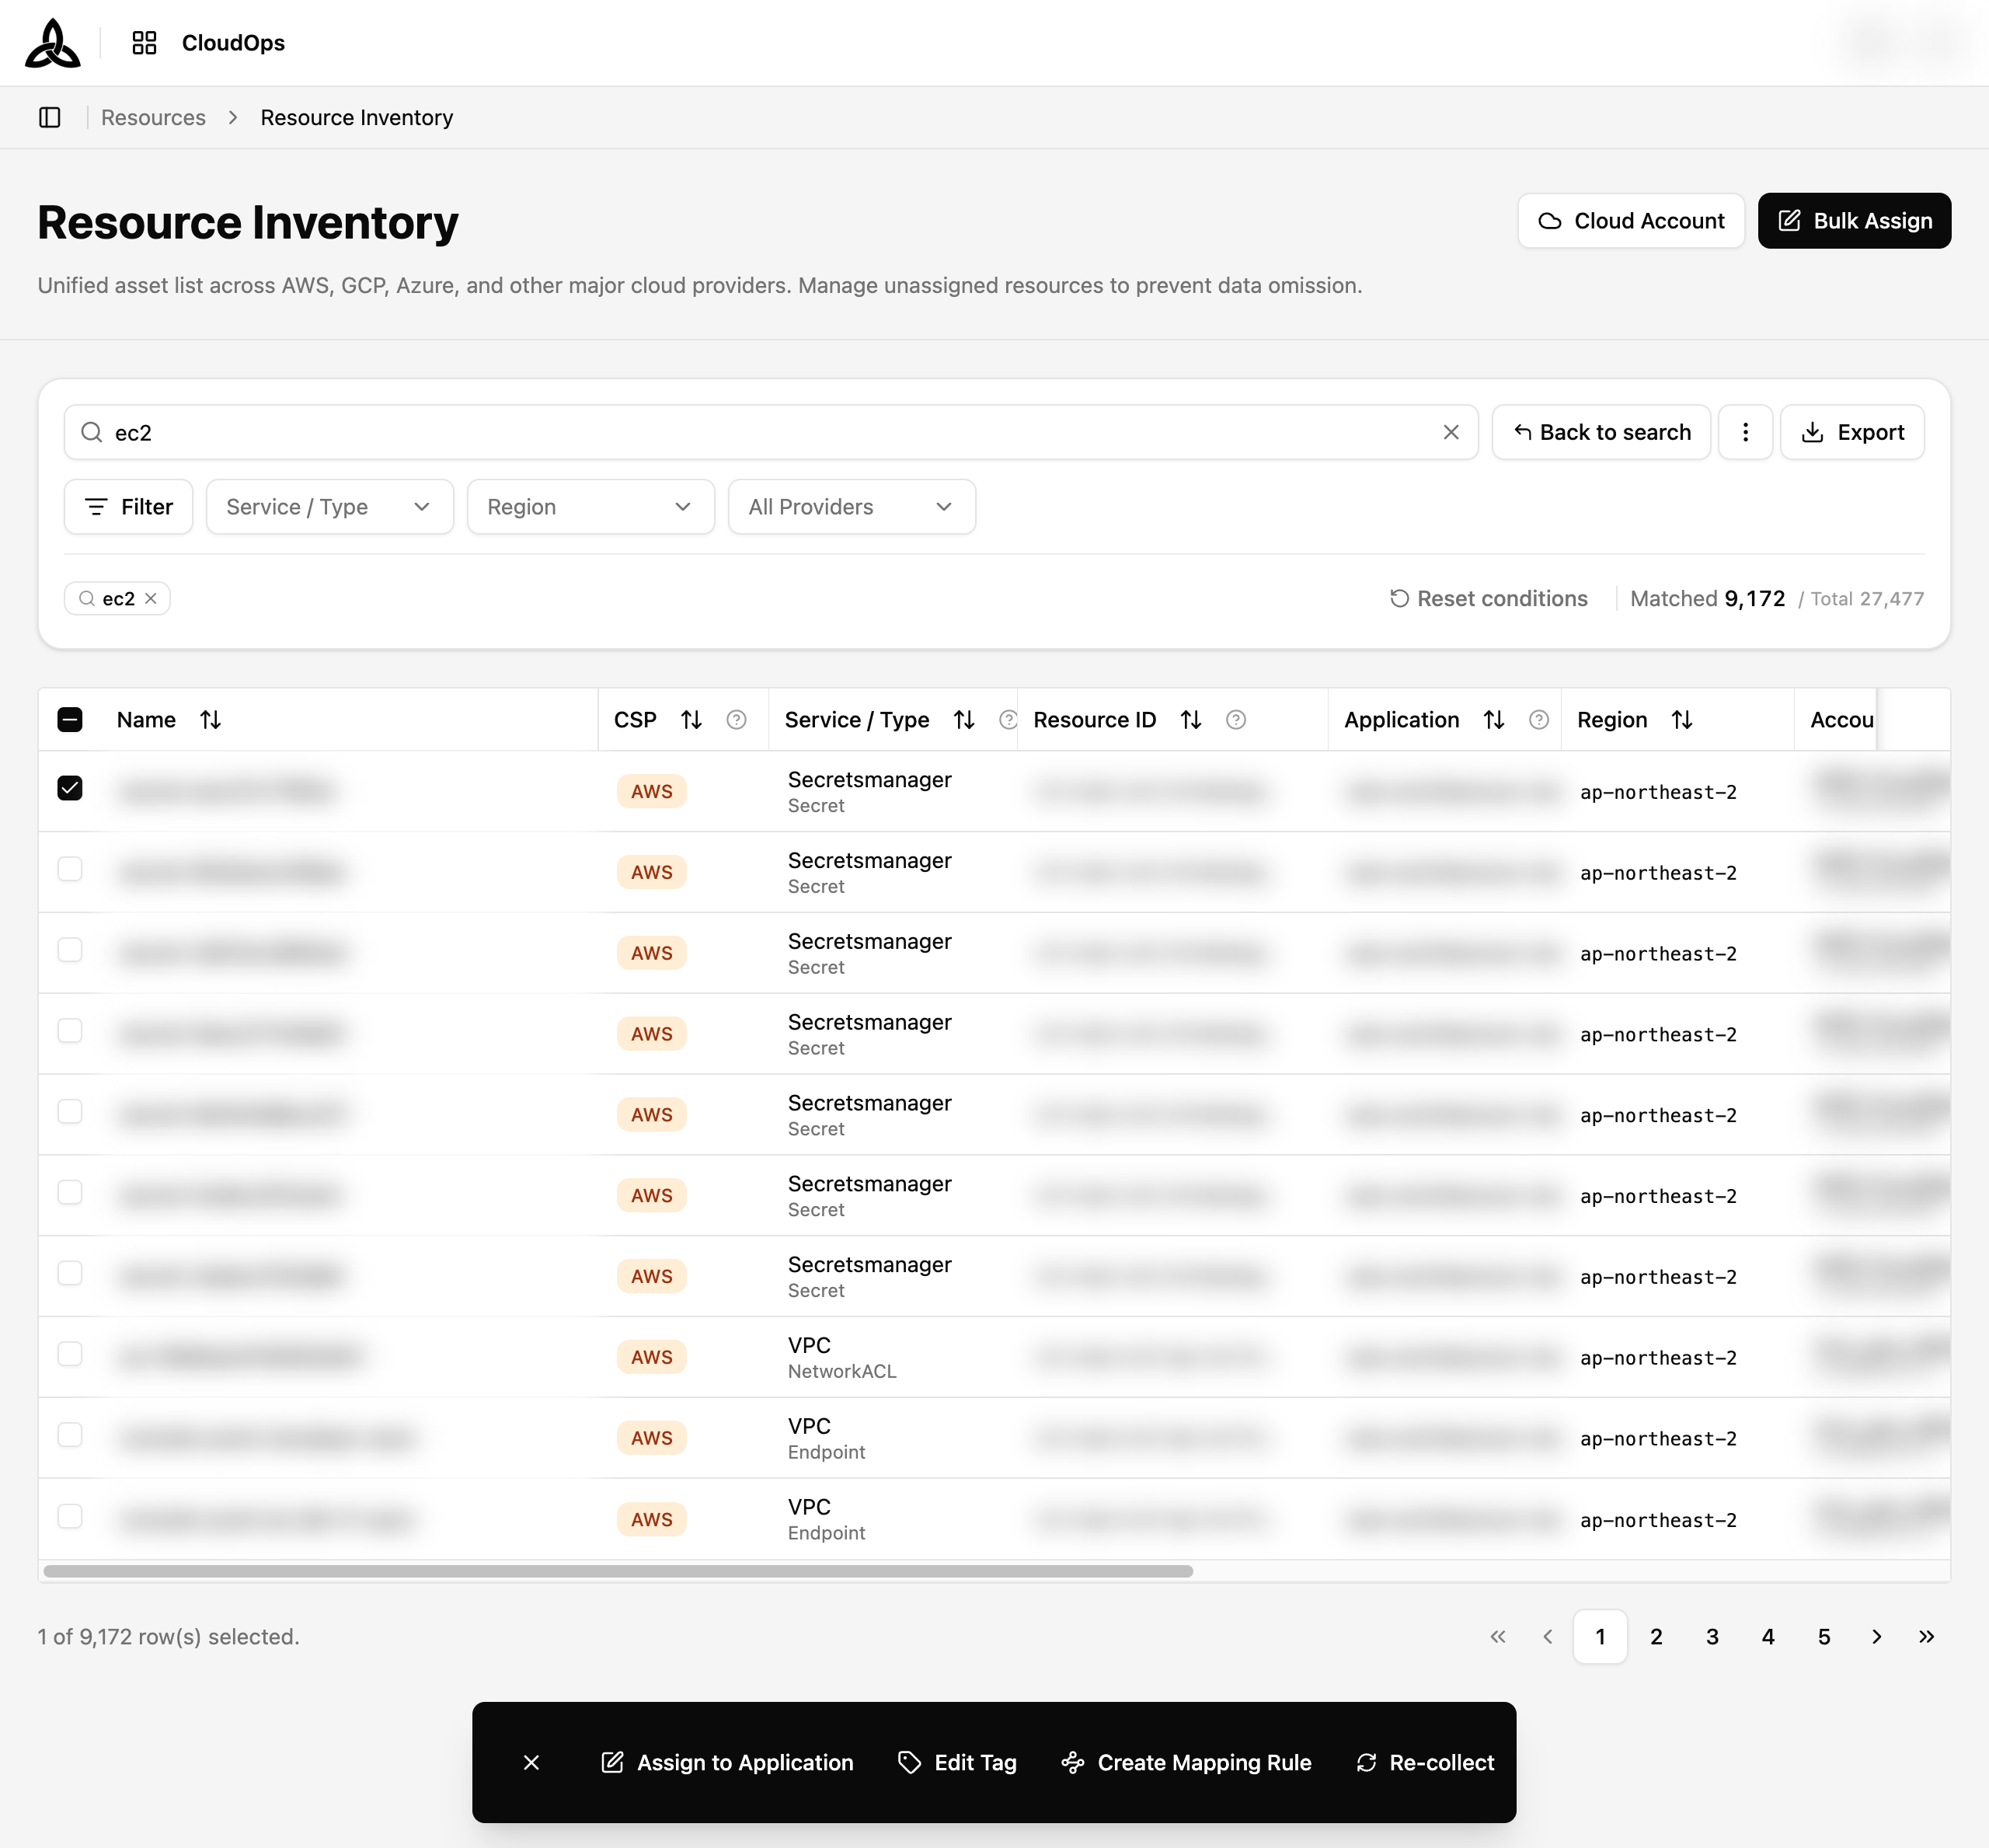
| Action | Description |
|---|---|
| Assign to Application | Assign the selected resources to a leaf application |
| Edit Tag | Edit CloudOps tags on the selected resources |
| Create Mapping Rule | Open the mapping-rule create screen, so a rule can do this automatically next time |
| Re-collect | Collect just the selected resources again — see below |
Re-collecting Selected Resources
Collection normally runs on a schedule for a whole account. Re-collect asks CloudOps to go and read specific resources again, right now — useful when you have just changed something in the provider console and do not want to wait for the next scheduled run.
Where you can start it
The same control appears wherever you might notice a resource is out of date:
| Entry point | Where |
|---|---|
| Resource list | The bottom action bar, after selecting rows |
| Resource detail | The [Re-collect] button in the page header |
| Architecture node detail | The collection section of a node’s detail panel — see Organization & Application |
| Ticket detail | The collection rows on a ticket — see Ticket Board |
| Cloud account | The account’s own collection controls — see Cloud Account |
What happens
| Outcome | Meaning |
|---|---|
In progress | The resource is being collected again |
Completed (updated) | Collection finished and the latest data is reflected |
Completed (deletion confirmed) | The resource is confirmed gone from the provider and is marked deleted |
Unverified | Existence could not be confirmed — a missing permission or a transient error. The resource is left unchanged |
Resources already marked Deleted cannot be re-collected — the deletion was itself the result of a collection, so there is nothing left to read. If a request cannot start, the reason is shown: the account could not be found, its credentials are invalid or expired, or the resource is not in the account any more (in which case collect the whole account first).
Resource Detail
Selecting a resource Name opens its detail page.
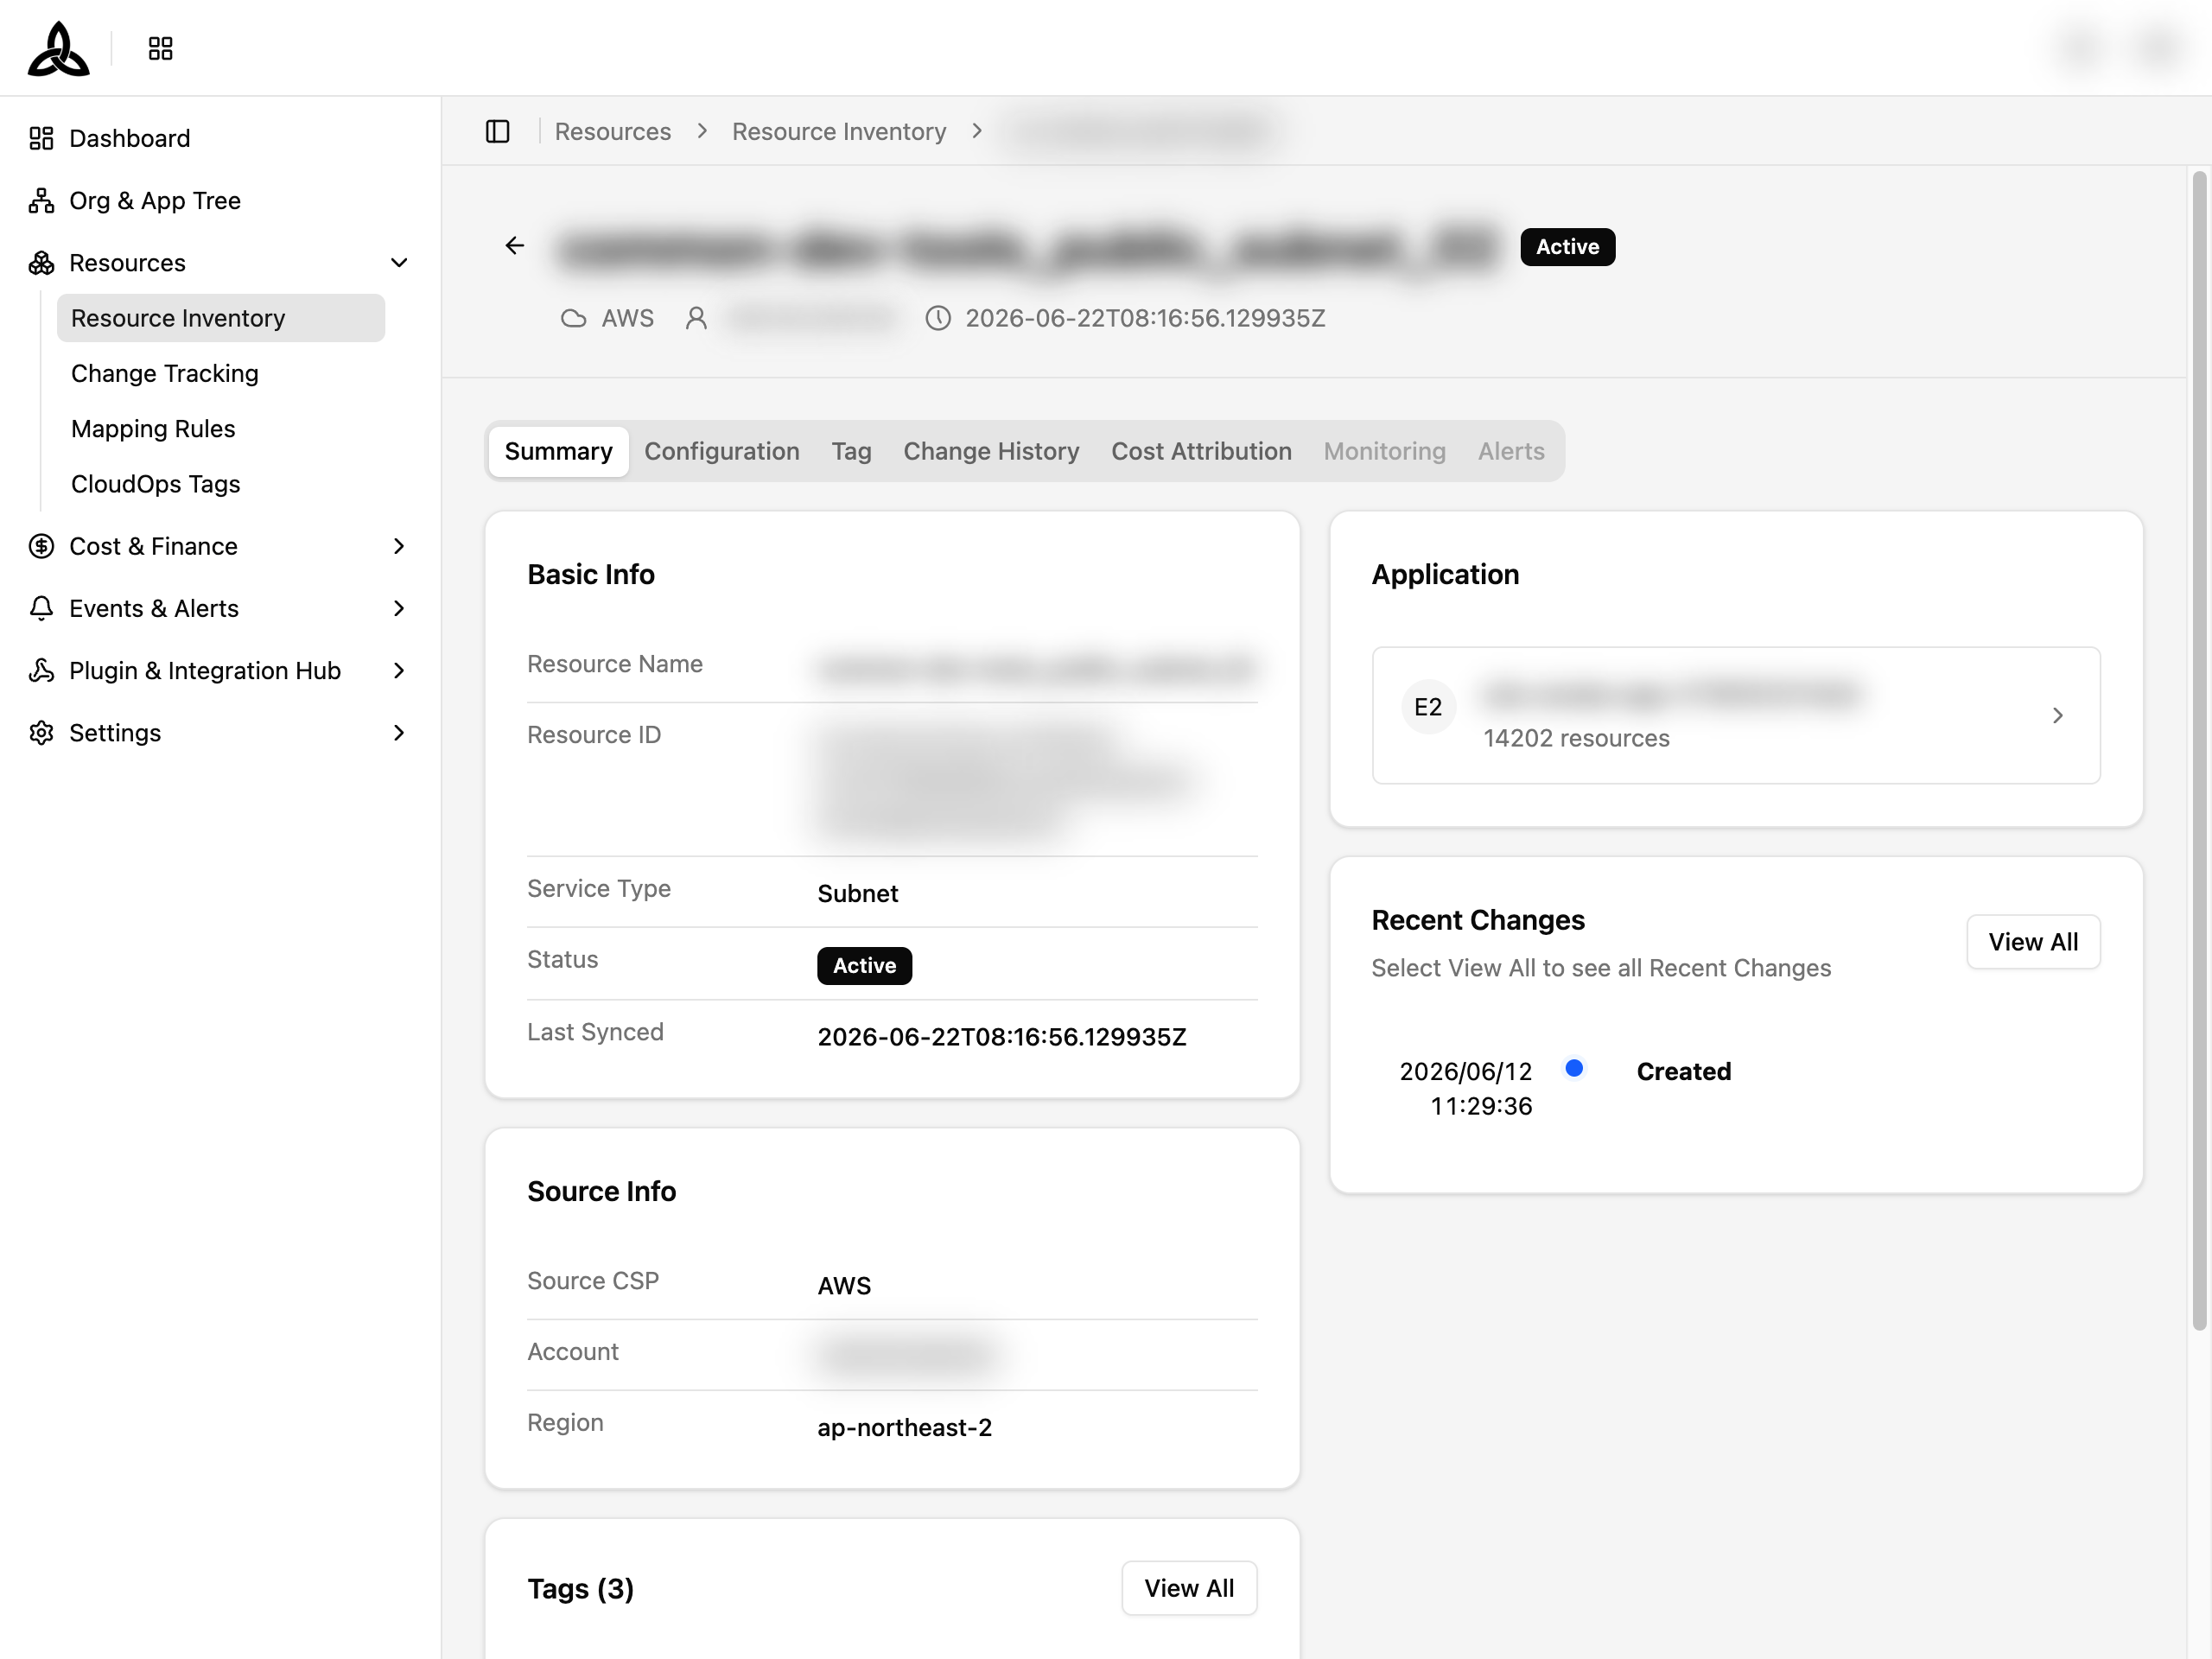
The header carries the resource name, its status, and [Re-collect].
| Tab | Description |
|---|---|
| Summary | Basic info, source info, tags, the owning application, and recent changes |
| Configuration | The resource’s configuration as collected |
| Tag | CSP tags and CloudOps tags in full |
| Change History | What changed on this resource over time |
| Cost Attribution | How this resource’s cost is attributed |
Bulk Assign
[Bulk Assign] in the page header opens a dedicated screen for attaching many resources to one application at once.
Narrow the candidates on the left with search and filters, then pick the target leaf application on the right and assign. Include resources assigned to other apps widens the candidate list to resources that already belong somewhere, so you can move them. A Reason can be recorded with the change.
Related
Rules that assign resources to applications automatically are managed on Mapping Rules. The accounts resources are collected through are managed on Cloud Account.