Users
On the [IAM > Users] page, you can invite new users to your workspace, and view and manage all users.
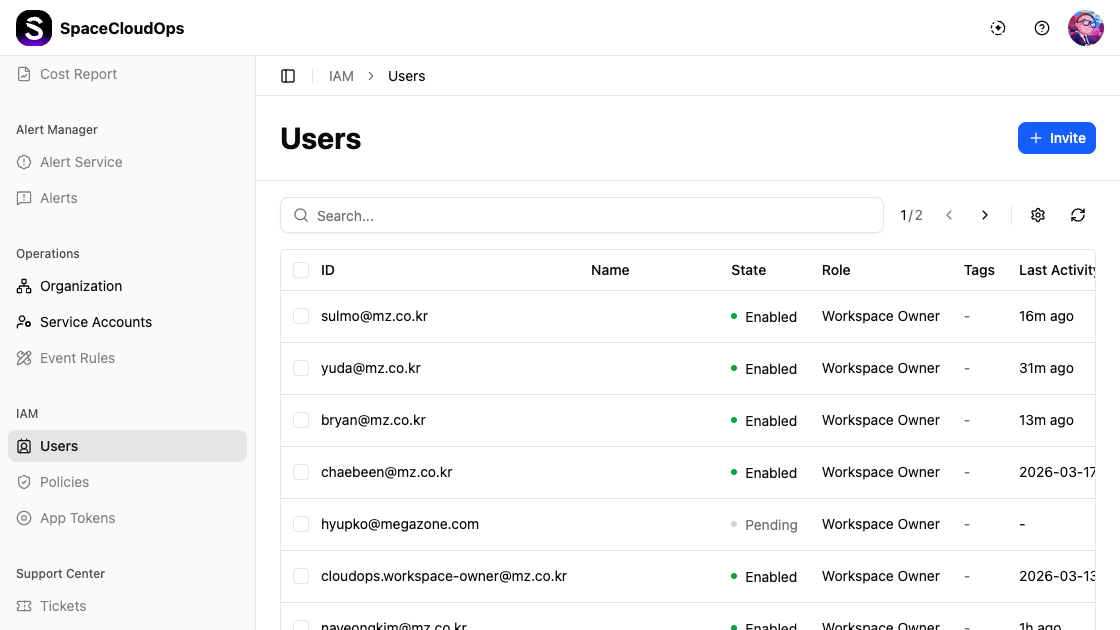
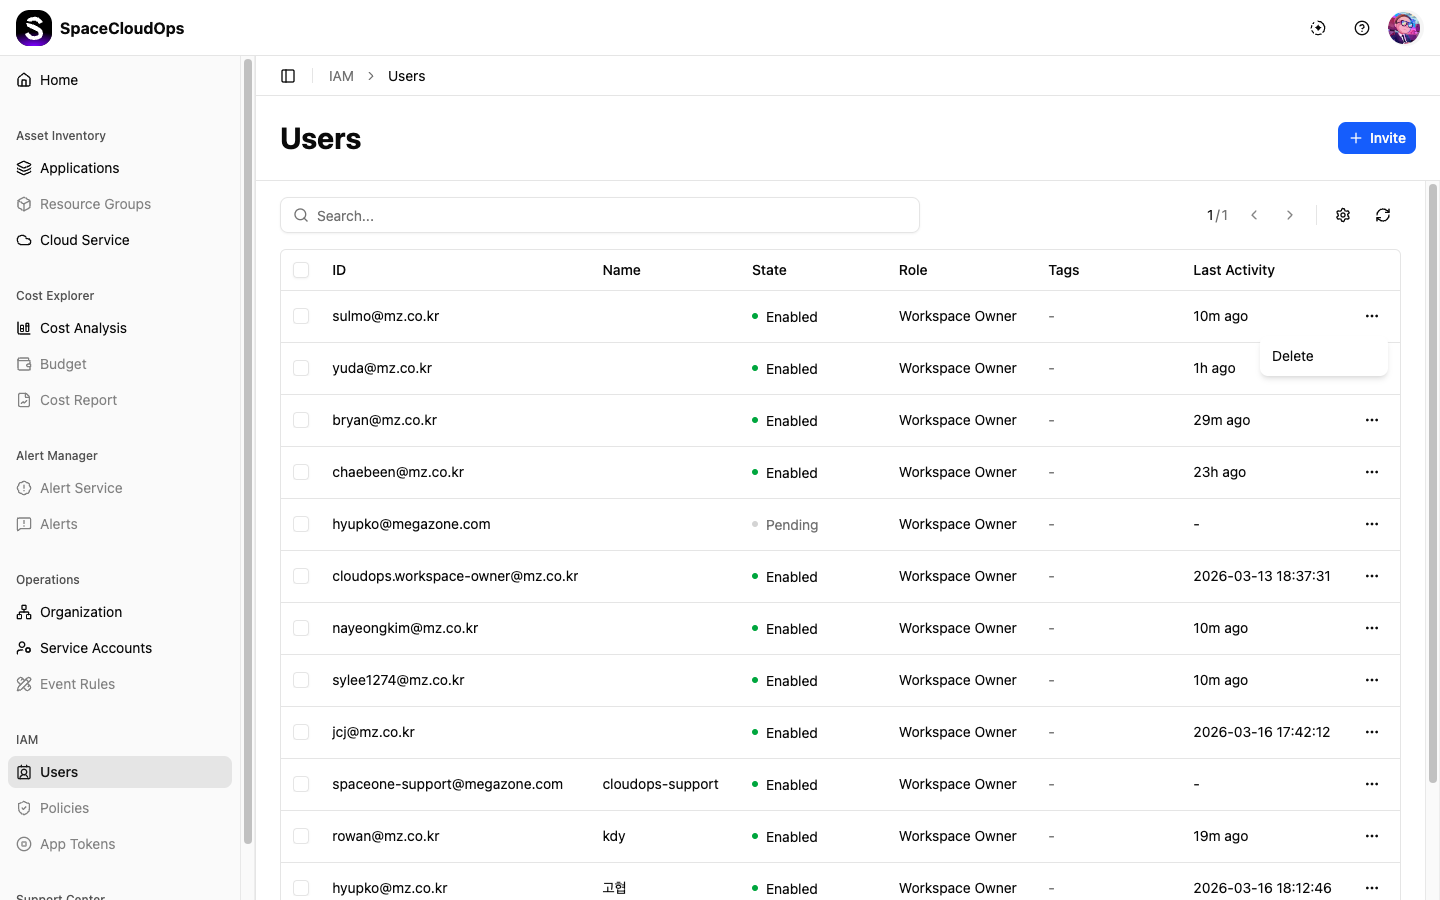
Viewing Users
Users are displayed in a table with the following columns:
| Column | Description |
|---|---|
| ID | The user’s email-based ID |
| Name | The user’s display name |
| State | Account status — Enabled (green), Disabled (gray), or Pending (orange) |
| Role | The assigned role (e.g., Workspace Owner) |
| Tags | Tags assigned to the user |
| Last Activity | Time since the user’s last activity (e.g., 16m ago) or a specific date |
Each row has a more menu (⋯) on the right for additional actions such as Delete.
User States
| State | Description |
|---|---|
| Enabled | The user account is active and can access the workspace |
| Disabled | The user account is inactive and cannot access the workspace |
| Pending | The user has been invited but has not yet logged in |
User Roles
| Role | Description |
|---|---|
| Workspace Owner | Full administrative access to the workspace |
| Workspace Member | Standard member access to the workspace |
Search and Toolbar

| UI Element | Description |
|---|---|
| Search | Enter keywords to find specific users |
| Pagination | Navigate between pages (e.g., 1/2) |
| Settings | Configure table columns |
| Refresh | Reload the user list |
User Detail Panel
Click a user row to open the detail panel on the right side. The panel header shows the user ID with expand and close buttons.
The detail panel has two tabs: Basic and Tags.
Basic Tab
The Basic tab displays the user’s information.
| Field | Description |
|---|---|
| Name | The user’s display name |
| ID | The user’s email-based ID |
| State | Account status (Enabled, Disabled, or Pending) |
| Role | The assigned workspace role, with an edit icon to change it |
| Last Activity | Time since last activity |
| Language | The user’s language setting (e.g., en) |
| Timezone | The user’s timezone (e.g., UTC) |
| Created At | The date and time the user was created |
Tags Tab
The Tags tab displays tags assigned to the user.
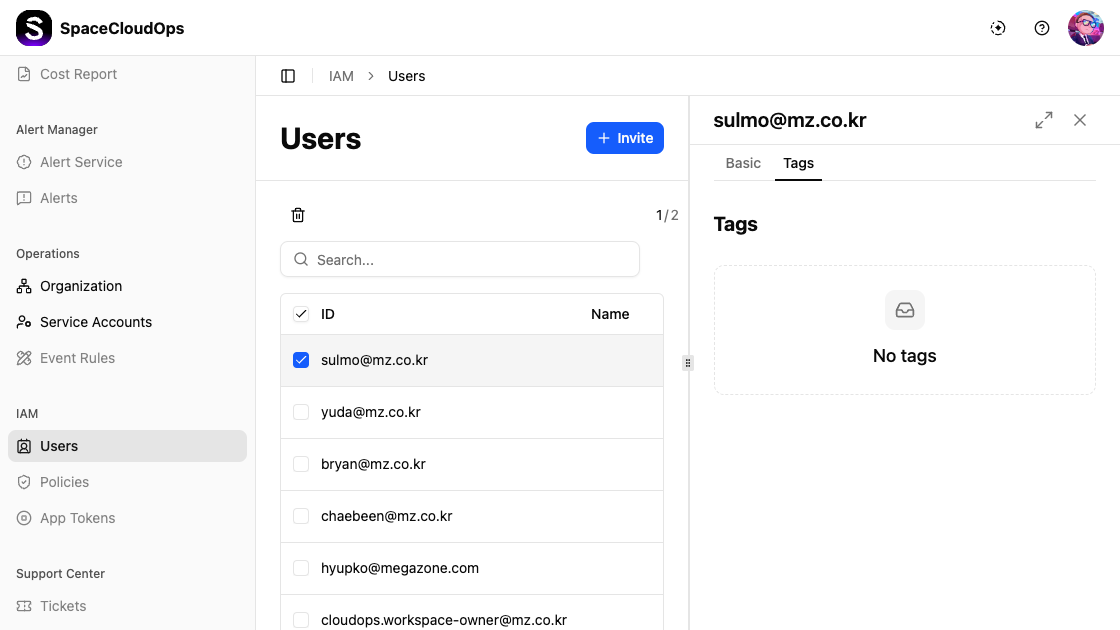
When no tags are assigned, it displays “No tags”.
Multi-Select
You can select multiple users by clicking their checkboxes. When multiple users are selected, the side panel shows a table view of all selected users.

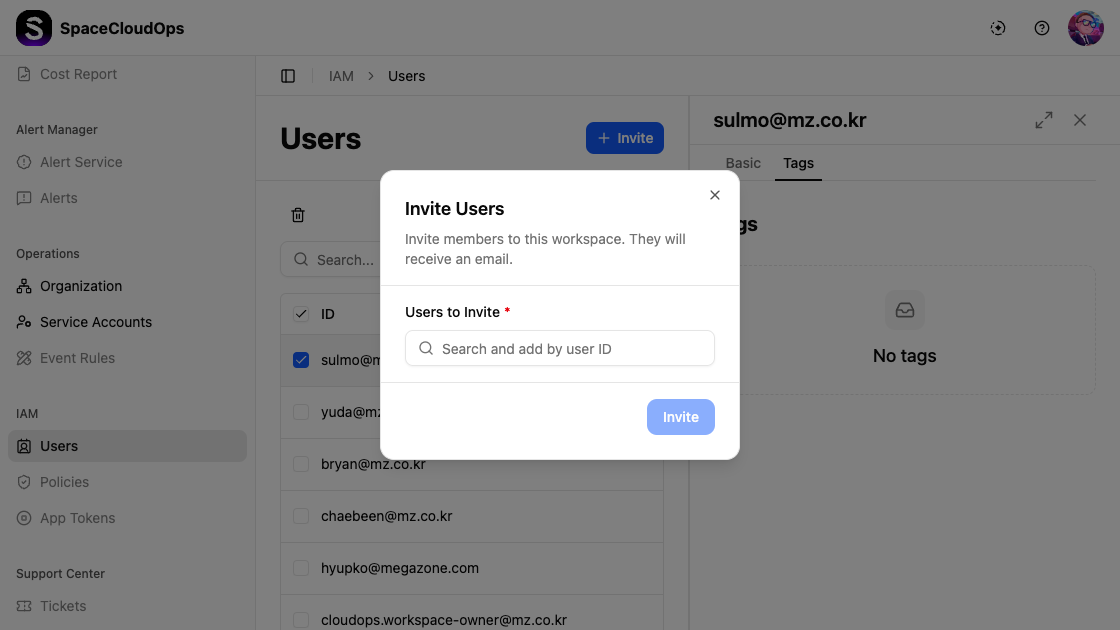
Inviting Users
Click [+ Invite] Button
Click the [+ Invite] button in the upper right corner of the Users page.
Search and Add Users
The Invite Users modal appears with the message “Invite members to this workspace. They will receive an email.”
| Field | Required | Description |
|---|---|---|
| Users to Invite | Yes | Search and add users by user ID |
Type in the search field to find available users. A dropdown list will appear showing matching users.
Complete Invitation
After selecting users, click the [Invite] button to send the invitation. Invited users will receive an email notification.
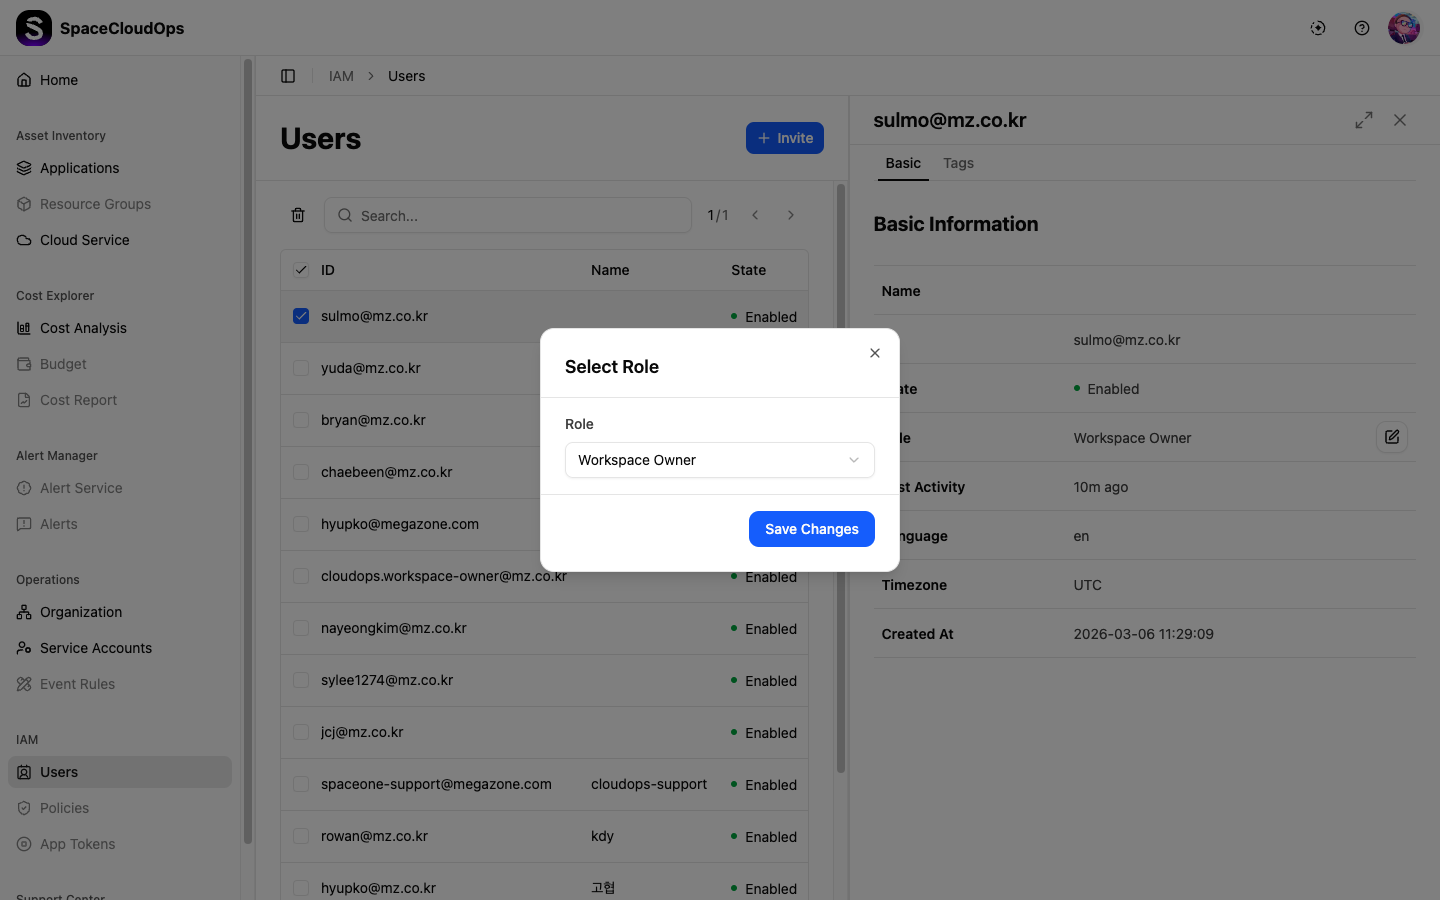
Pending.Changing User Role
Select a user
Click on the user whose role you want to change to open the detail panel.
Click the edit icon
In the Basic tab, click the edit icon (pencil) next to the Role field.
Select a new role
In the Select Role dialog, choose the desired role from the dropdown and click [Save Changes].
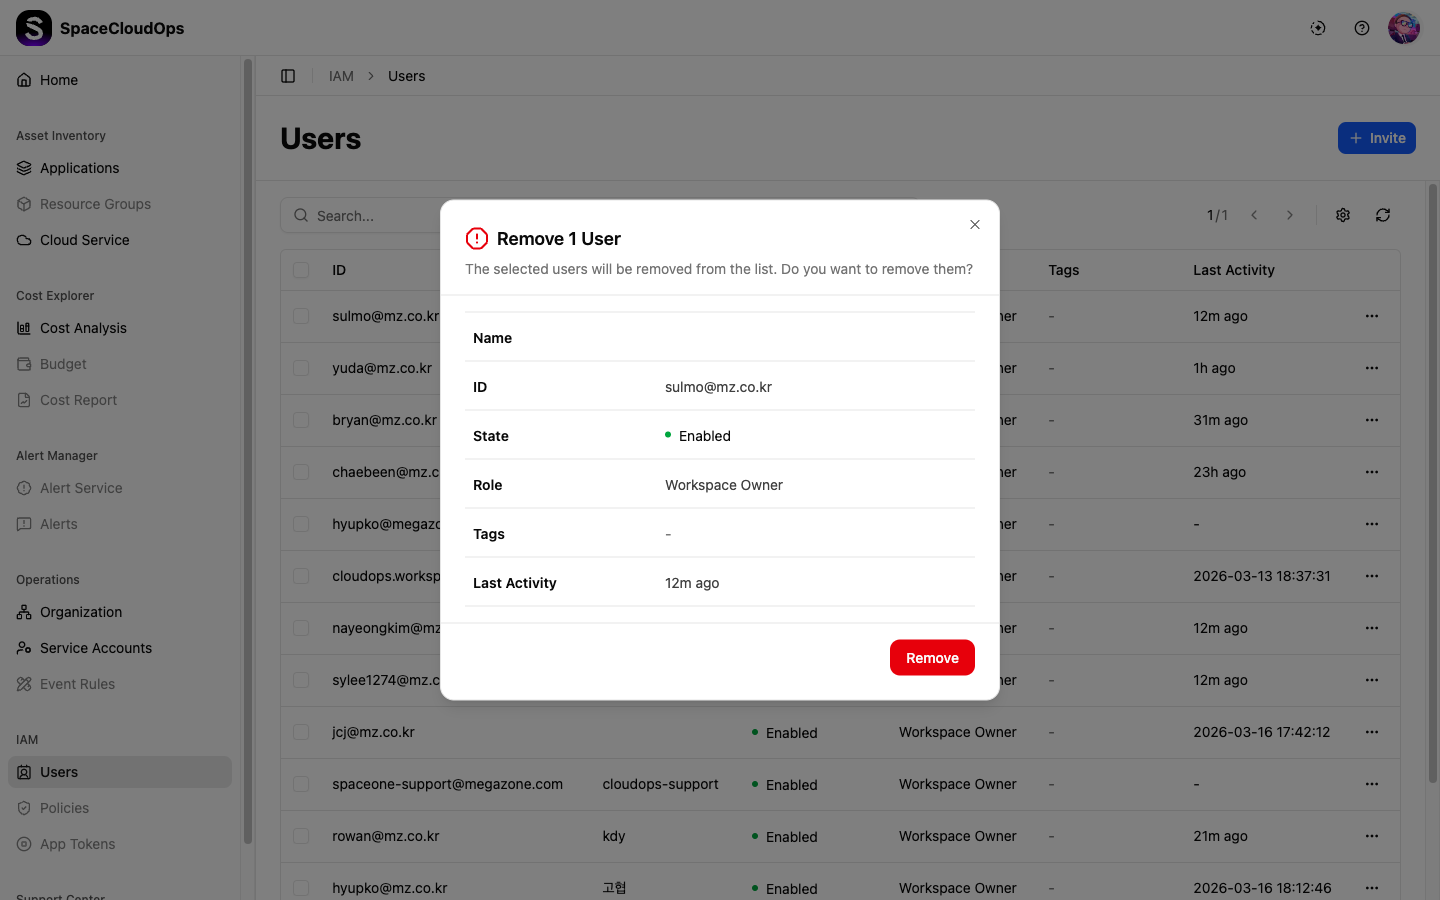
Removing Users
There are two ways to remove users from the workspace:
Option 1: Using the Row Menu
Click the more menu (⋯) on the right side of a user’s row, then select Delete from the dropdown.
Option 2: Using the Toolbar
Select one or more users by clicking the checkbox next to their ID, then click the delete icon (trash) that appears above the user list.
A confirmation dialog will appear. Click [Remove] to confirm the removal.