Quick Start
CloudOps manages cloud resources by Application, giving you a single view of costs, alerts, and infrastructure topology. Follow these 5 steps to go from resource collection to a fully visualized infrastructure overview.
You can complete Steps 1–4 in a single wizard at [Settings > Onboarding Hub].
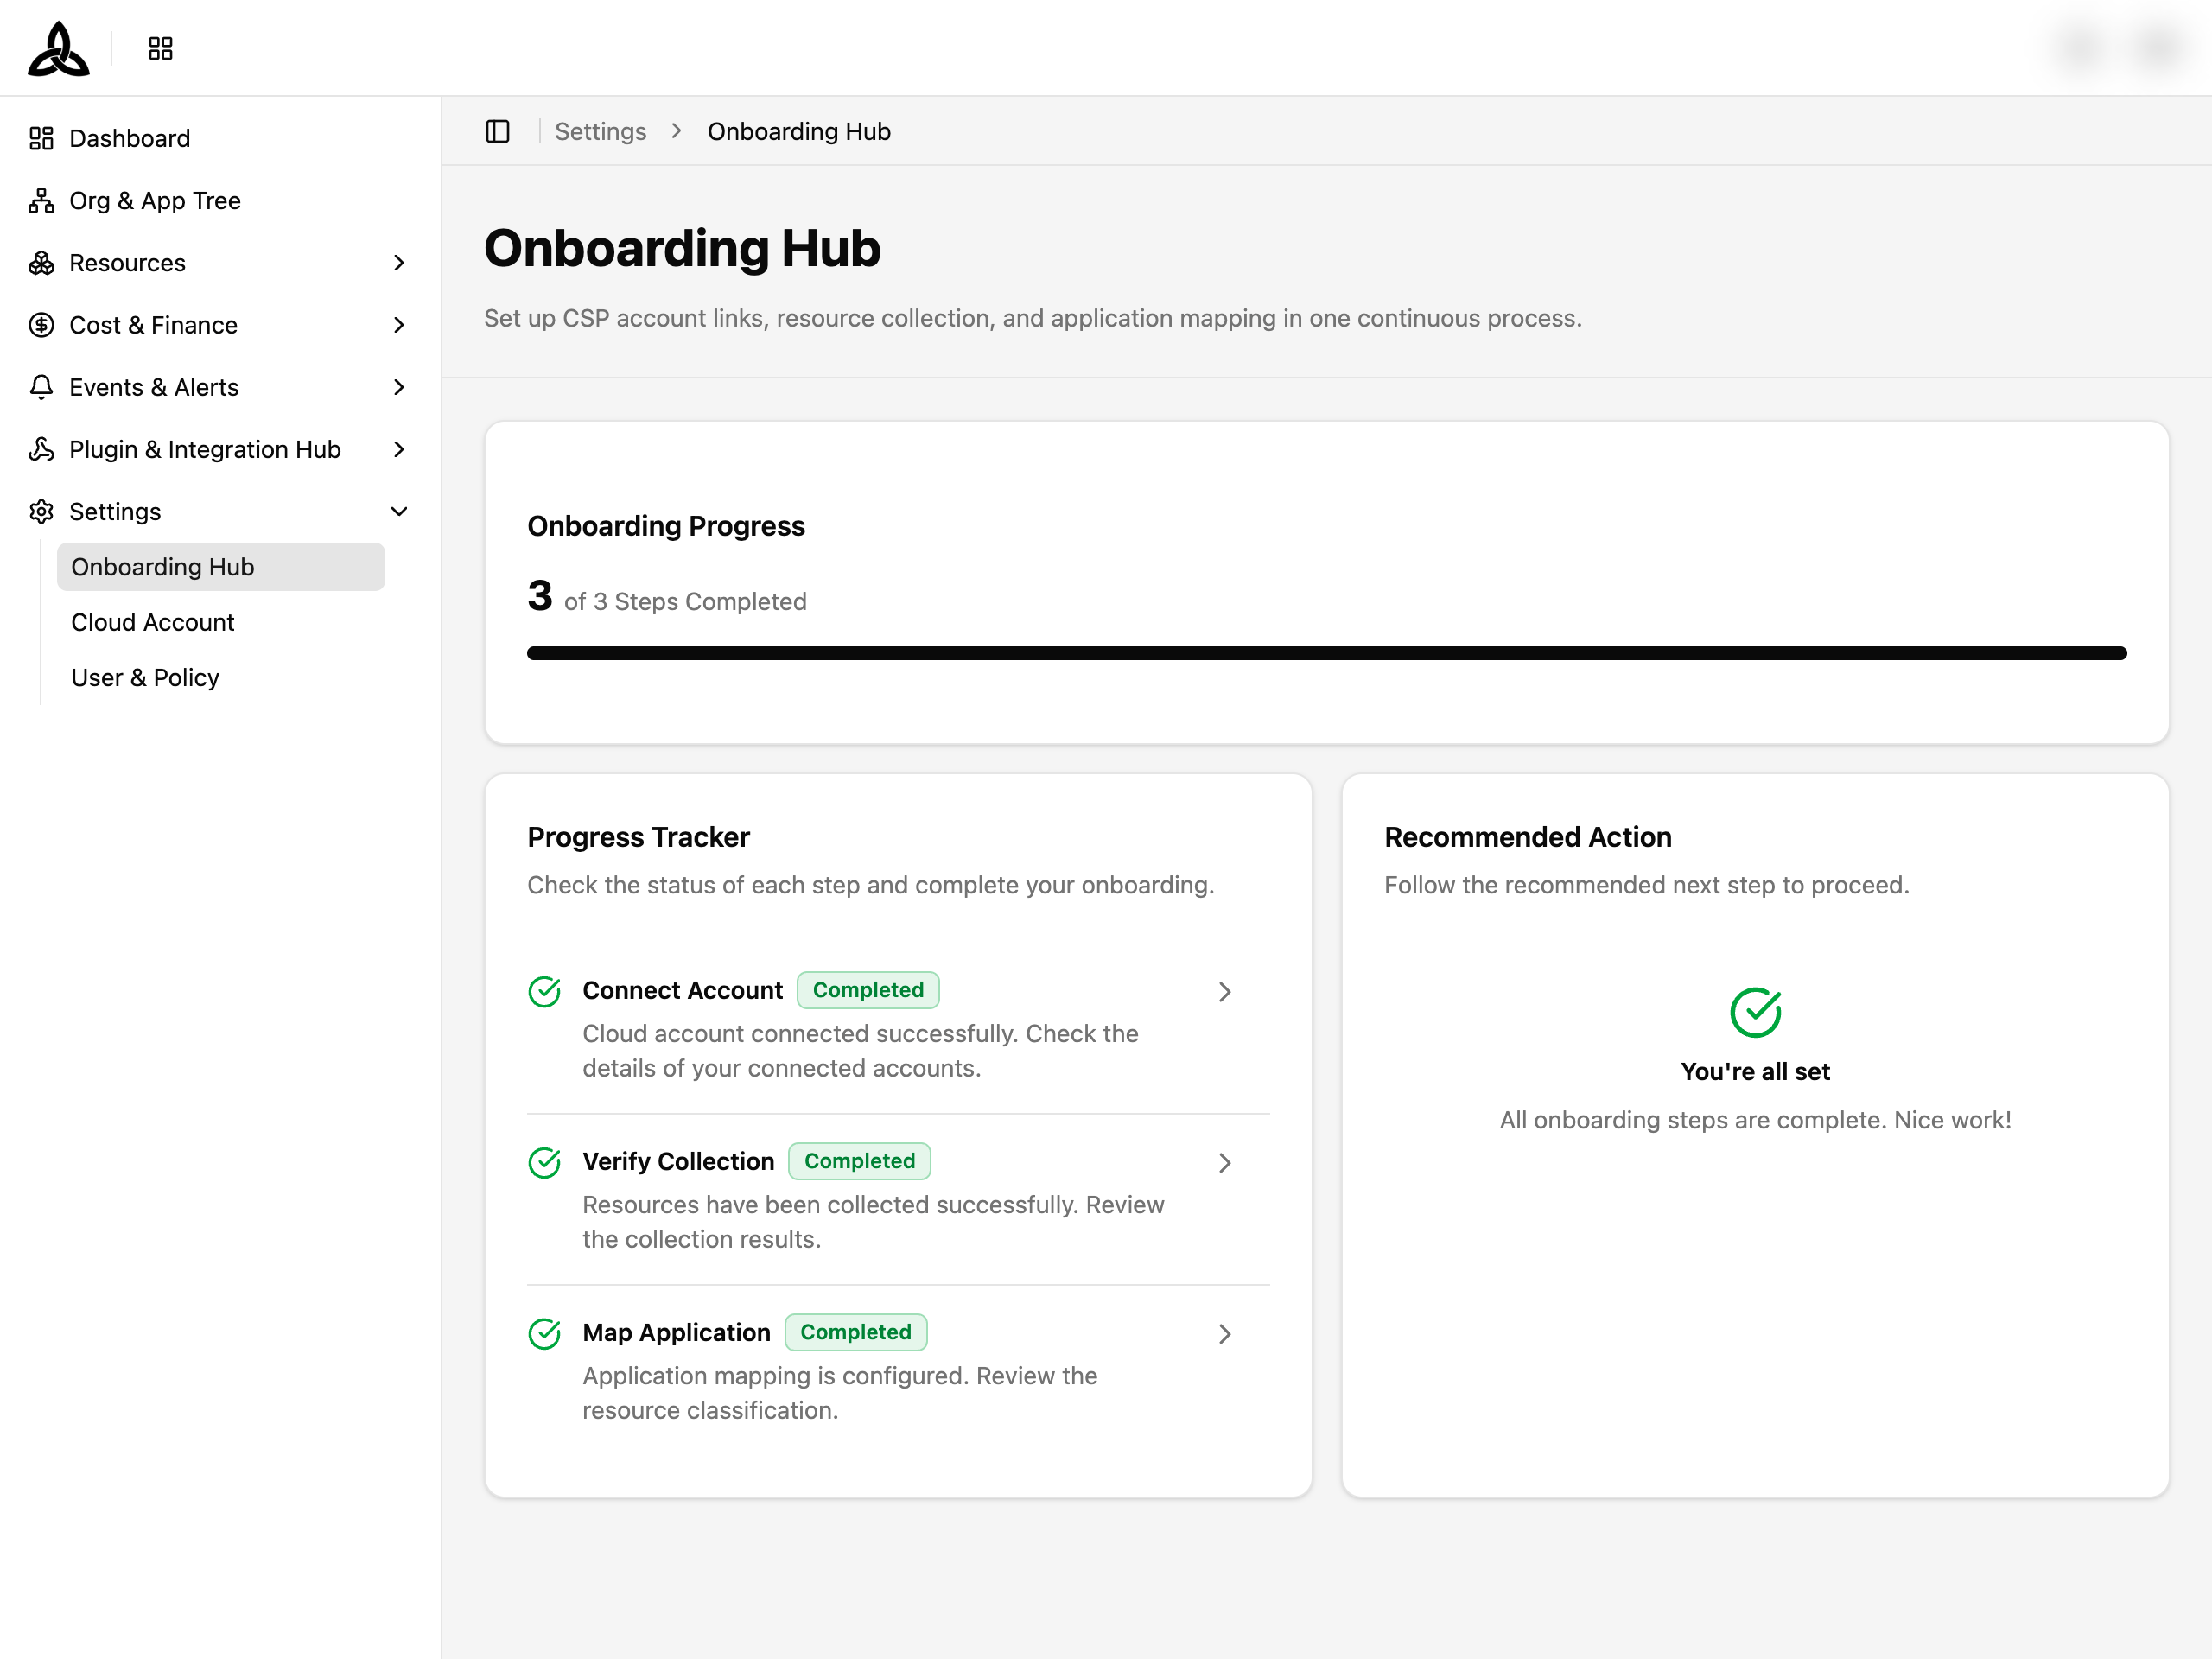
Step 1. Connect a Cloud Account
CloudOps must first register a cloud account to collect CSP resources.
1-1. Select CSP and Connect Account
Go to [Settings > Cloud Account], select your CSP, and connect the account. See the detailed setup guides below for each CSP.
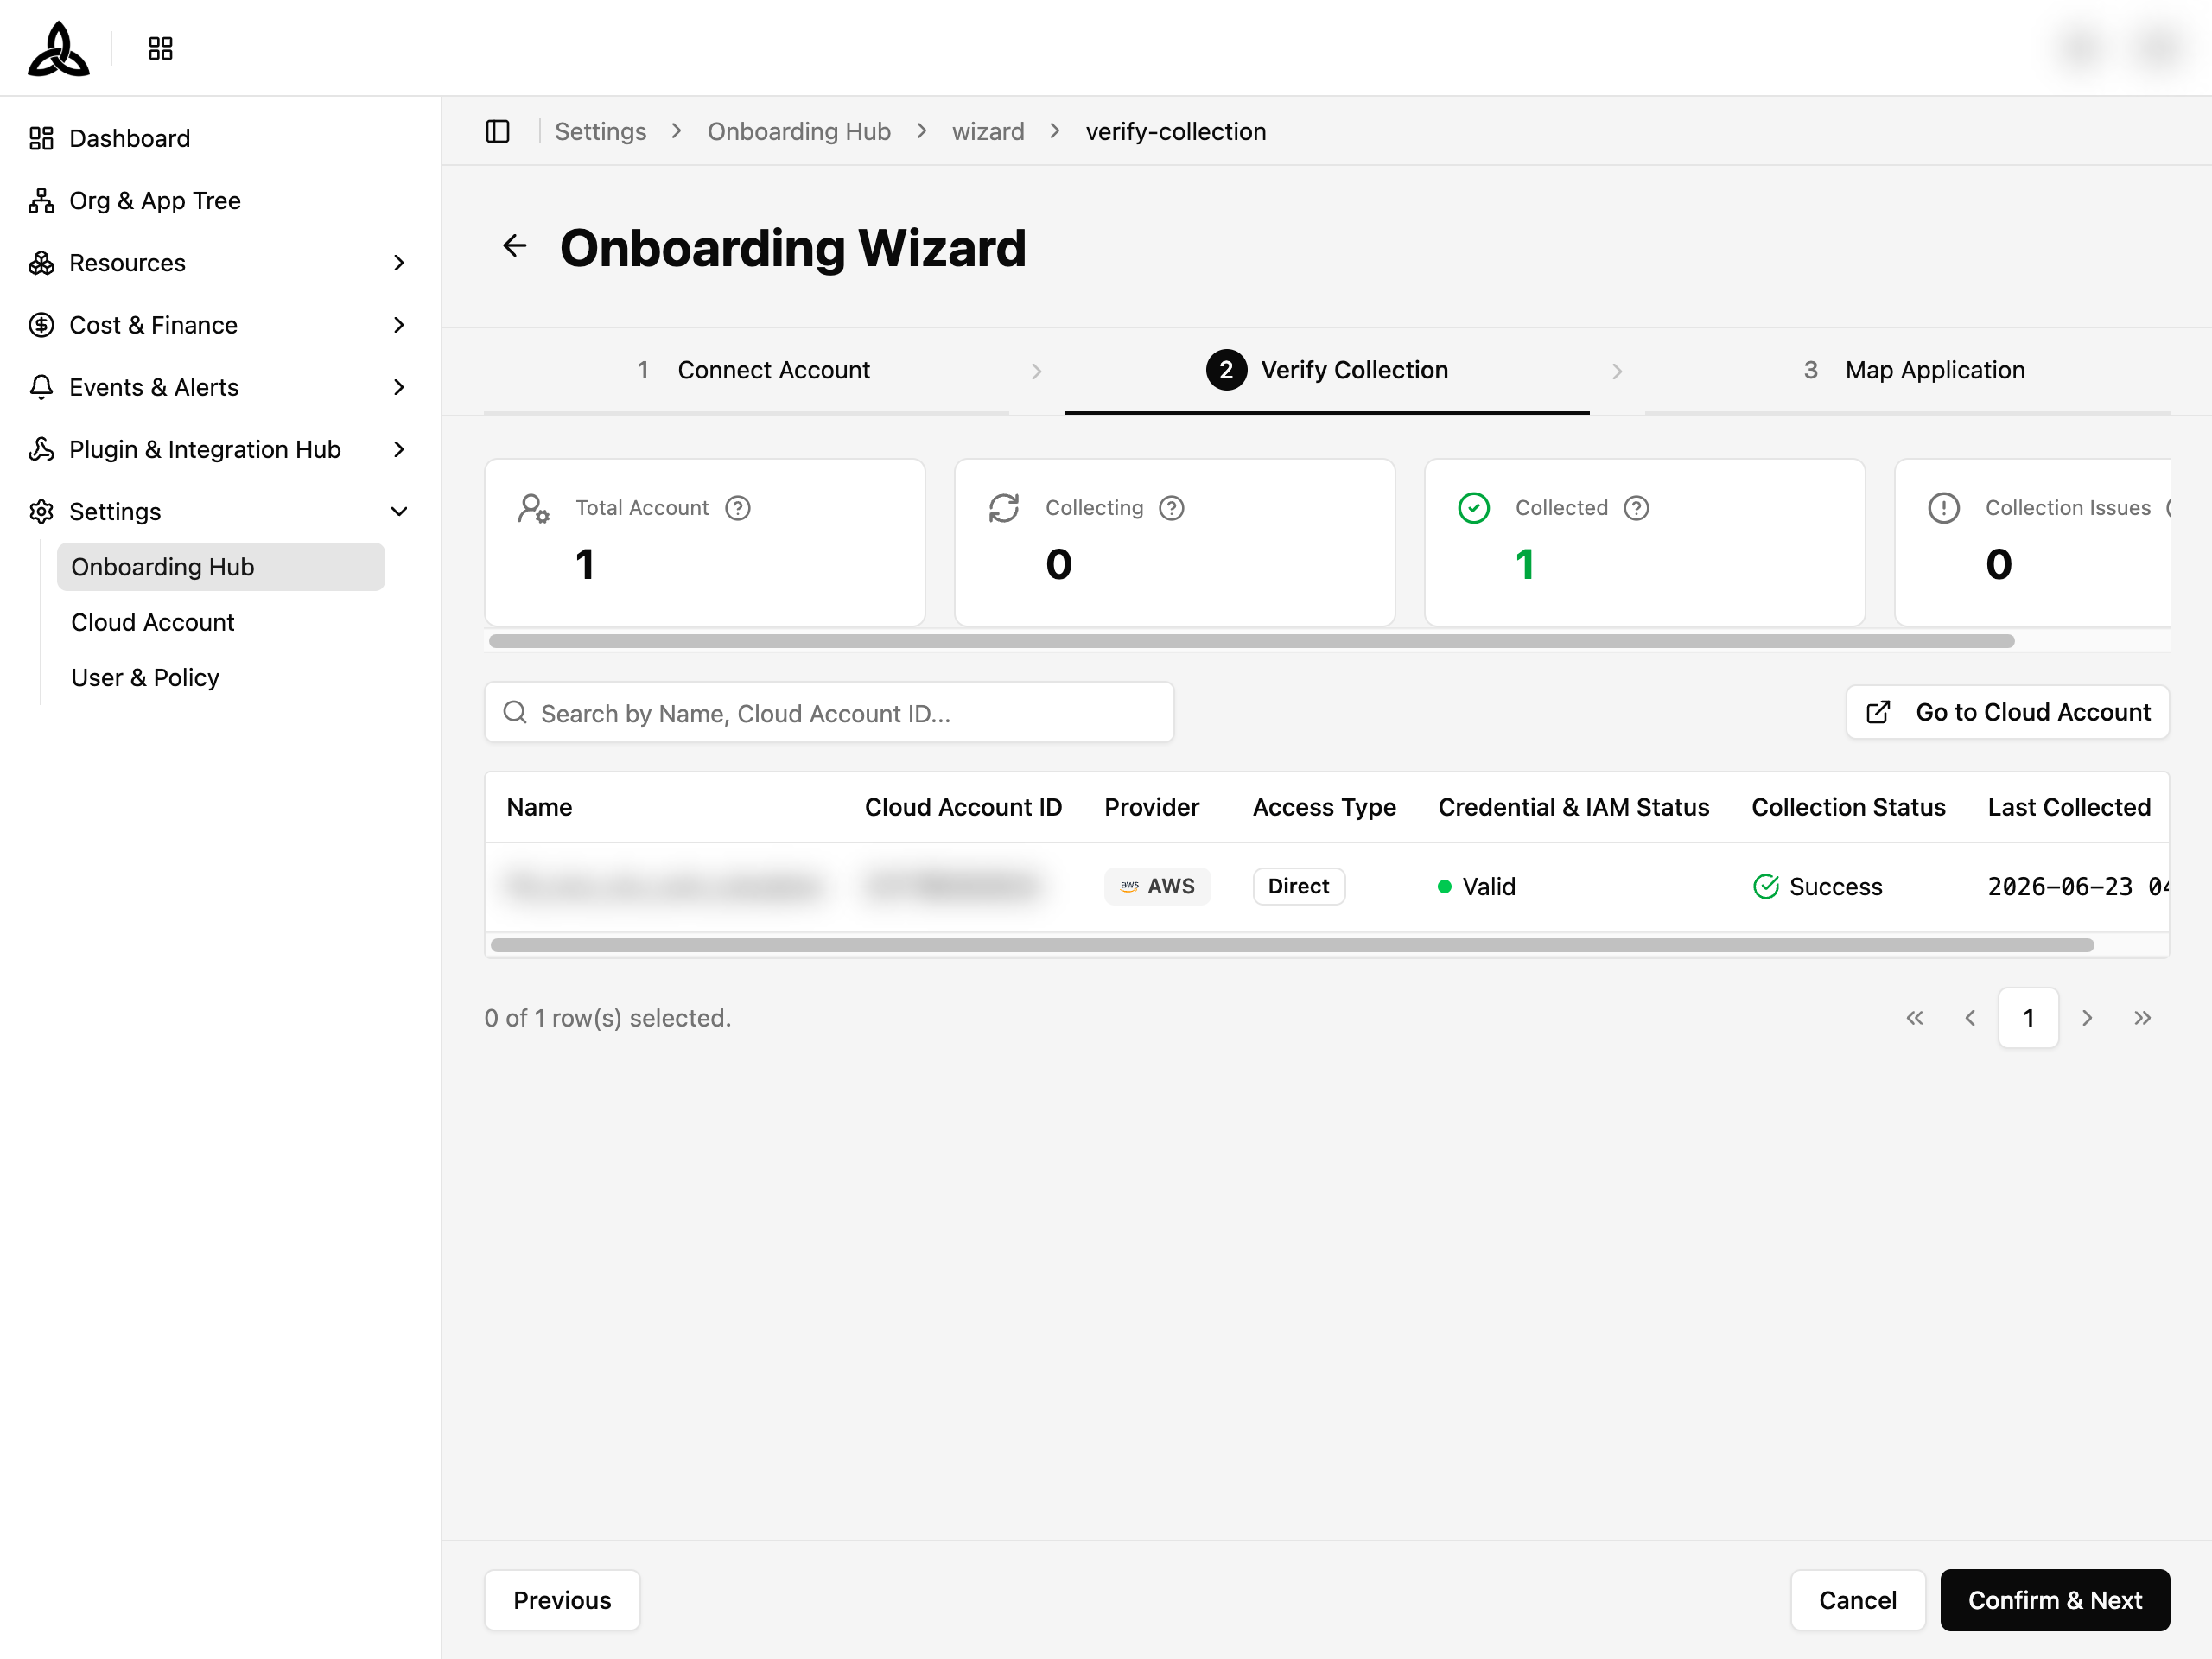
Step 2. Verify Resource Collection
Once the account is connected, resource collection begins automatically. You can verify collected resources in [Resources > Resource Inventory].
Step 3. Create an Application
You can add applications on the [Org & App Tree] page.
See Org & App Tree > Creating an Application for instructions.
3-1. Application Structure Patterns
Applications can be freely structured to match your team’s operational needs. Below are common patterns.
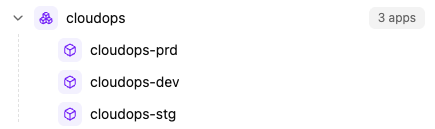
Pattern 1 — By Environment
Separate resources by deployment environment.
- cloudops (Root Application)
- cloudops-dev
- cloudops-stg
- cloudops-prd
Pattern 2 — By Service
Separate resources by microservice or project.
- my-platform
- api-gateway
- user-service
- billing-service
- monitoring
Pattern 3 — Environment + Service
Nest services under environments for finer-grained management.
- my-platform
- dev
- api-gateway
- user-service
- stg
- api-gateway
- user-service
- prd
- api-gateway
- user-service
- dev
Step 4. Set Up Mapping Rules
Create rules in [Resources > Mapping Rules]. See Mapping Rules for the full guide.
4-1. Auto-mapping with CSP Tags
When you design CSP (AWS, Azure, Google Cloud) resource tags thoughtfully, Mapping Rules automatically sort resources into the right Applications at every collection cycle. Once configured, even newly created resources flow into the correct app without manual intervention — and you can immediately view resource status and infrastructure topology (Architecture View) per Application.
Tag design principle — Align your tag keys with the same axis you use to organize Applications (environment, service, account, etc.) for accurate mapping.
| App structure | Recommended CSP tag key | Mapping Rule condition example |
|---|---|---|
| By environment (dev/stg/prd) | environment | Tag/Label · environment · equals · prd |
| By service | service / application | Tag/Label · service · equals · payment |
| By account | account | Tag/Label · account · equals · prod-account |
How to tag in each CSP: AWS Tags · Azure Tags · Google Cloud Labels
Example 1 — Basic Tag Mapping
This example tags CSP resources with application=cloudops and creates a Mapping Rule to auto-map them.
1) Add a tag to CSP resources
| Key | Value |
|---|---|
application | cloudops |
2) Create a Mapping Rule in CloudOps
Go to [Resources > Mapping Rules], click [Create Mapping Rule], and enter the following.
| Field | Value |
|---|---|
| Rule Name | cloudops-tag |
| Condition | Tag/Label · application · in · cloudops |
| Target Application | CloudOps |
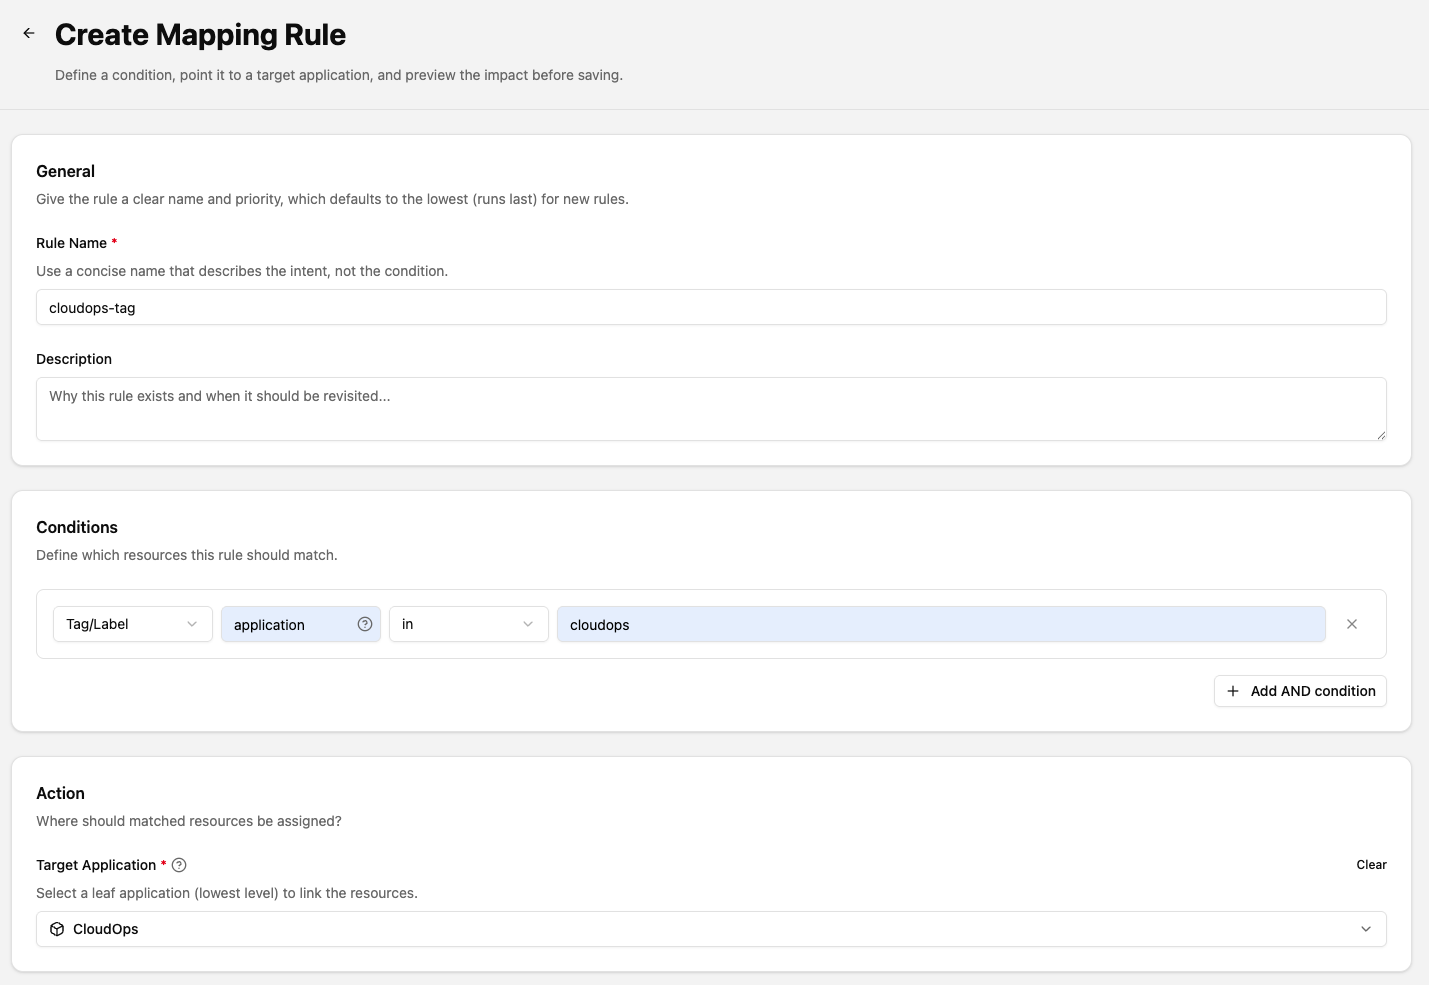
Once this rule is enabled, all resources tagged with application=cloudops in your CSP will be automatically assigned to the CloudOps application at the next collection cycle.
Example 2 — Managing Resources by Account
If you want to view and manage resources separately by account in CloudOps, use CSP tags to organize Applications by account.
1) Add an account tag to CSP resources
| Key | Value |
|---|---|
account | prod-account |
2) Create a Mapping Rule for each account
| Field | Value |
|---|---|
| Rule Name | prod-account |
| Condition | Tag/Label · account · equals · prod-account |
| Target Application | cloudops / cloudops-prd |
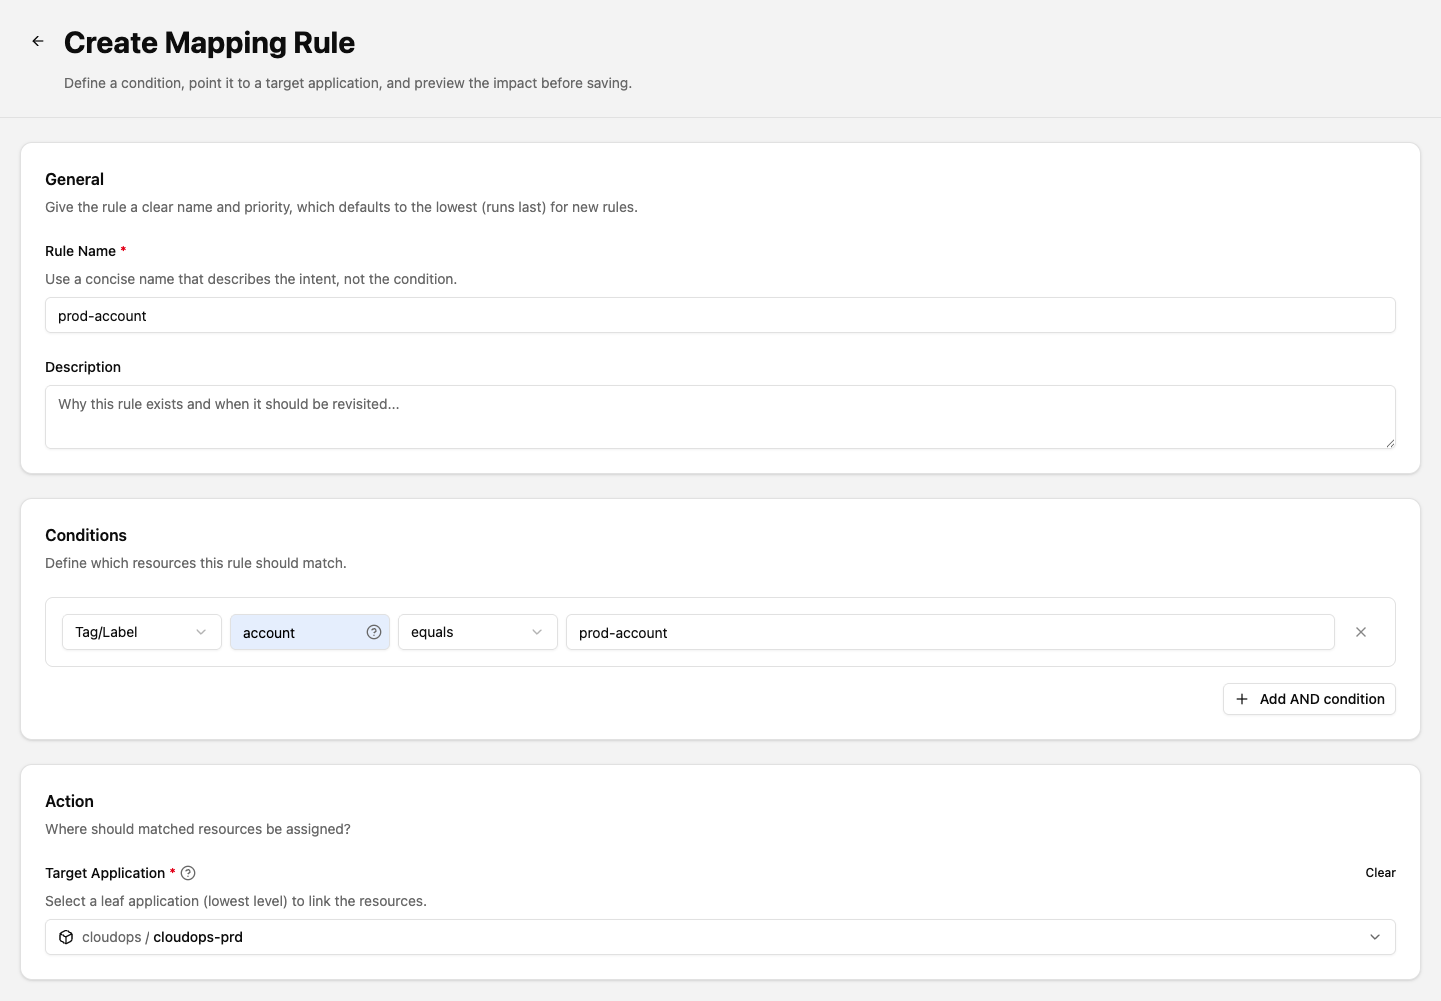
This maps resources matching the account tag condition to the corresponding Application. If you have multiple accounts, create an Application and Mapping Rule for each one.
4-2. (Optional) Map Resources with CloudOps Tags
If setting tags in the CSP console is not practical (permission constraints, legacy resources, etc.), you can use CloudOps’s own tagging system. Create a CloudOps Tag, assign it to resources directly in CloudOps, and use the CloudOps Tags condition in Mapping Rules to auto-map resources to applications.
Manage tags in [Resources > CloudOps Tags]. See CloudOps Tags for the full guide.
Example — Auto-mapping by CloudOps Tag
1) Create a CloudOps Tag
Create a tag in [Resources > CloudOps Tags].
| Field | Value |
|---|---|
| Name | Application |
| Tag Key | app |
| Value Type | String |
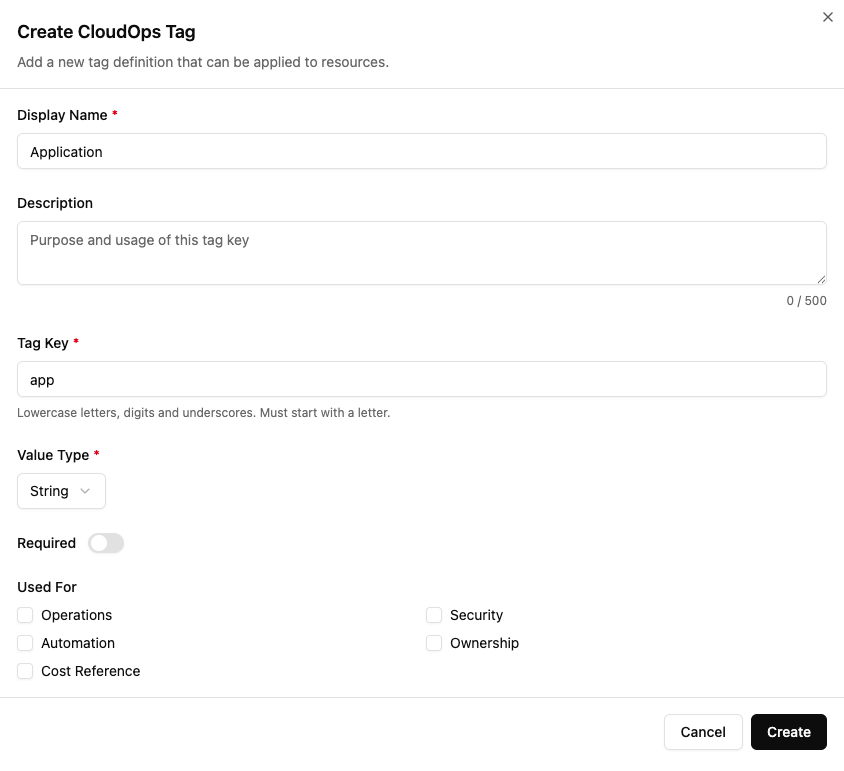
2) Assign the CloudOps Tag to resources
In [Resources > Resource Inventory], select the resources to map and assign the value cloudops to the CloudOps Tag app.
3) Create a Mapping Rule
| Field | Value |
|---|---|
| Rule Name | cloudops-tag-mapping |
| Condition | CloudOps Tags · Application · equals · cloudops |
| Target Application | cloudops |
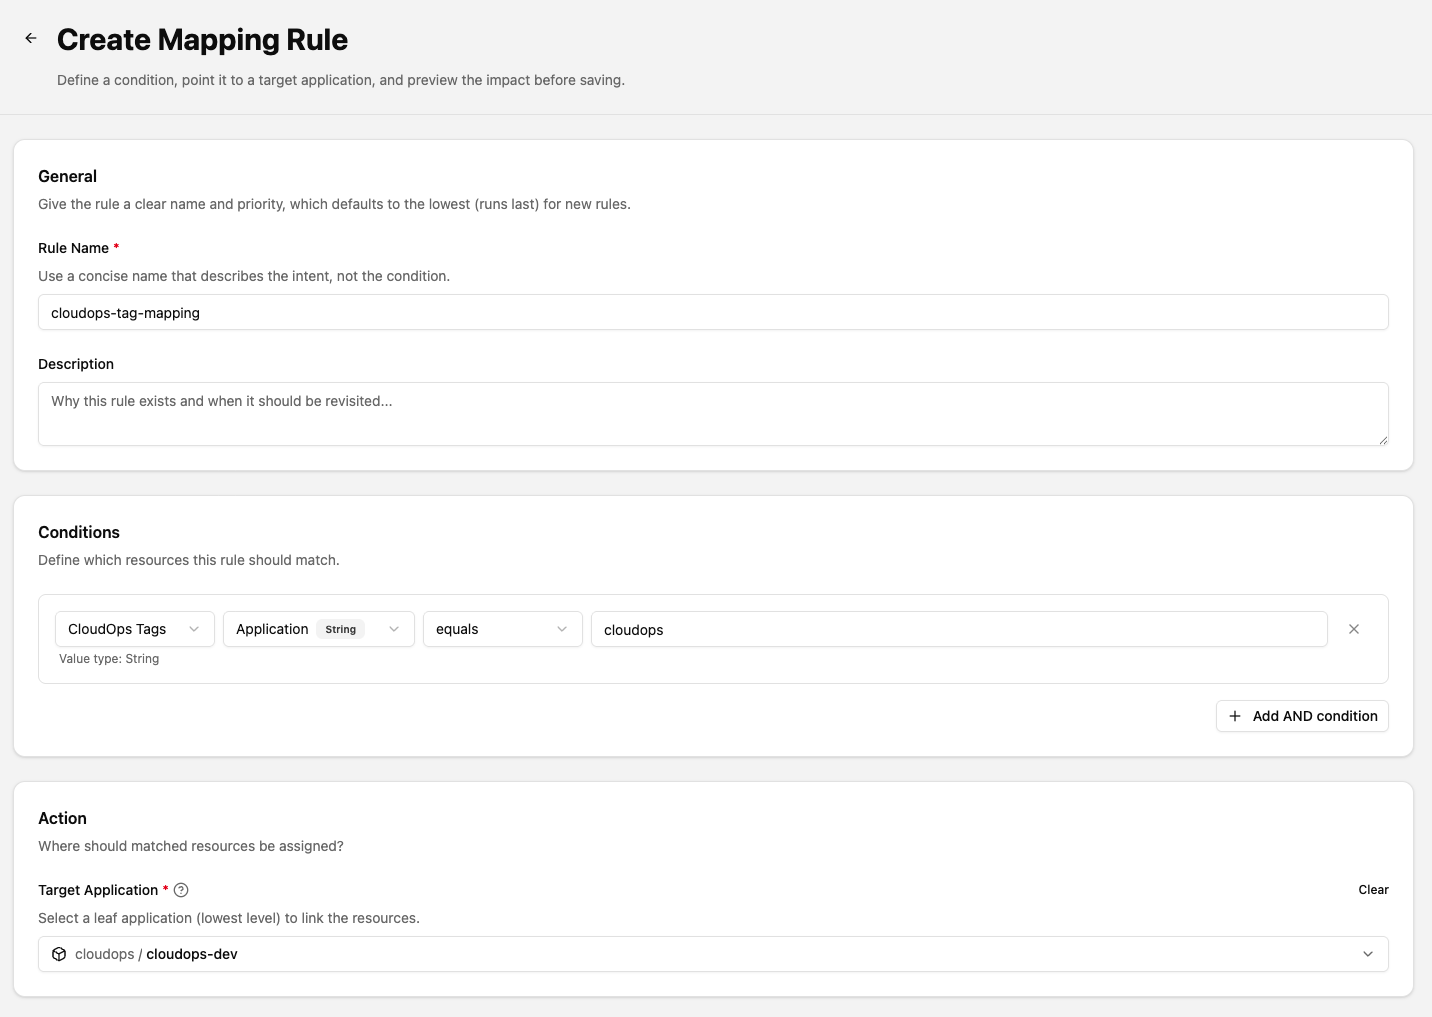
Once this rule is enabled, resources with CloudOps Tag app=cloudops will be automatically mapped to the cloudops application.
Step 5. Verify the Results
Once Mapping Rules run, resources are automatically assigned to Applications. Let’s verify the connections.
5-1. Check Assigned Resources
In [Org & App Tree], select an Application and click [View Details]. The Assigned Resources tab shows the mapped resource list and mapping method (Rule / Manual).
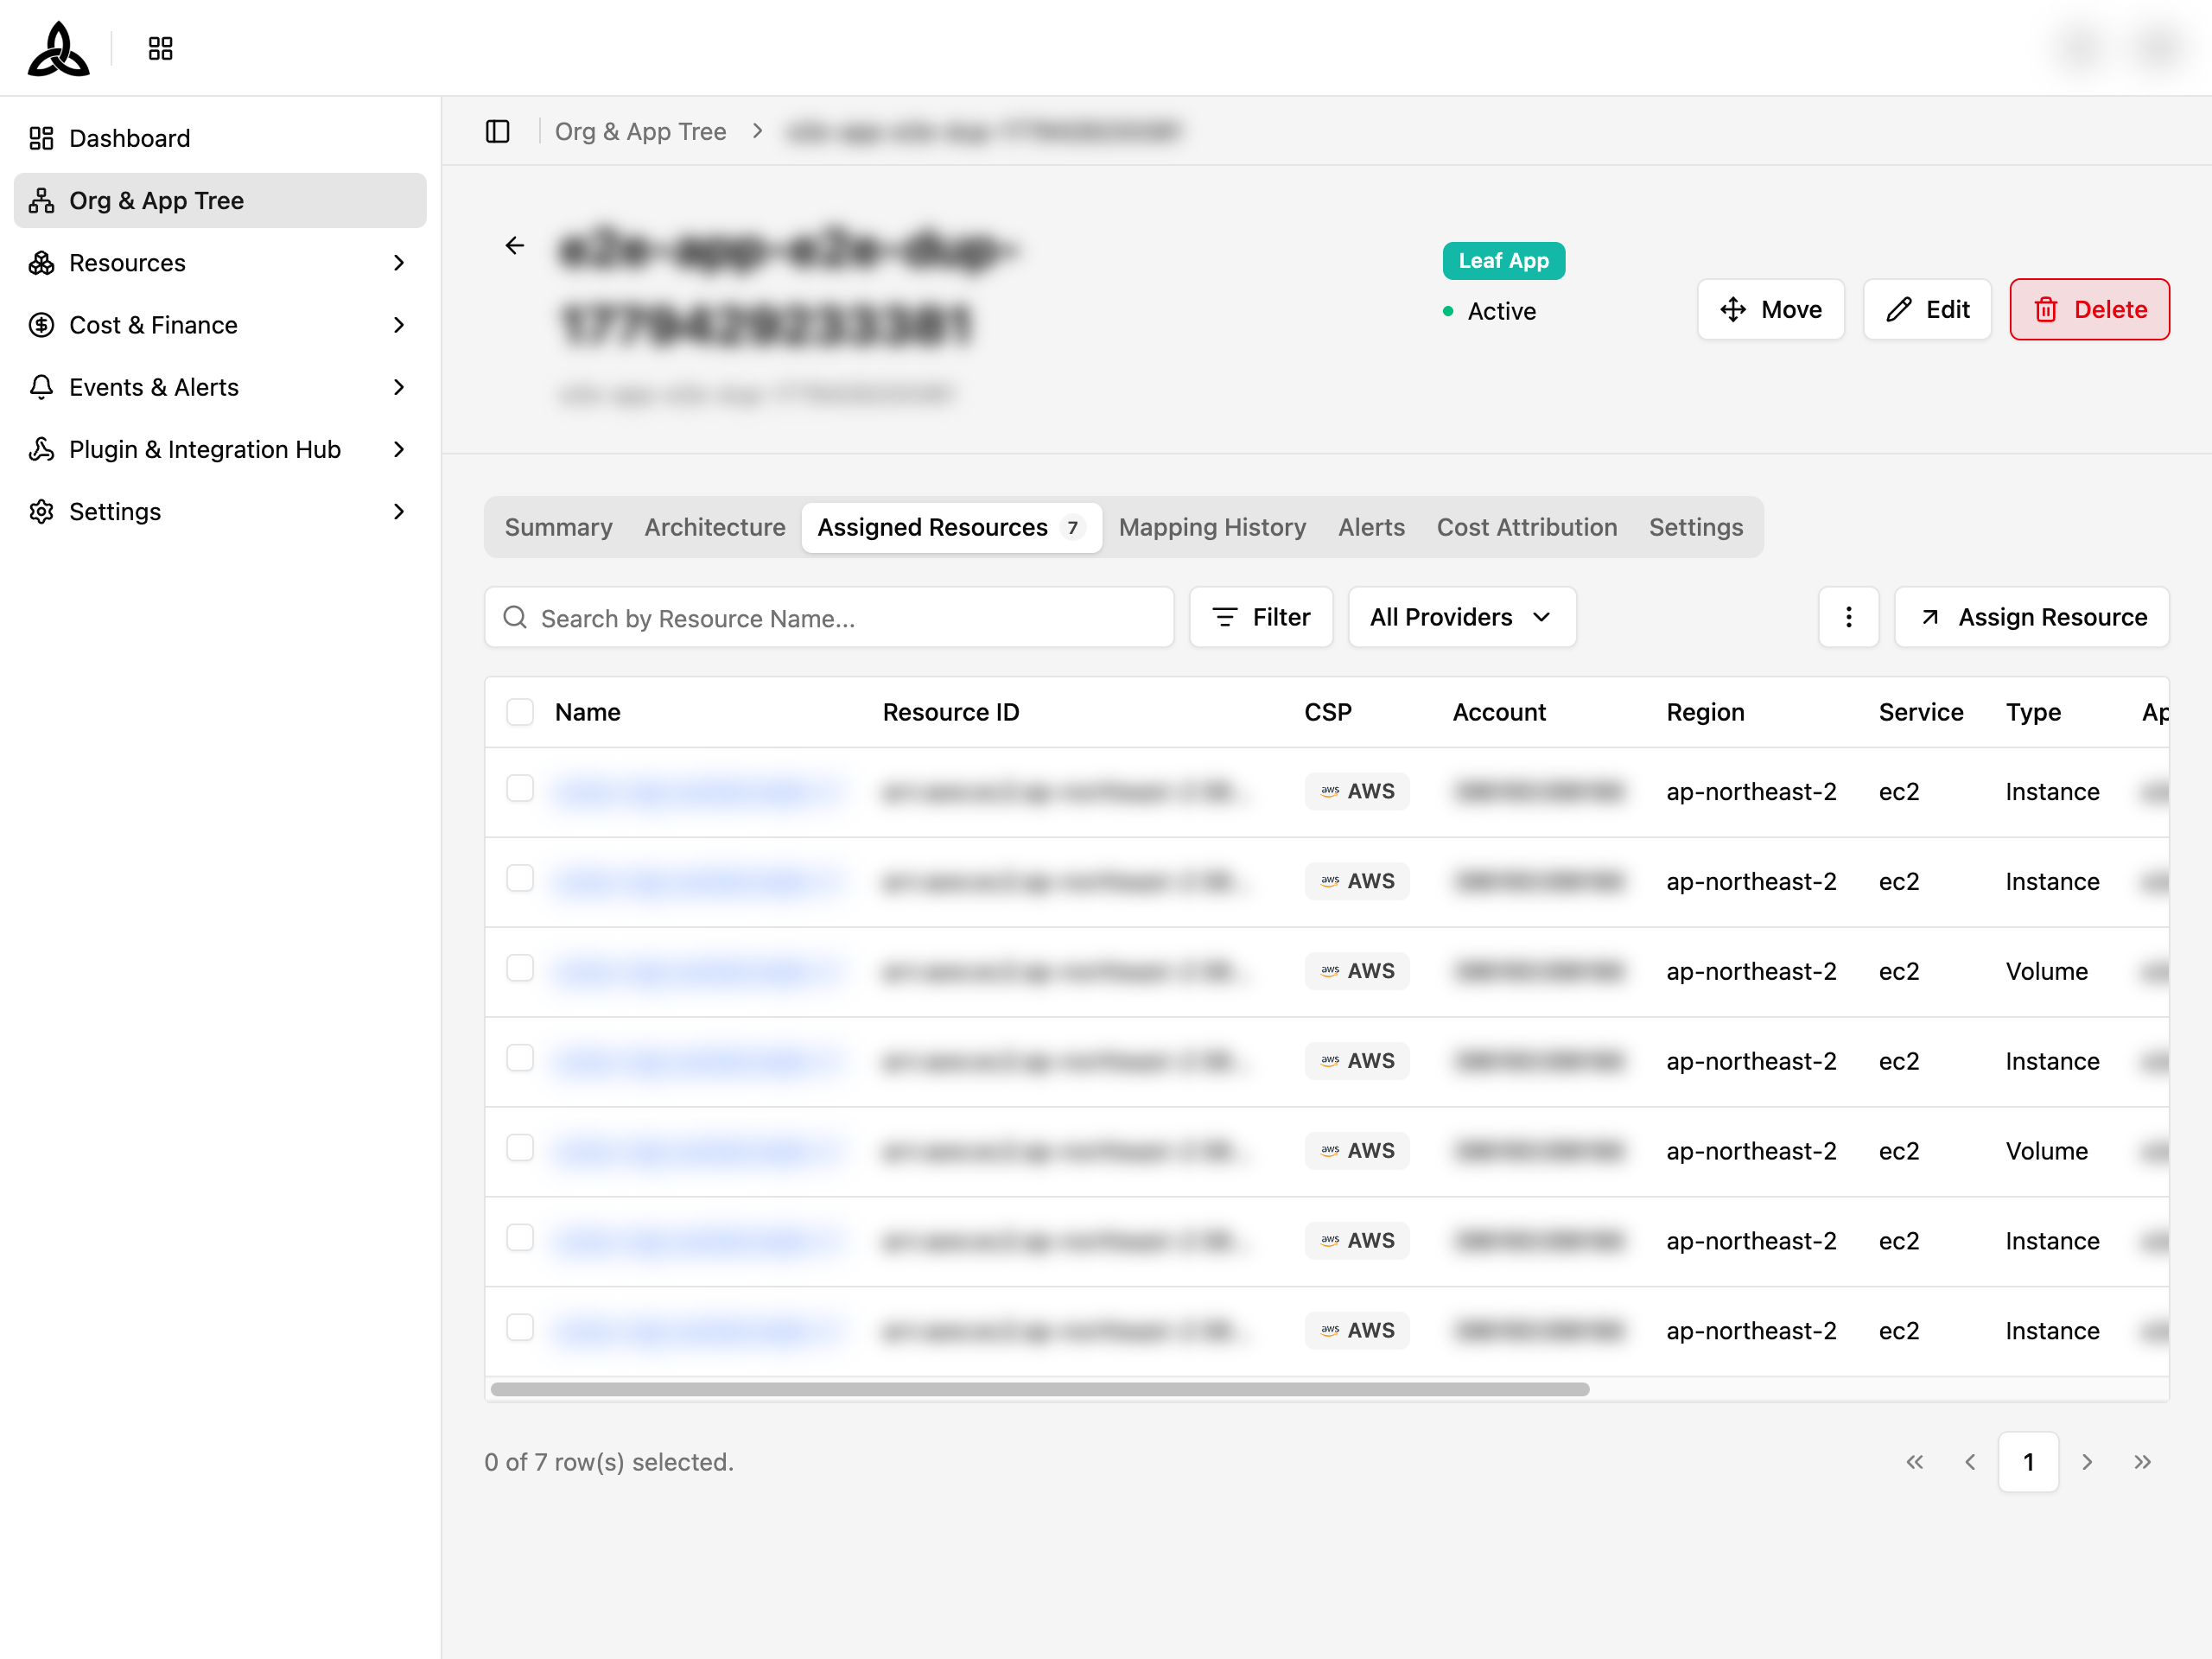
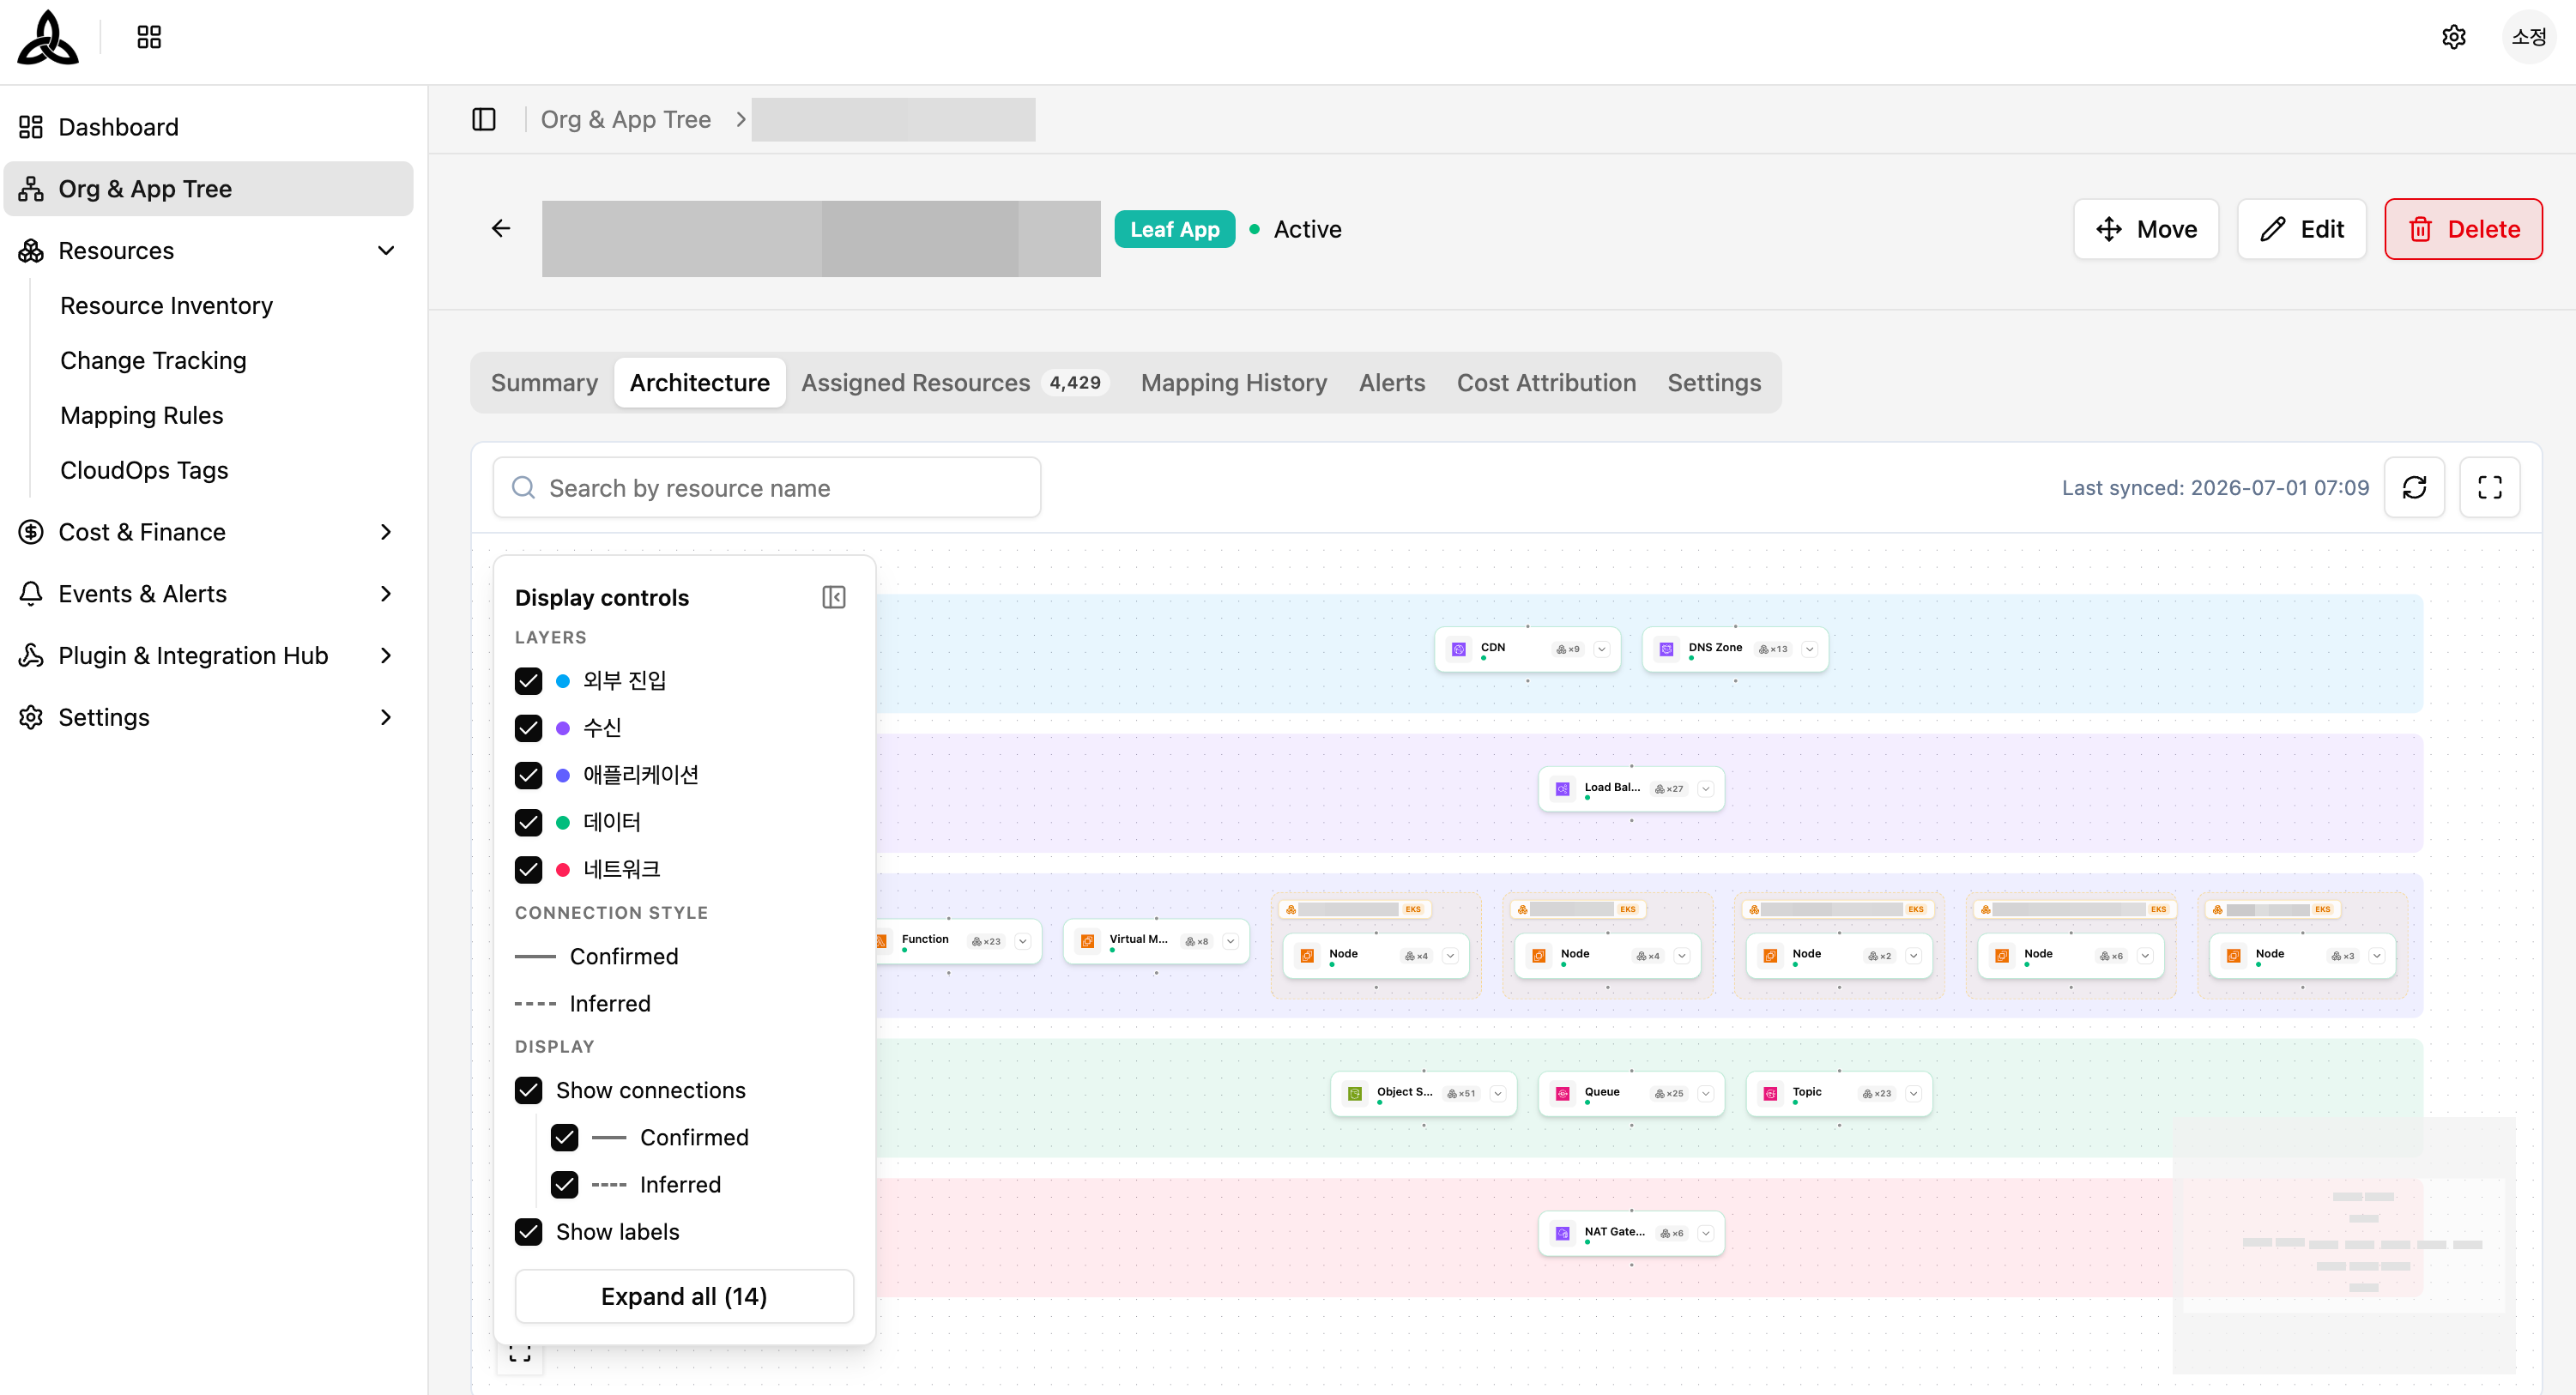
5-2. View Infrastructure with Architecture View
Switch to the Architecture View tab to see your infrastructure topology generated automatically from mapped resources. No need to draw diagrams manually — VPCs, subnets, and resource relationships are visualized at a glance.
With these steps complete, you can manage resource status, infrastructure topology, costs, and alerts — all organized by Application.
Next Steps
Basic setup is complete. Explore these features to manage your cloud resources in depth.